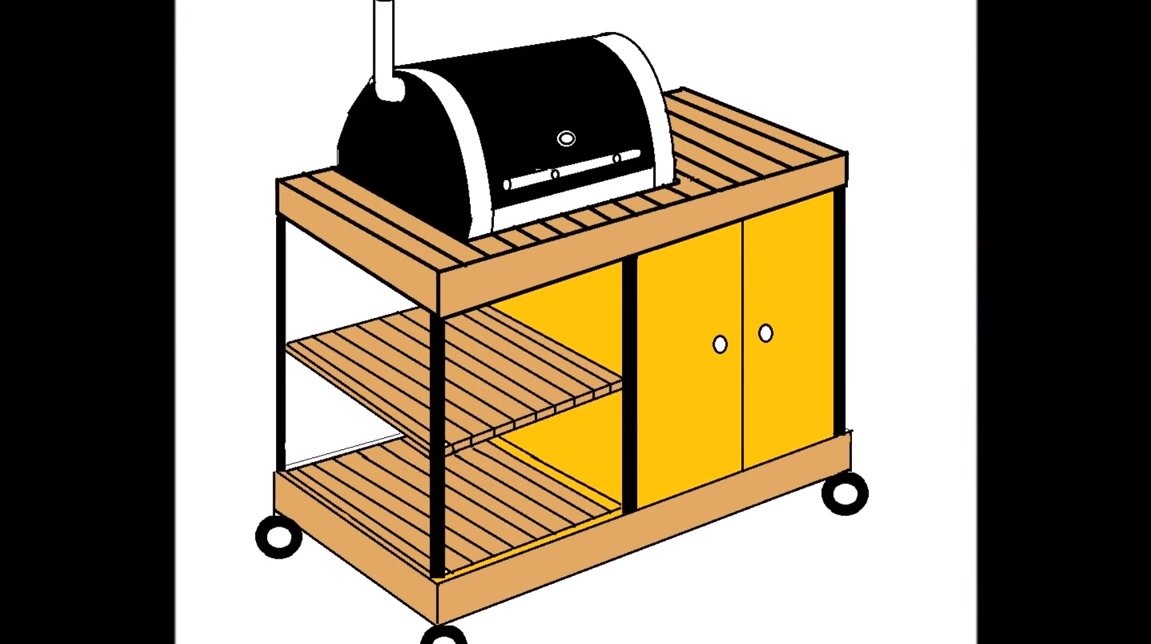
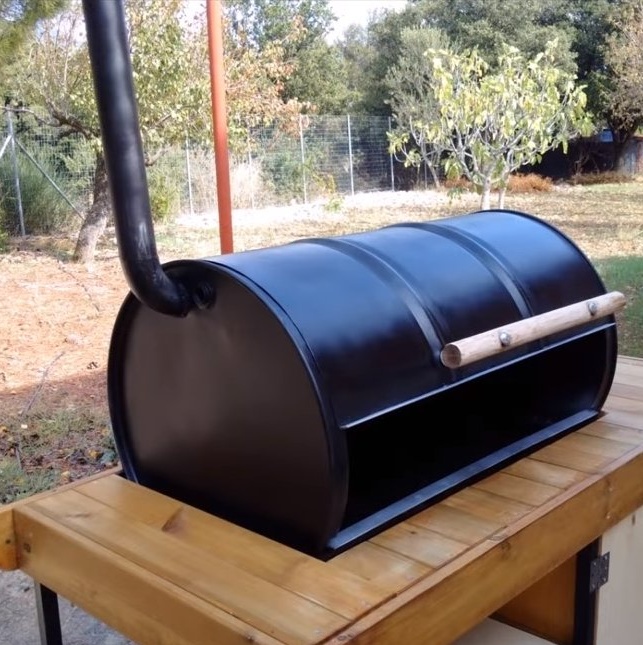
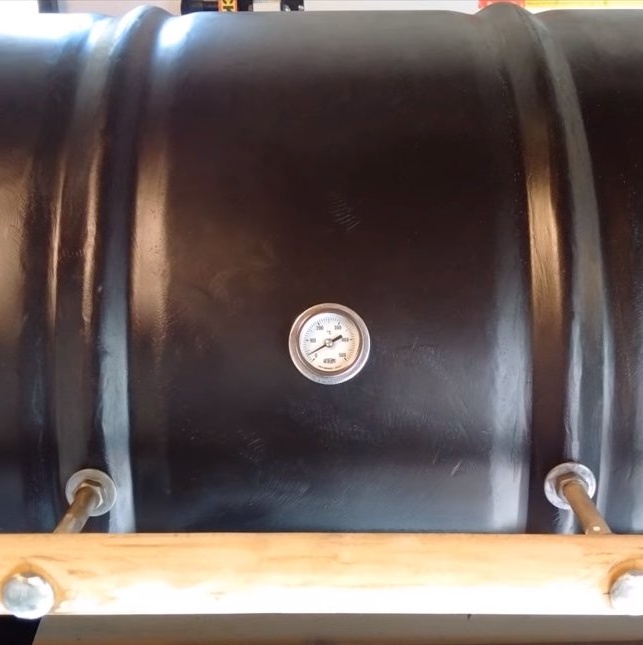
Hello fans to craft, I propose to study an article on the manufacture of grill from a barrel. Homemade it turned out to be convenient and functional, there is a system for raising and lowering the grill, there is a thermometer, the air supply is easily and conveniently regulated in the furnace. The author also made a special table for the oven for all necessary utensils and other kitchen tools. To retain heat inside the furnace, the chimney is equipped with a damper, and wheels are welded to the legs of the table, so that the whole structure can ride. Going homemade is not difficult and available materials. If you are interested in the project, I propose to study it in more detail!
Materials and tools used by the author:
Material List:
- barrel;
- lattice;
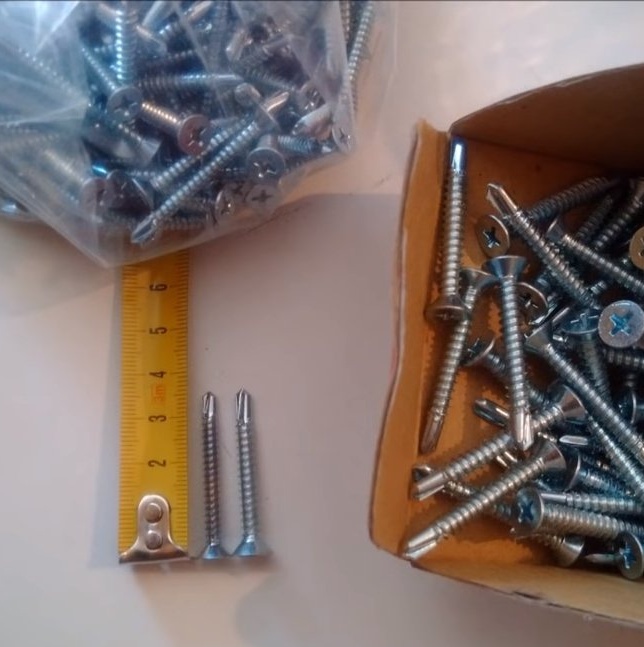
- bolts and nuts;
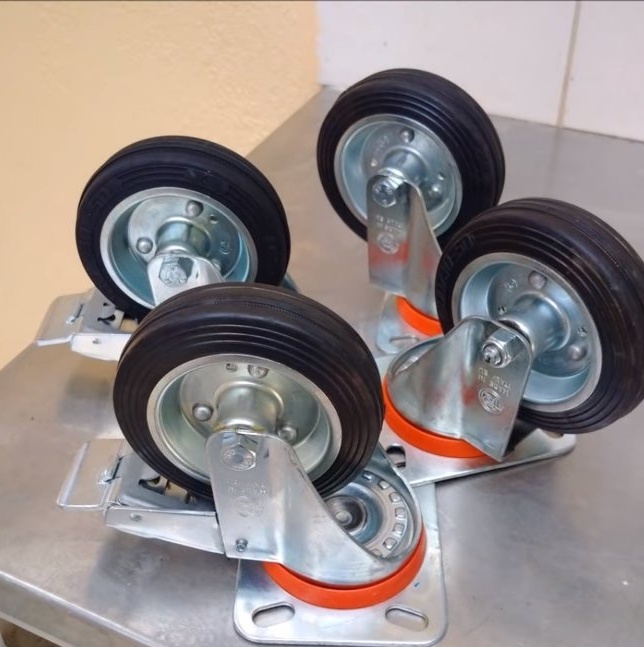
- castors for trolleys;
- profile pipes;
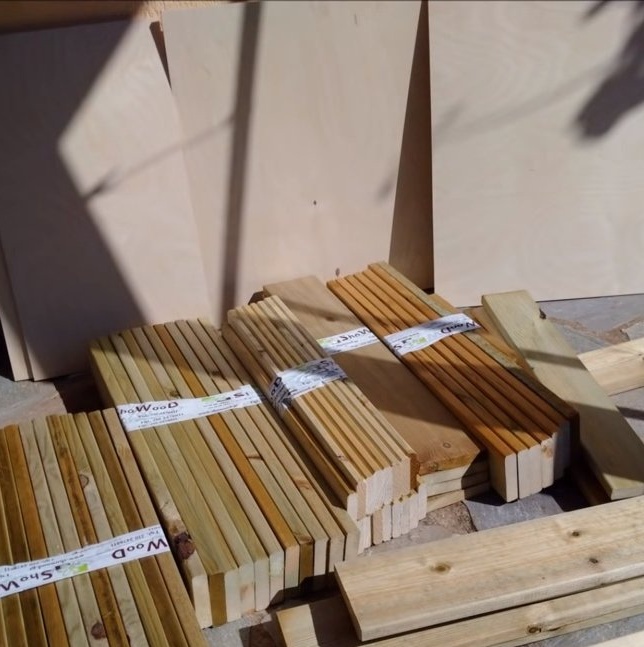
- boards and plywood;
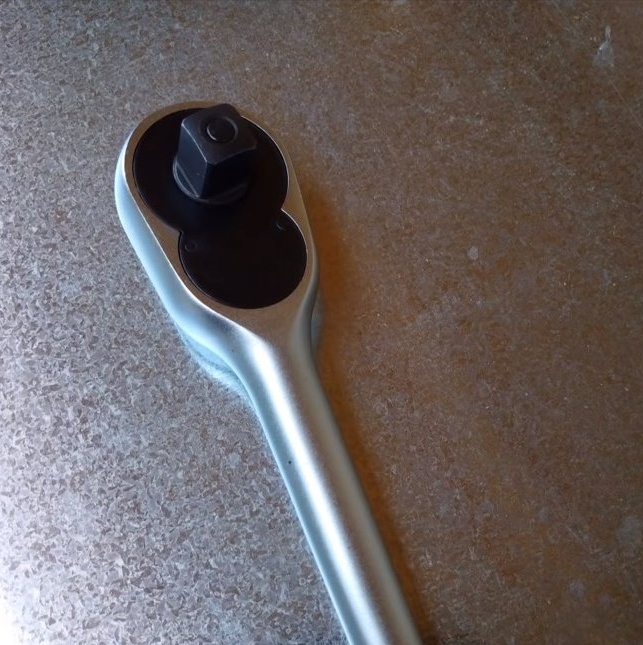
- ratchet wrench;
- chain;
- sheet metal;
- round pipes;
- furnace thermometer;
- heat resistant paint;
- self-tapping screws.
Tool List:
- grinder;
- drill;
- screwdriver;
- welding machine;
- tape measure, marker and other measuring tool.
Grill manufacturing process:
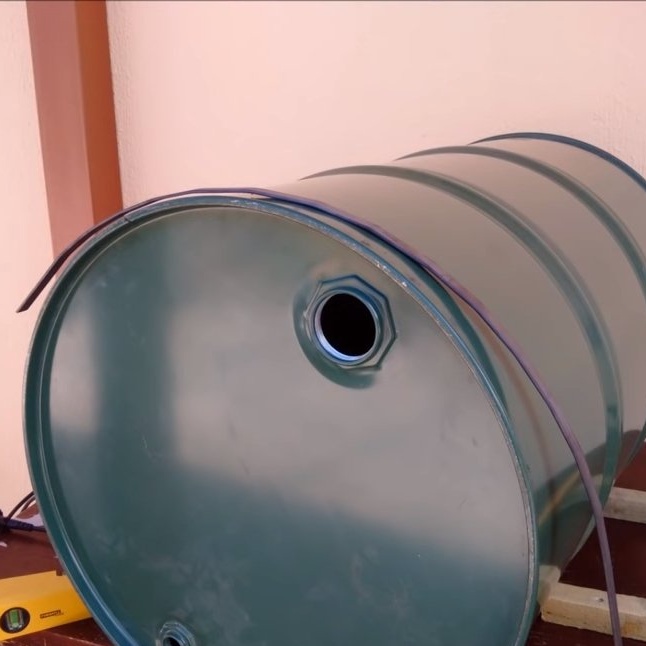
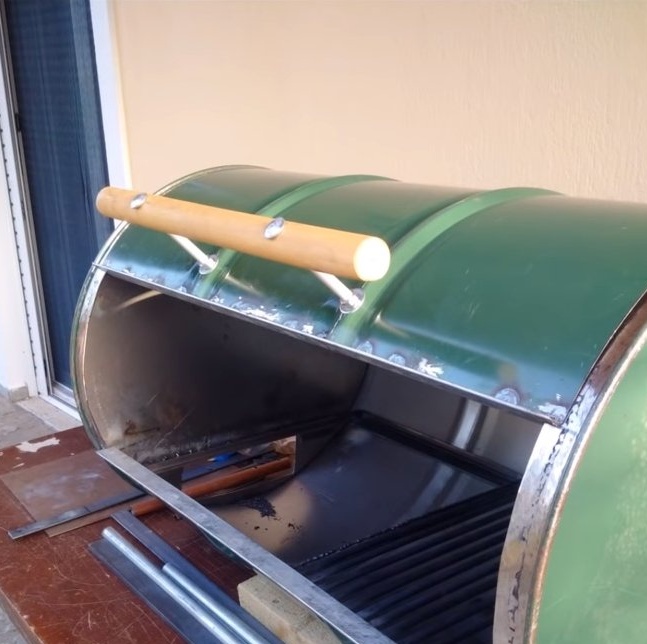
Step one. Cut the barrel
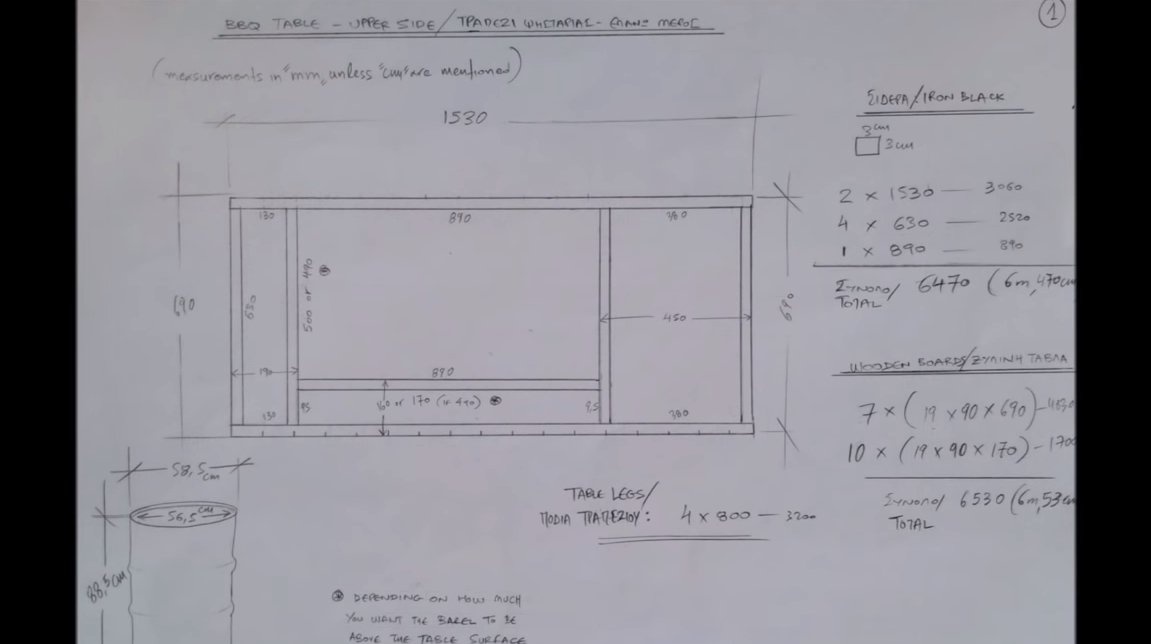
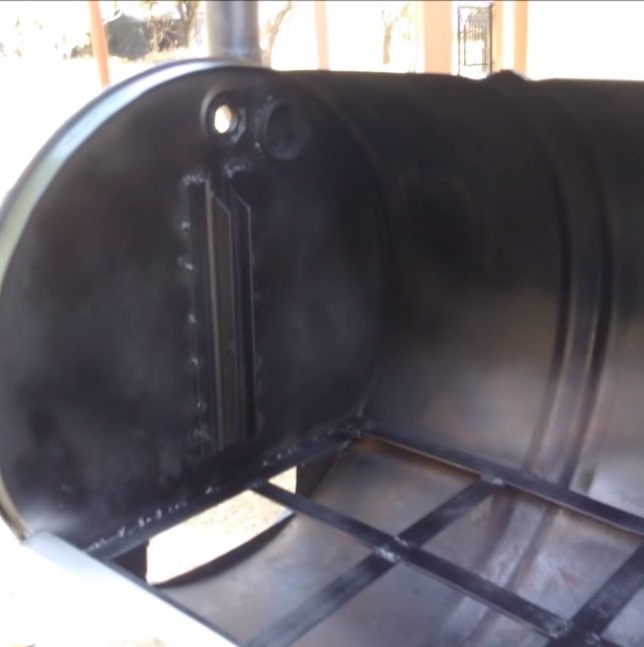
The author makes home-made work according to a pre-made project, if you wish, you can use the author's drawings when building your furnace. We cut the barrel with a grinder, cut out the part that will be the door. The door is on the rails, we weld them to the body of the future furnace.


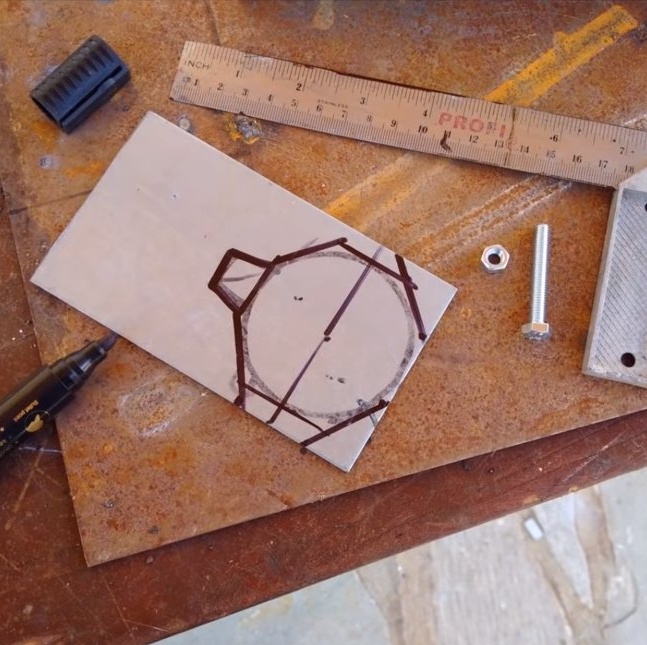
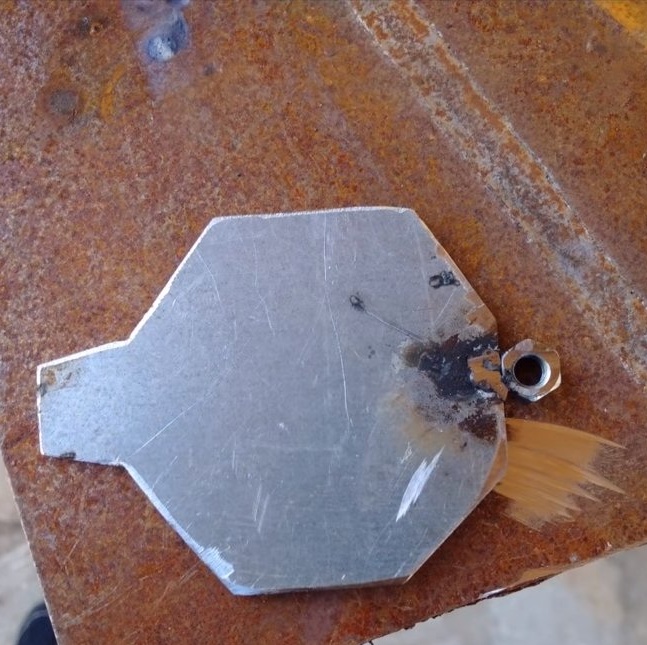
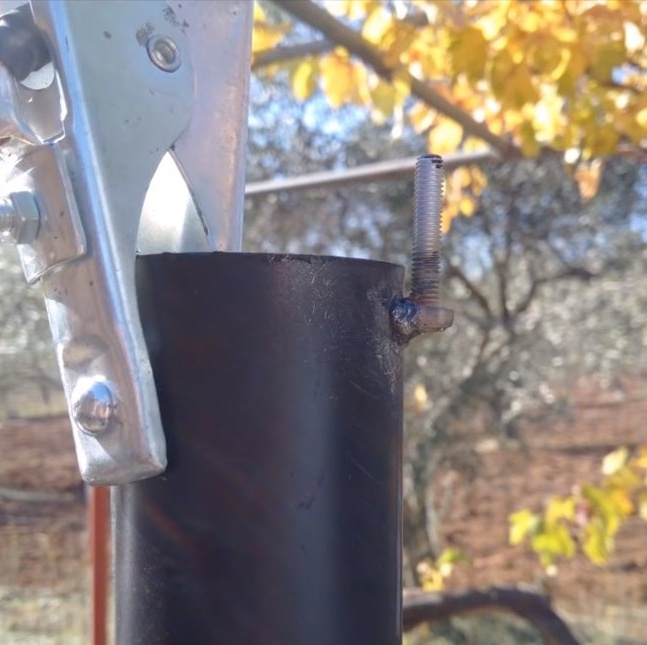
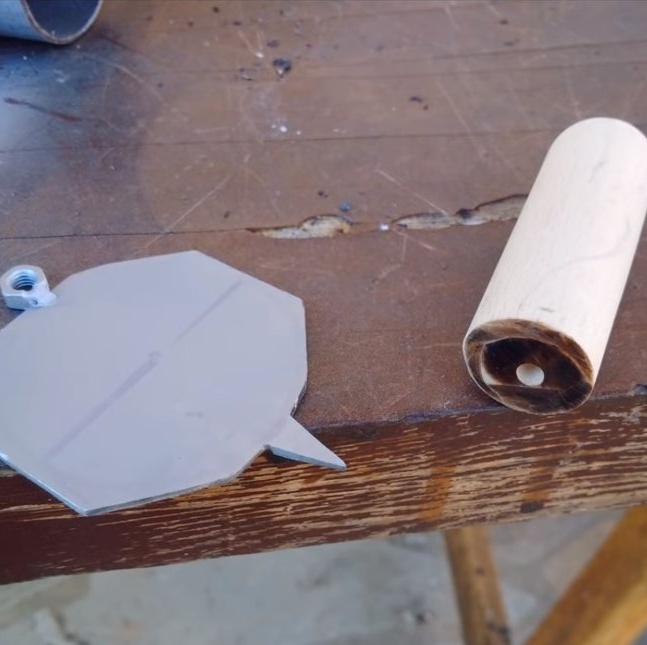
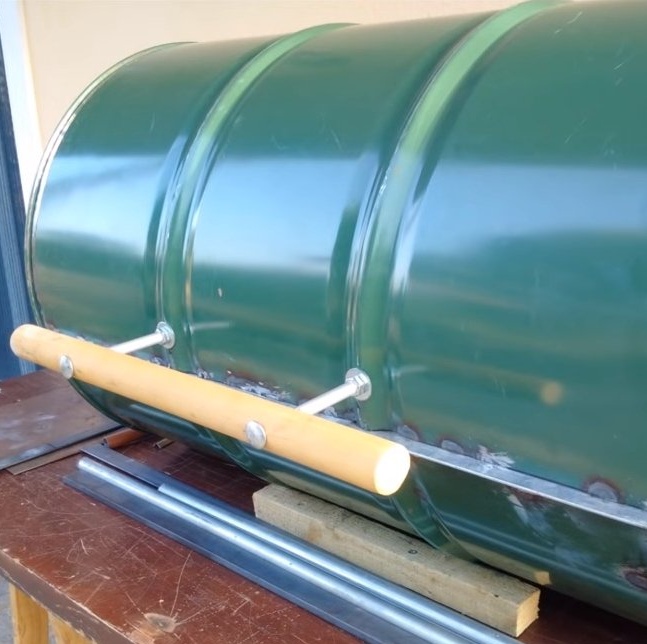
Step Two A pen
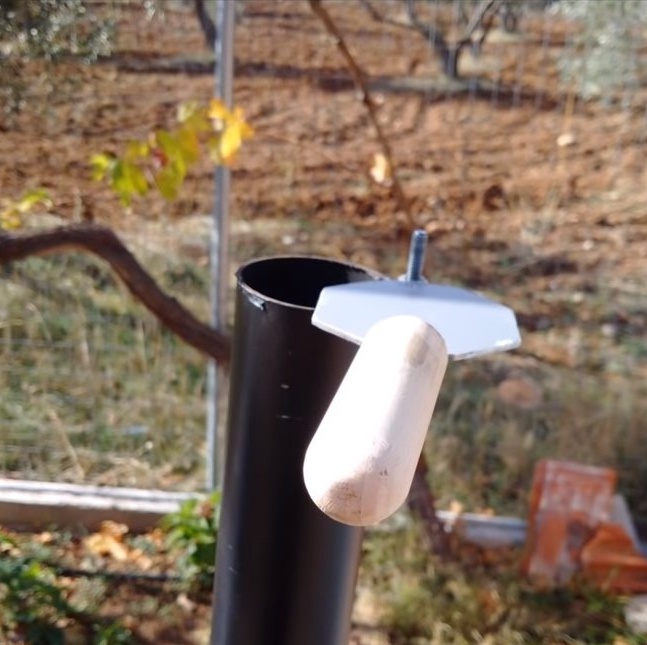
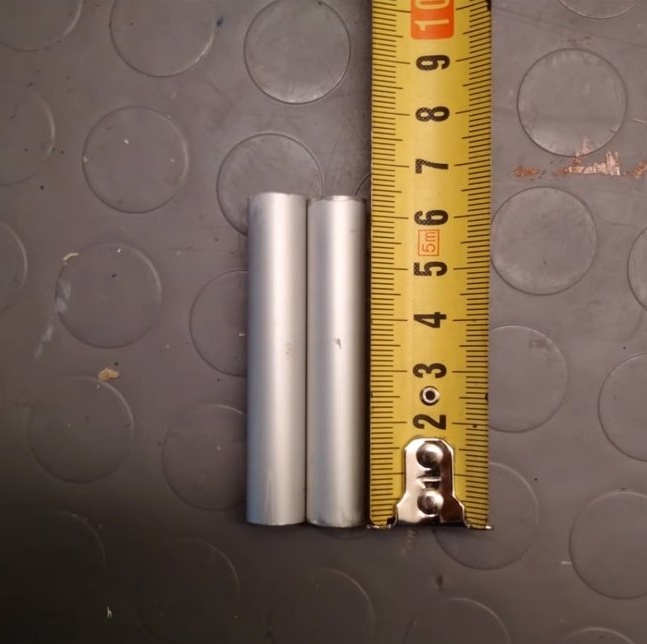
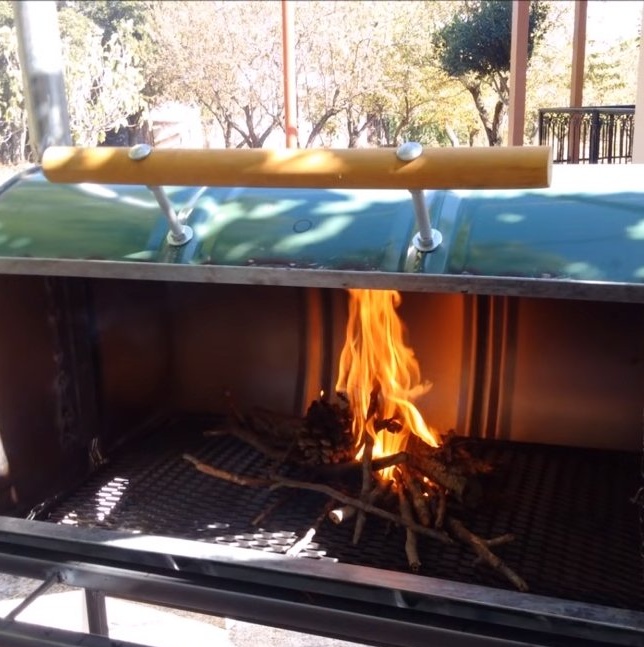
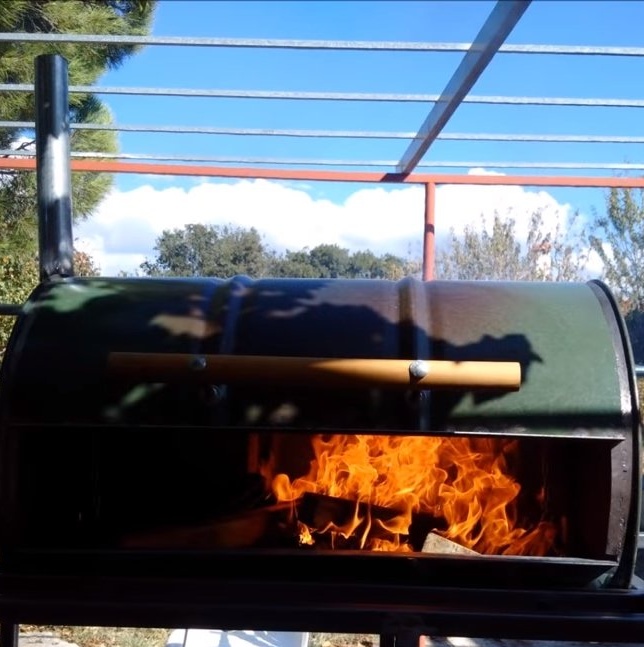
The stove will become very hot, so you need to make a safe handle. For such purposes, we need two long screws with nuts, as well as a stick of suitable length, which will serve as a handle. As spacers we use pieces of iron pipes. We drill holes and fasten the handle to the door.


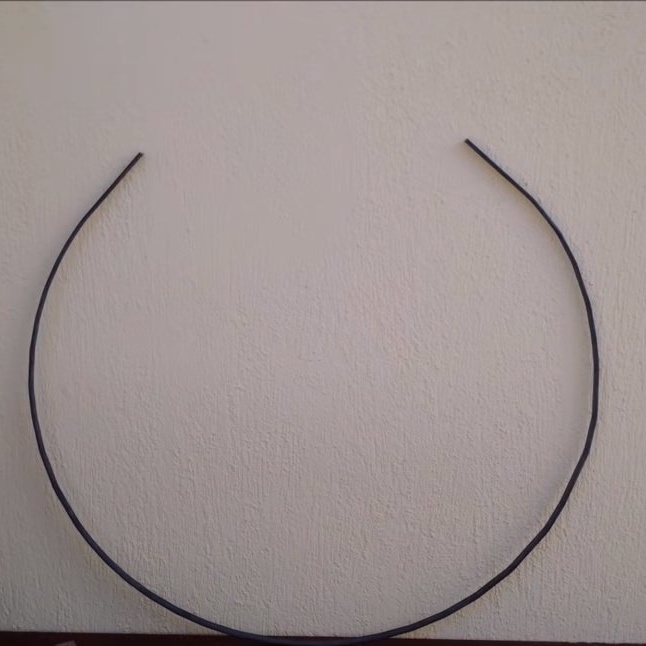
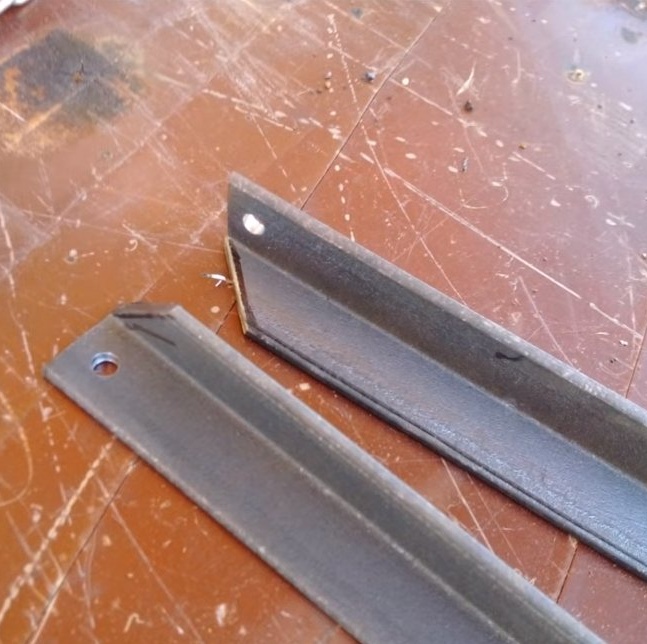
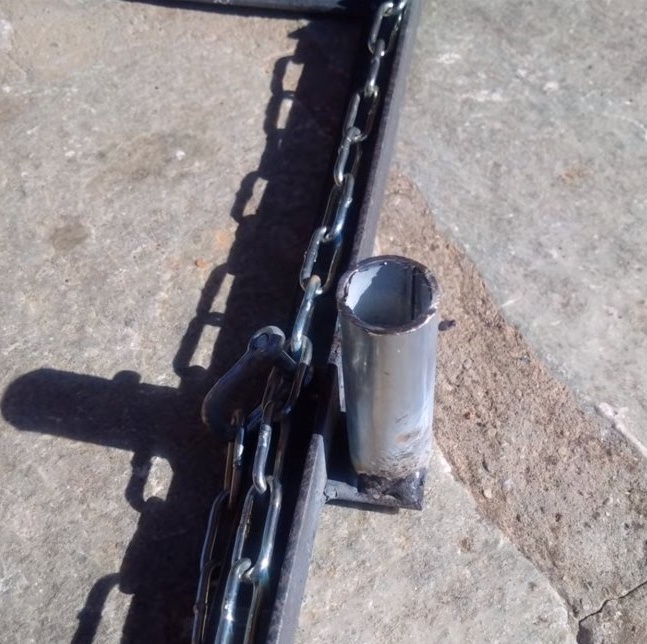
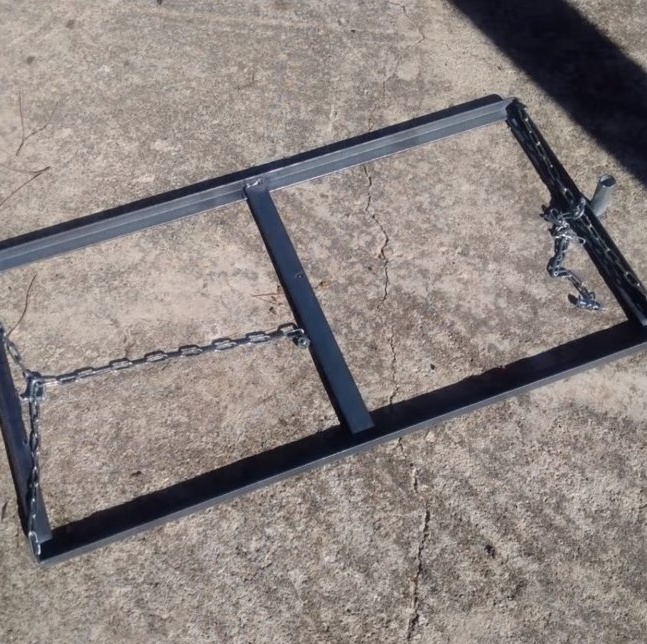
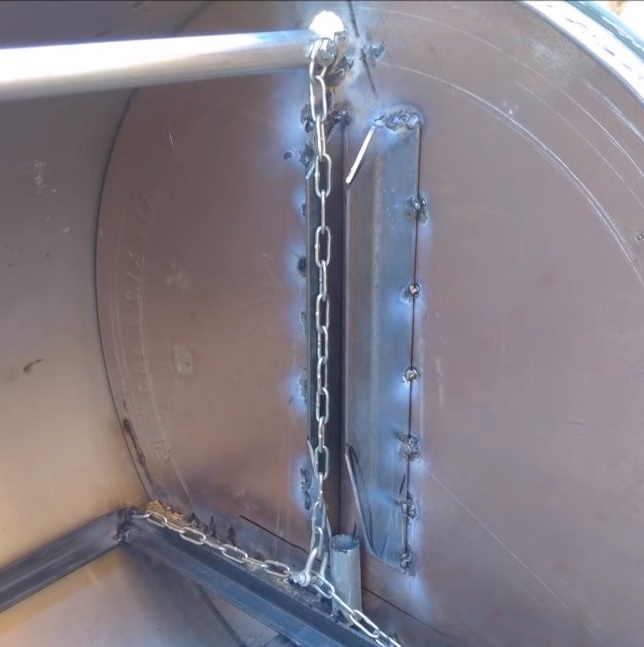
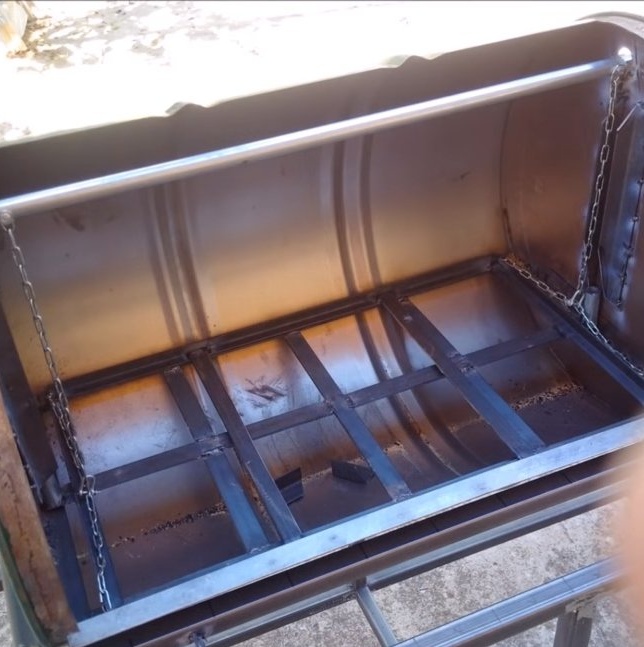
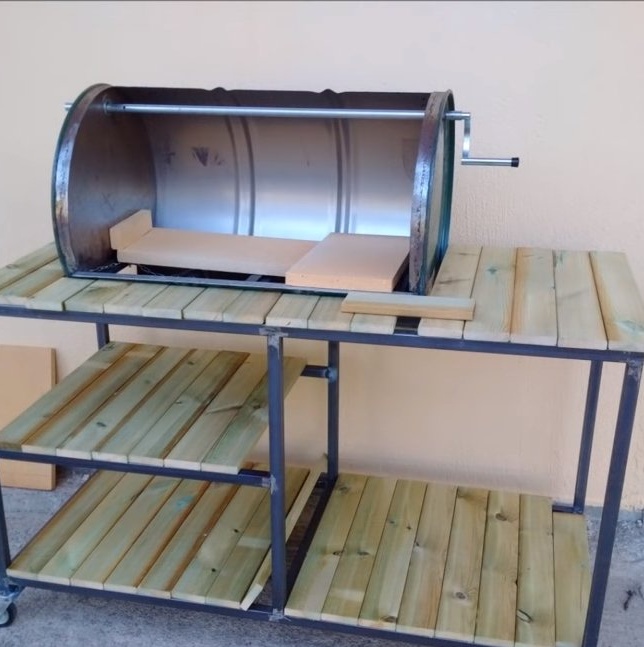
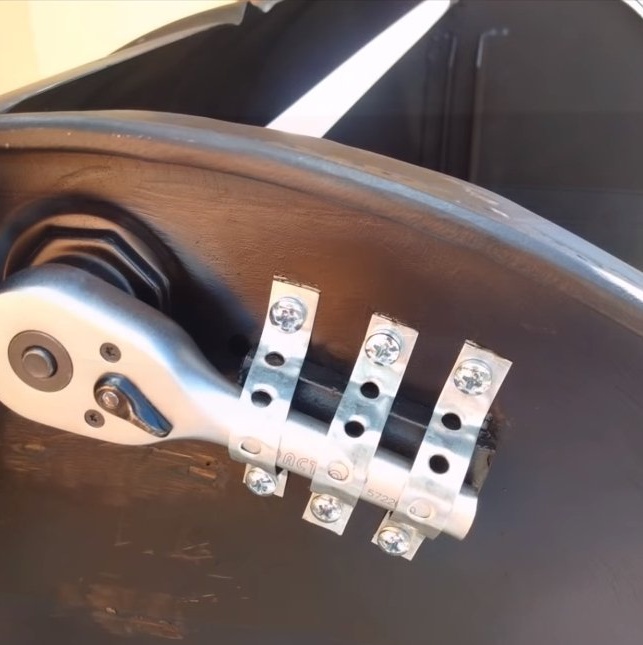
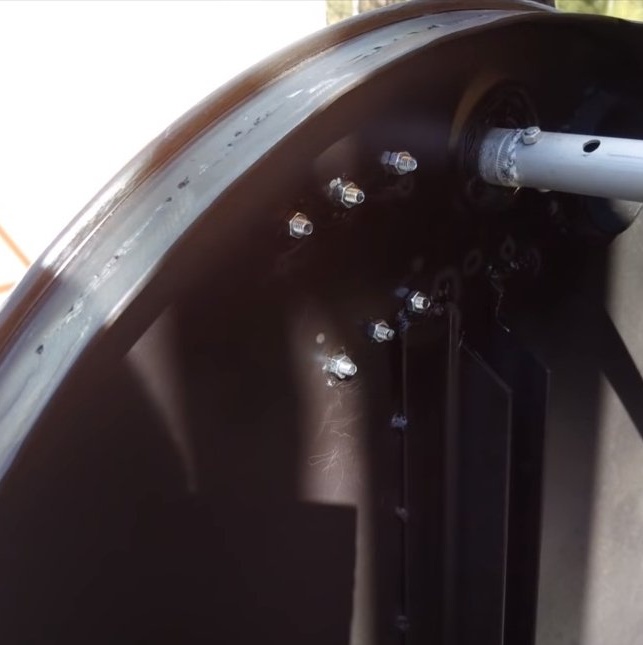
Step Three Grill and hoist
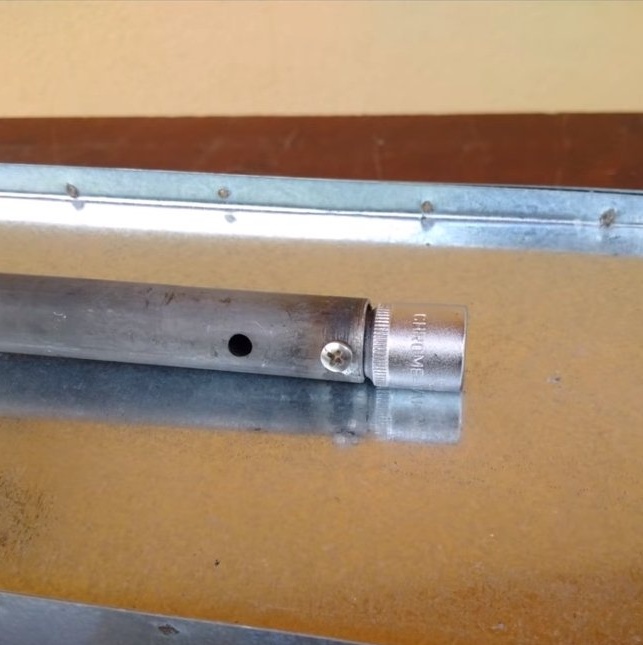
We make a grill grate, weld a frame for it from a corner, and then weld an iron grate to it. Pieces of pipes are welded to the frame along the edges, these will be guides, also guides in the form of corners are welded to the furnace body. The lattice itself is suspended on chains, we use a round pipe as a shaft, we weld a handle to it.


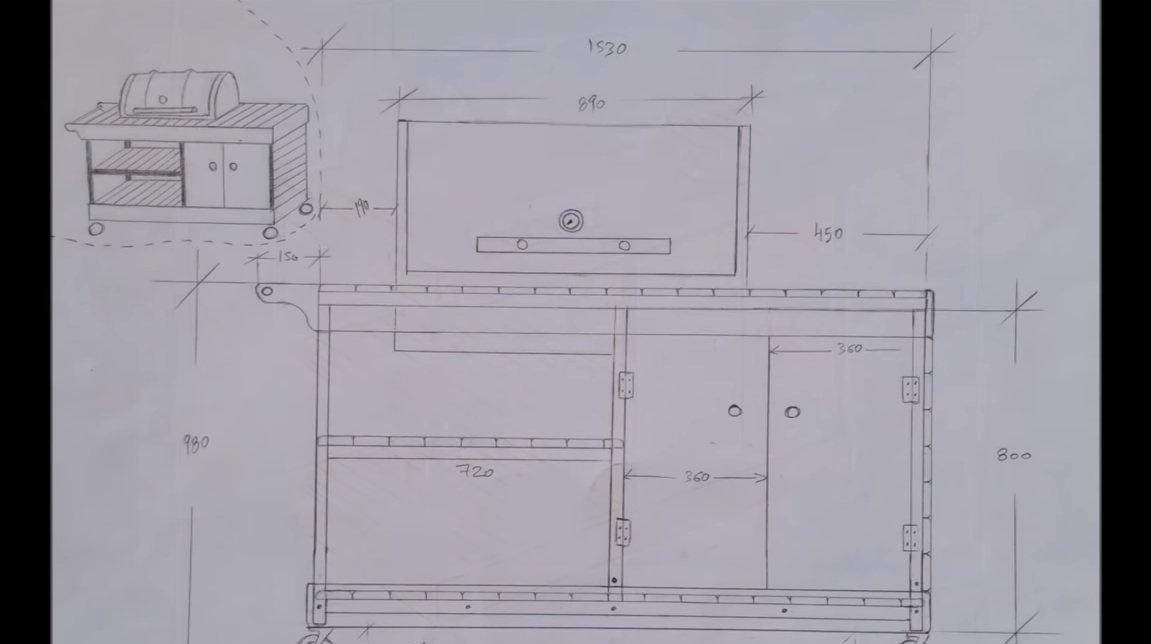
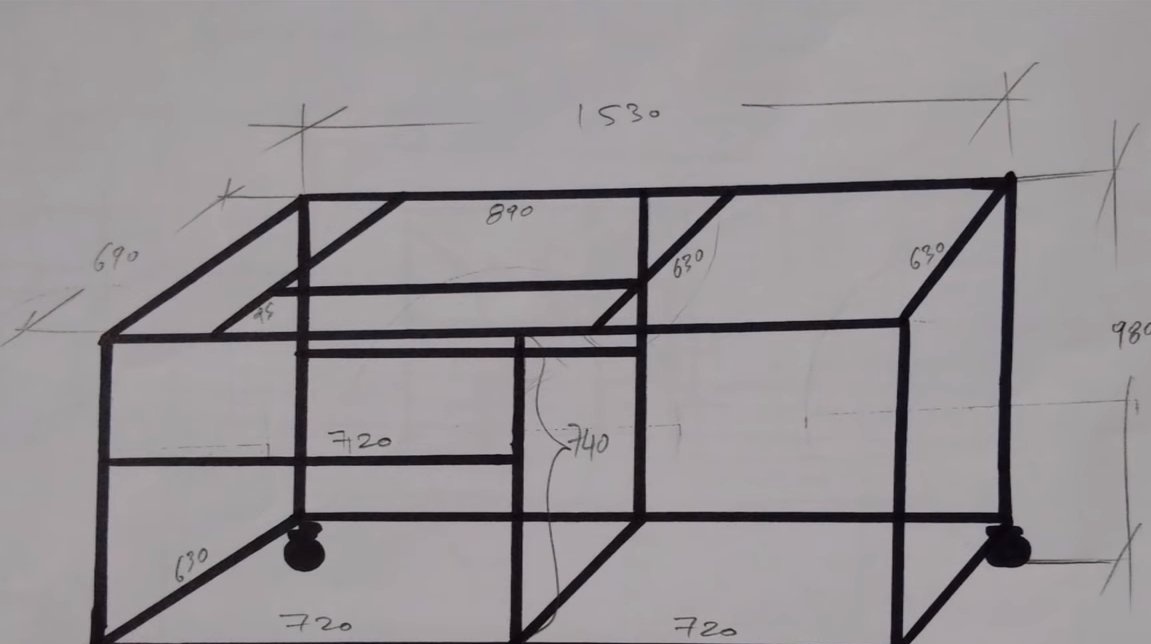
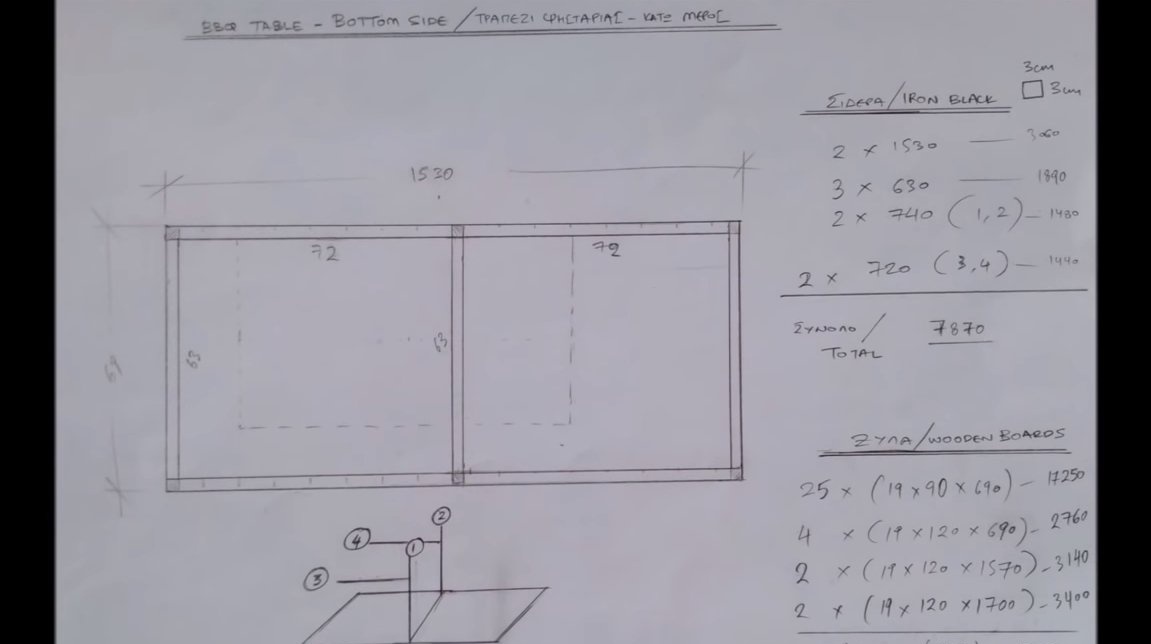
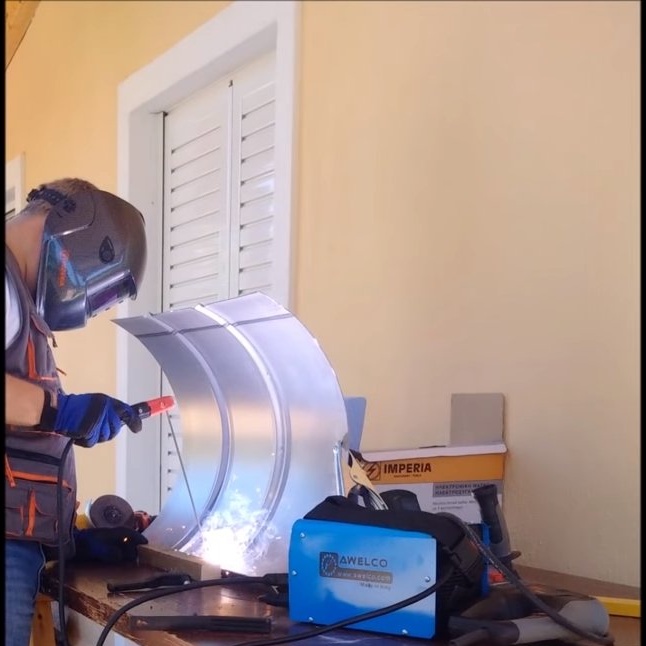
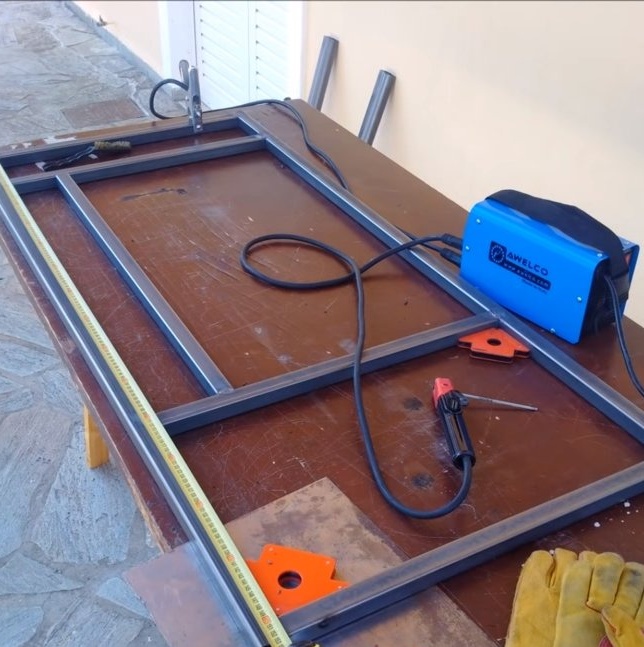
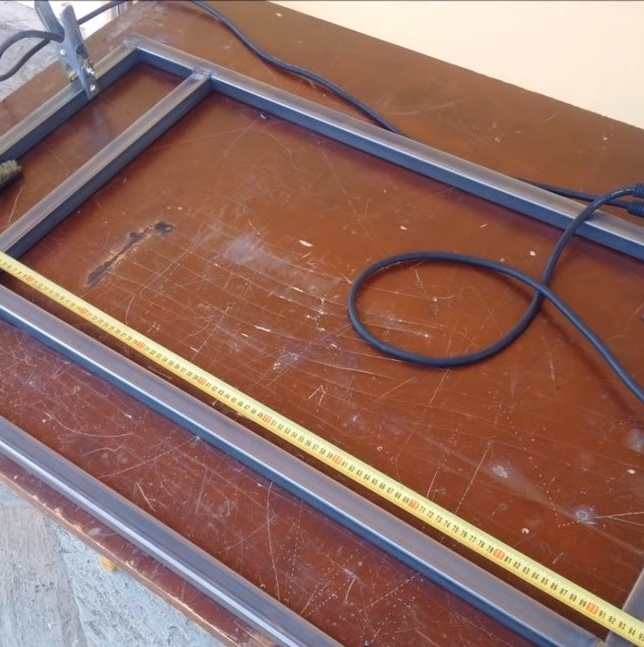
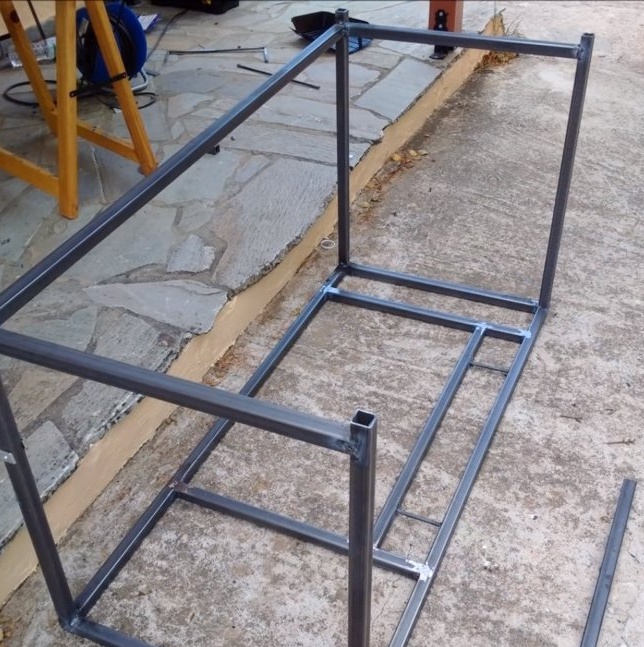
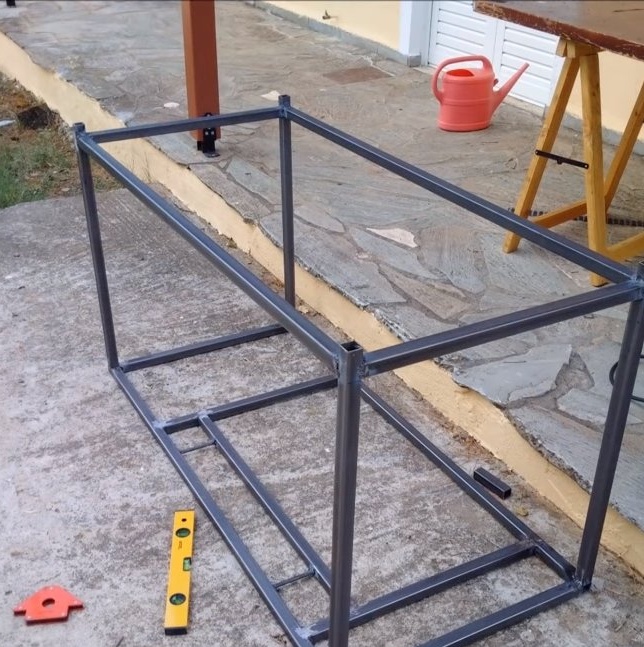
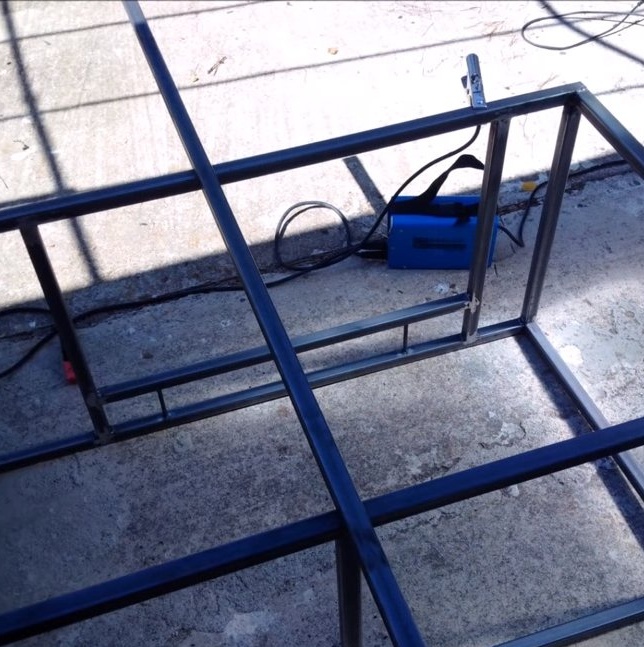
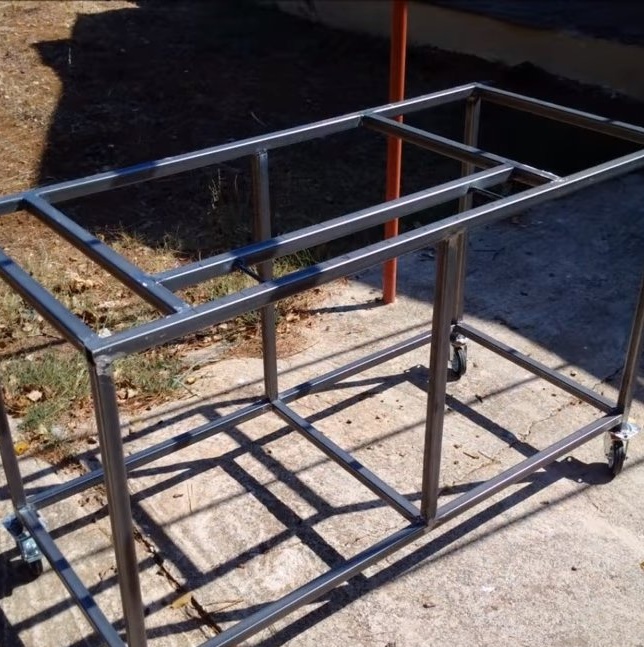
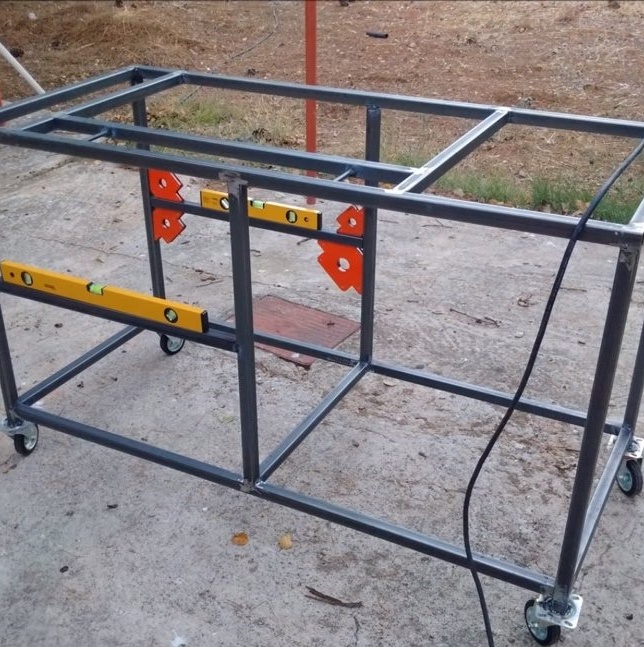
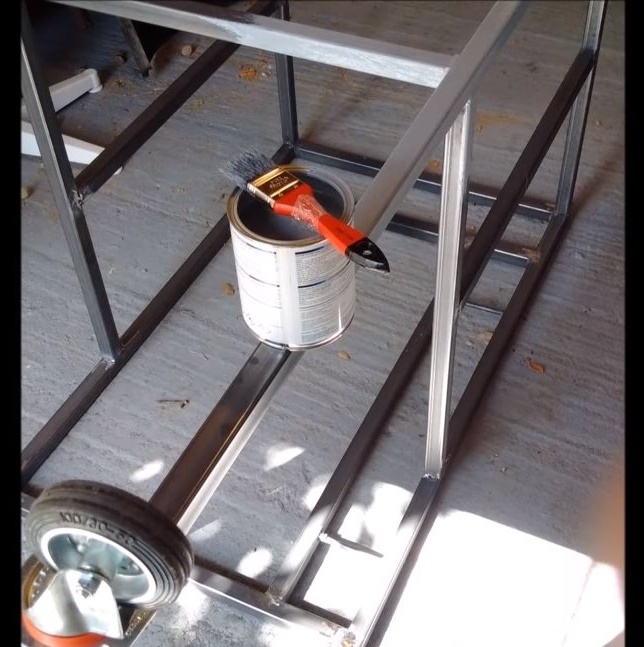
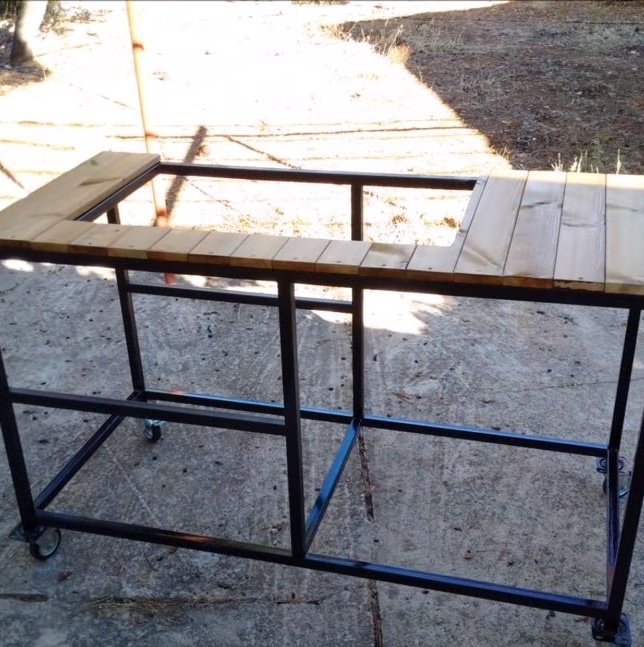
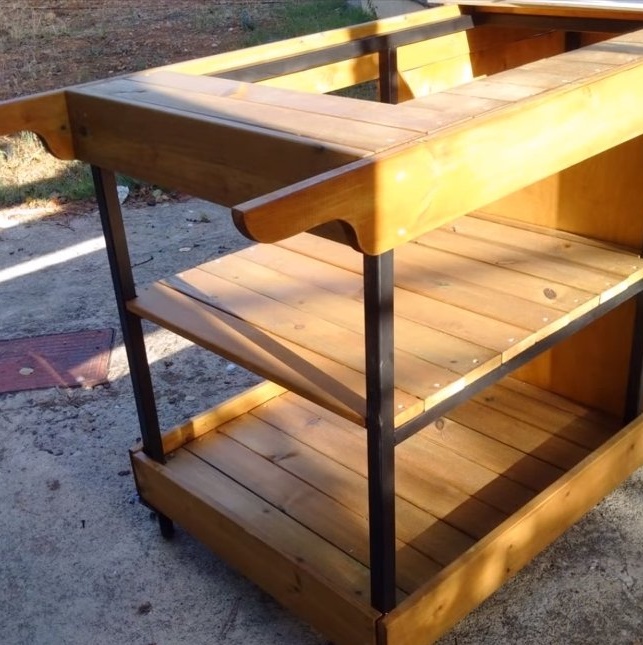
Step Four Table frame
We weld the table frame, for such purposes we need profile pipes. Of course, it is best to cut such a material with a miter saw, so everything will turn out quickly and accurately. But you can handle the grinder. When welding, you can not do without such useful assistants as magnetic squares, they will allow you to weld the nodes at right angles.We clean welds so that everything looks neat and beautiful.


Step Five Painting
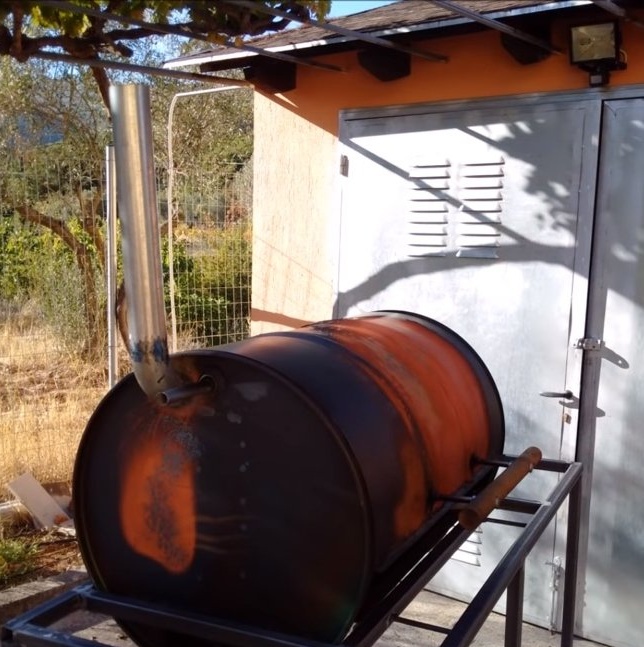
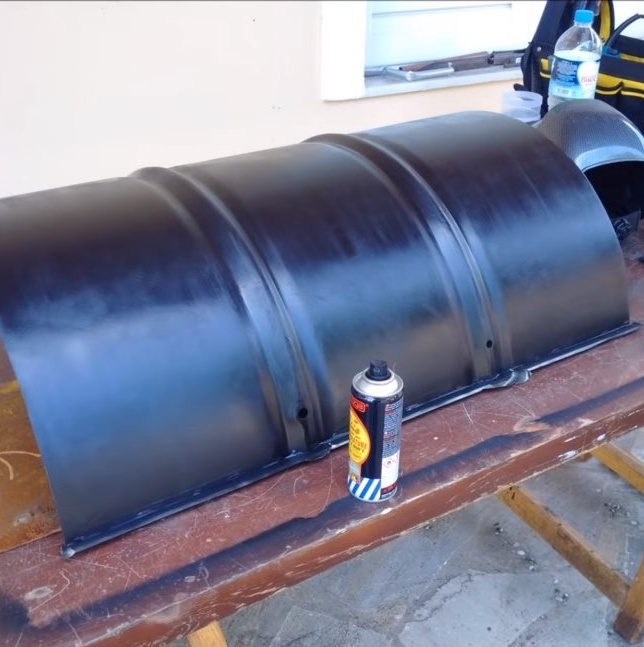
All the iron parts must be painted, otherwise this whole thing will rust, and will look ugly. There will be no problems with the frame, but you need to burn the barrel. We start our furnace and warm it up well. At the same time, the paint will burn from the barrel and it can be easily removed. We arm ourselves with a grinder with a petal or brush nozzle and grind the furnace to a shine. Further, the author paints it from a spray can with heat-resistant paint.
You can paint the oven with a similar paint from the inside.


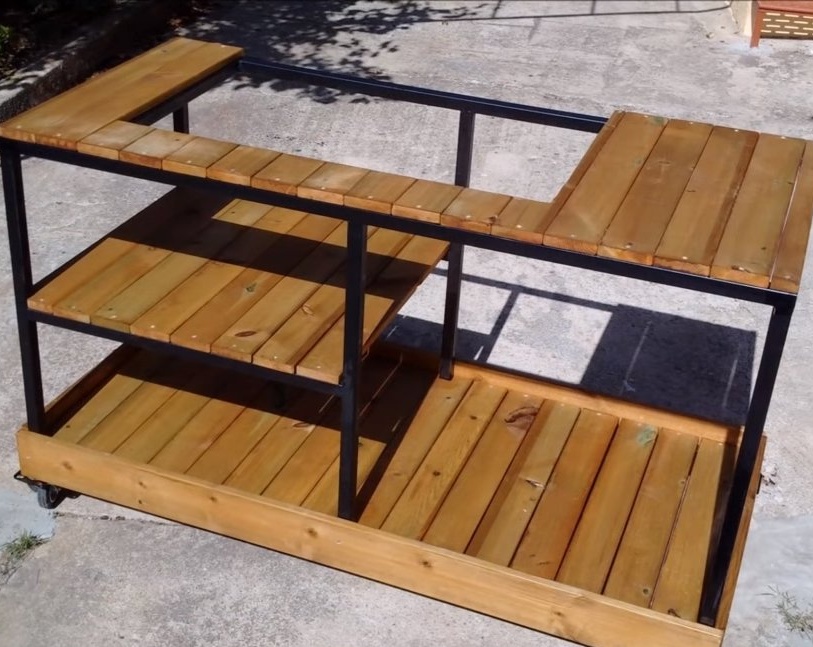
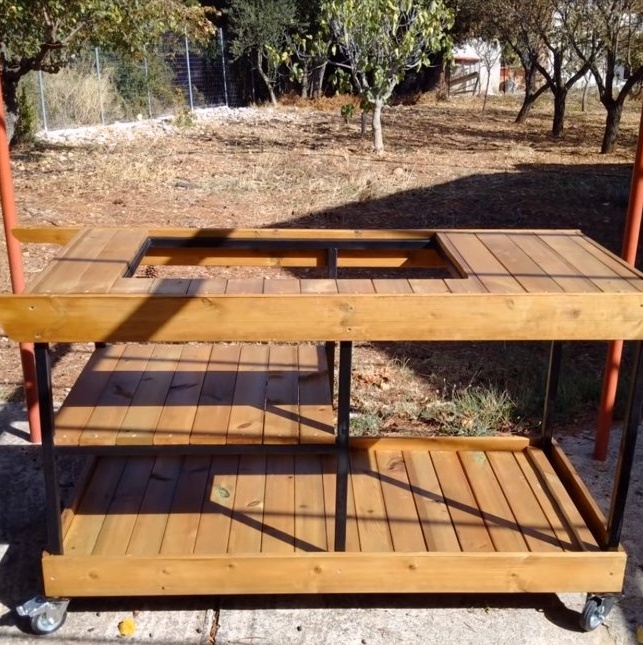
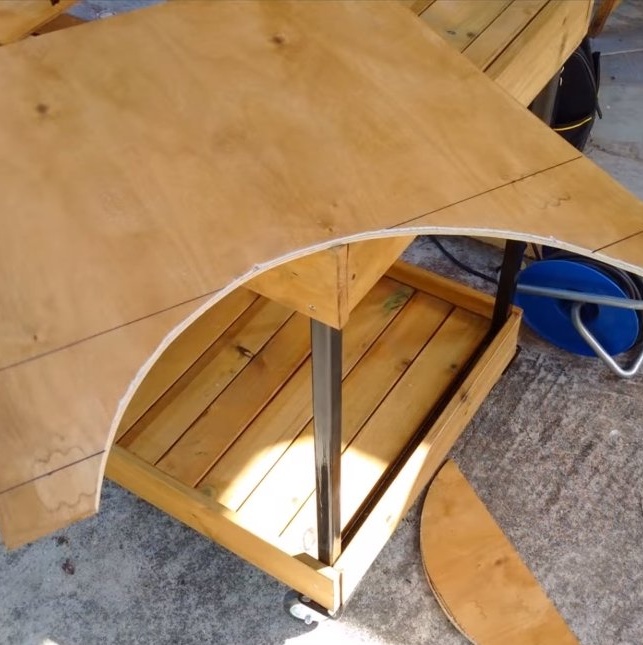
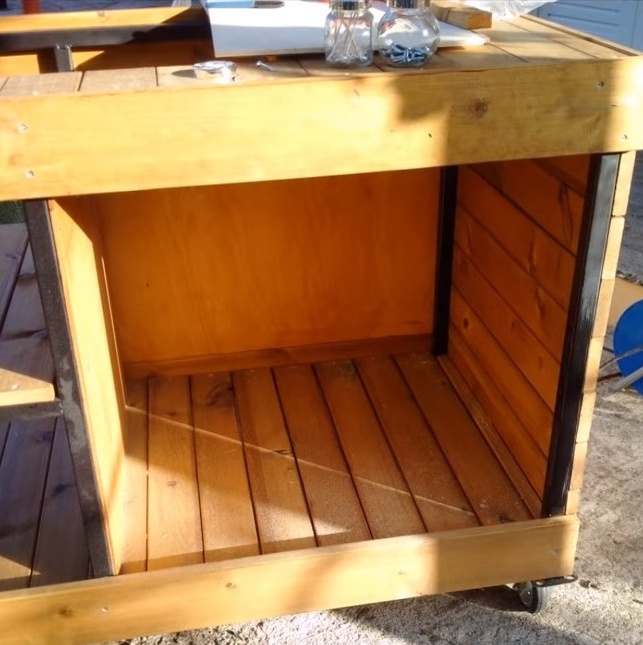
Step Six Sheathing
We plank the table with boards, from which shelves, a countertop and a side wall are made. As for the back wall, it can be cut out of plywood. If desired, the boards can be painted, but under the varnish everything looks much more interesting.
The author also puts heat-resistant material inside the furnace.


Seventh step. Lattice fixing
We also need to provide a system for fixing the grill at the desired height. Then the author did not turn around and made a simple practical decision. A ratchet wrench was used as a ratchet. We attach it to the furnace, and connect the shaft to the inside.
Step Eight. Doors
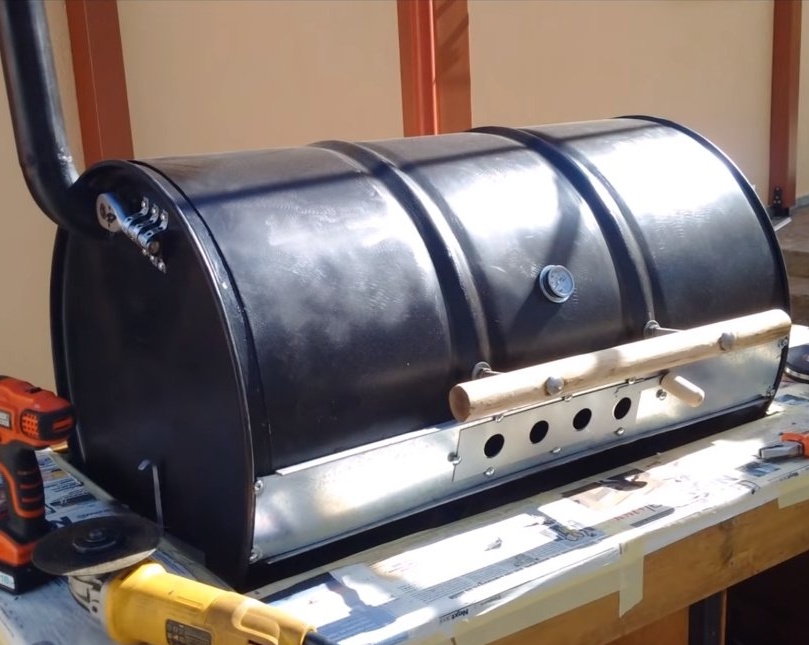
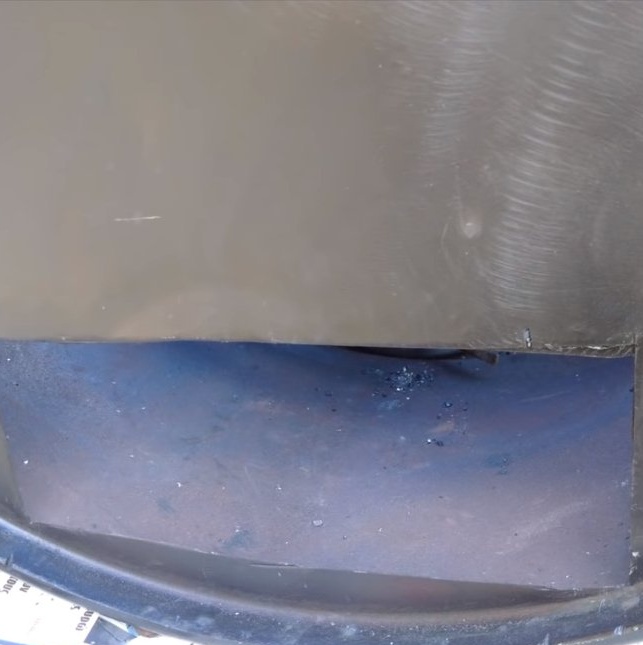
A window is cut out at the bottom of the furnace, through which it will be possible to pick up ashes. For this con, you need to make a door, otherwise the air supply will be uncontrolled. The door is cut out of a stainless steel sheet, it rests against two self-tapping screws wrapped in a barrel.

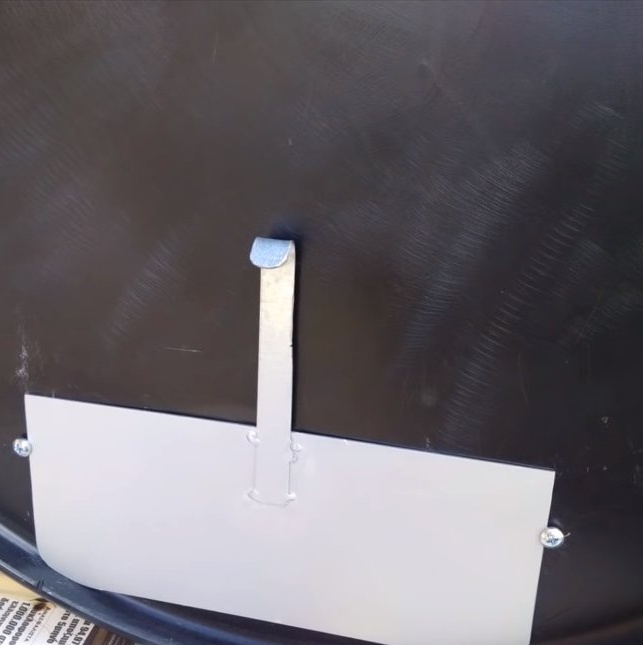
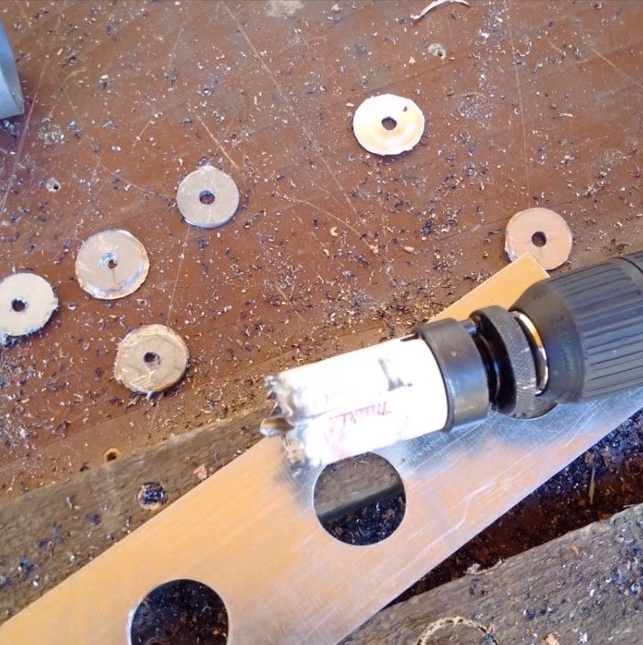
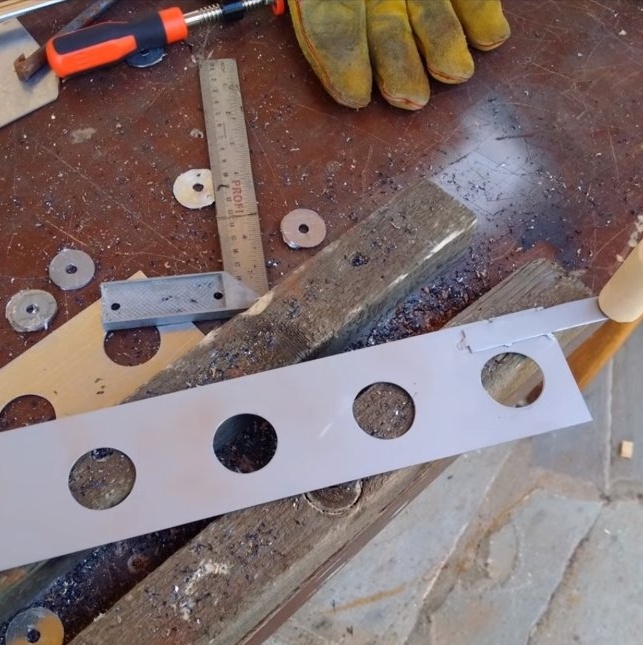
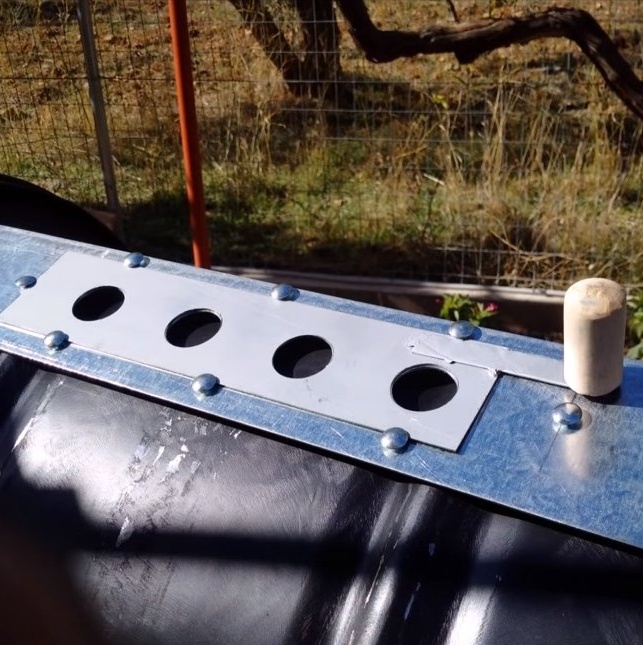
We also need to think through a blowing system. The author cut a valve from a sheet of stainless steel, the system consists of two plates with rows of holes. For such a valve, do not forget to make a handle that will not heat up.
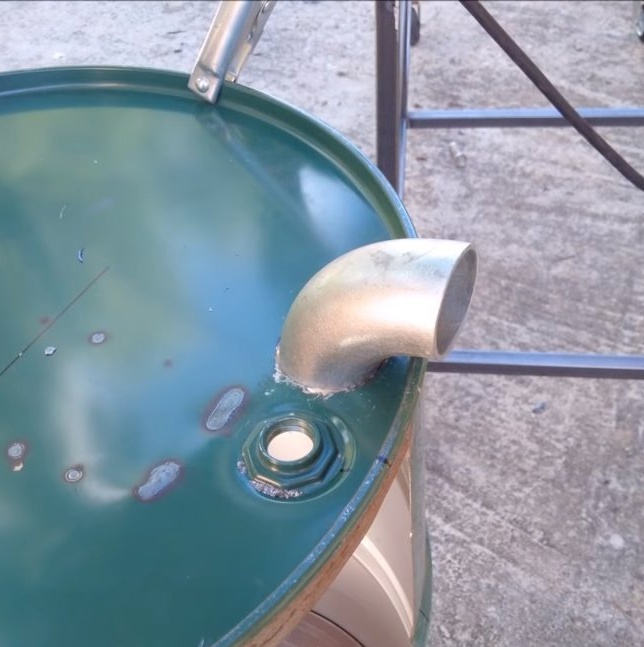
Step Nine. Chimney gate valve
For additional control of the furnace, we will make a chimney gate valve, cut it out of sheet iron. The author used a bolt with a nut as a hinge, it is simple and reliable.
After that, the oven will be ready and can be tested. Everything works perfectly, the oven is convenient and completely safe to use. I hope you enjoyed the project and found useful thoughts for yourself. Good luck and creative inspiration, if you decide to repeat this. Do not forget to share your ideas and homemade things with us!