
In this article, we will consider how an ordinary wooden block in skillful hands turns into a beautiful and useful thing.
Tools and materials:
-Wooden bar or board;
-Pencil;
-Bandsaw machine;
-Tool for wood carving;
-Kolovorot;
-Drill;
-Wire;
-LED lamp;
-Acrylic tube;
-Soldering accessories;
Epoxy resin;
-Oil paint;
- brush;
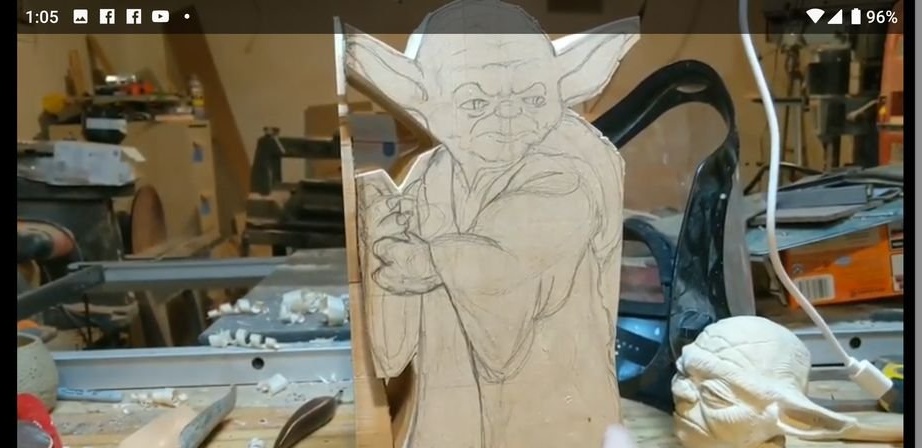
Step One: Drawing
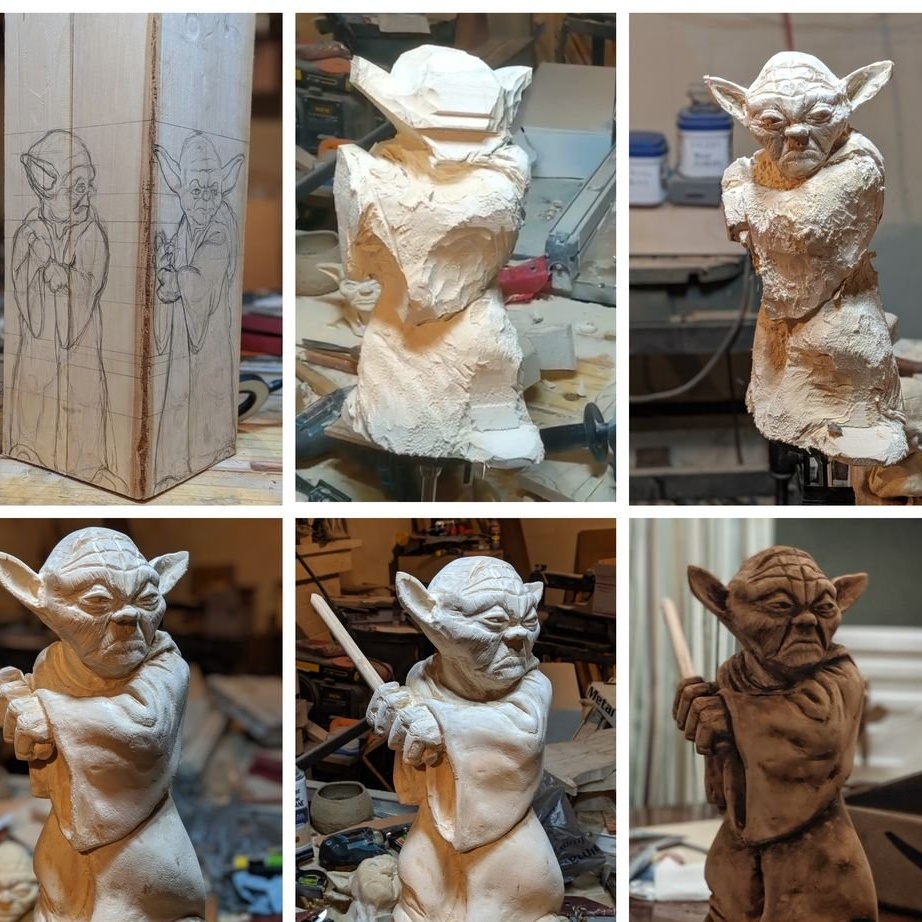
For the manufacture of the lamp, you can take a bar of a suitable size, or glue the boards. On one side of the bar is drawn a figure of Yoda front view, on the side, side view.


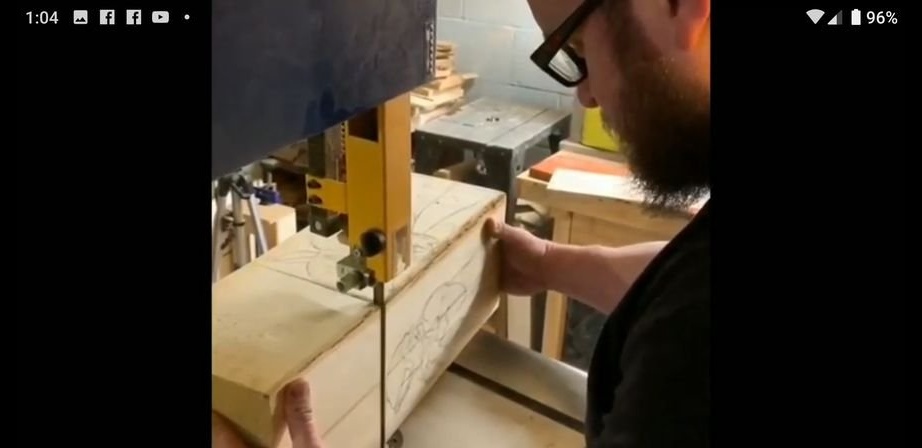
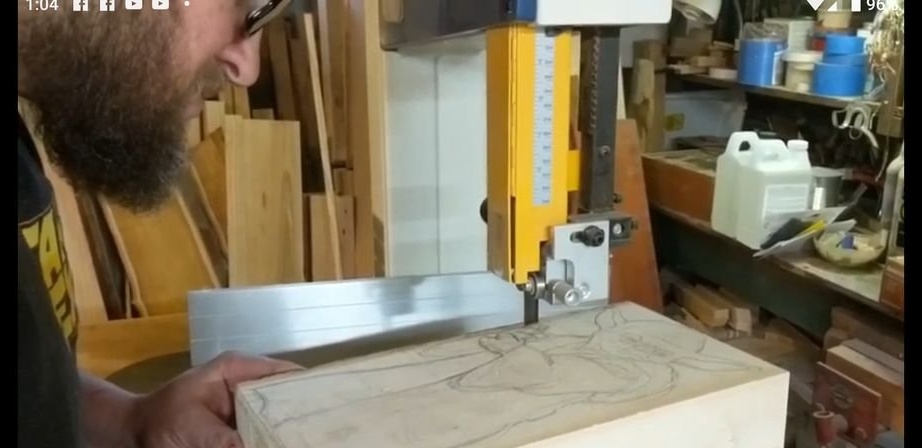
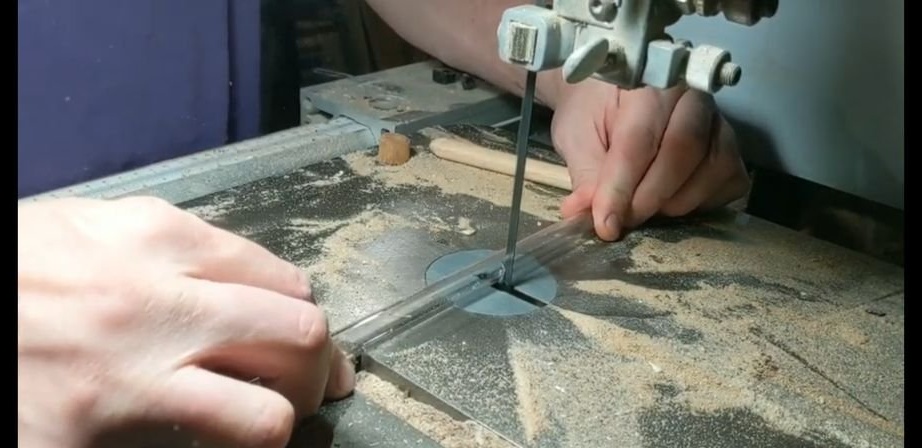
Step Two: Cutting
Now you need to cut on the band saw, along the contour of the picture, first the front, and then the side. Thus, a rough cut was obtained.
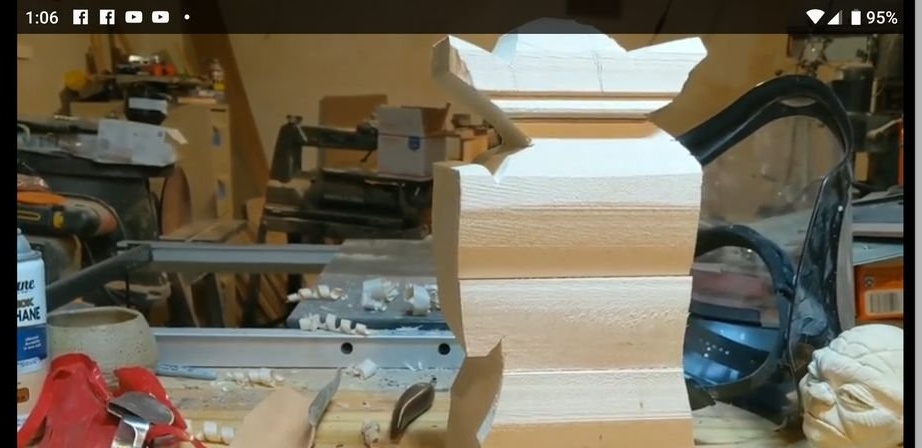
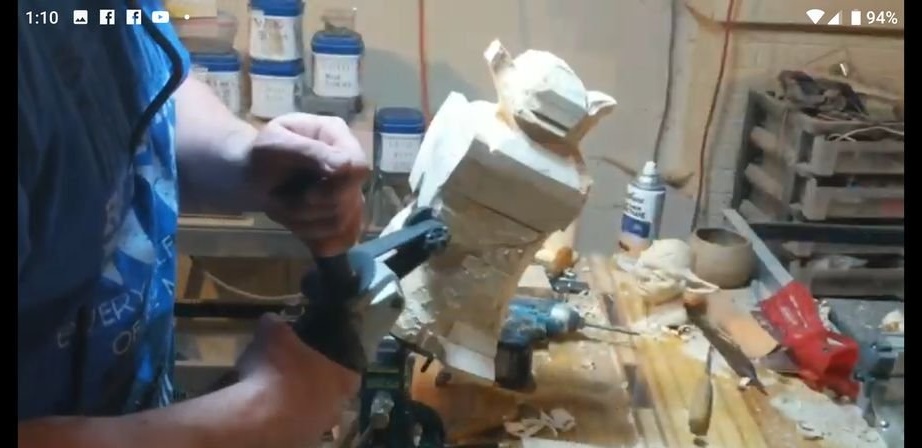
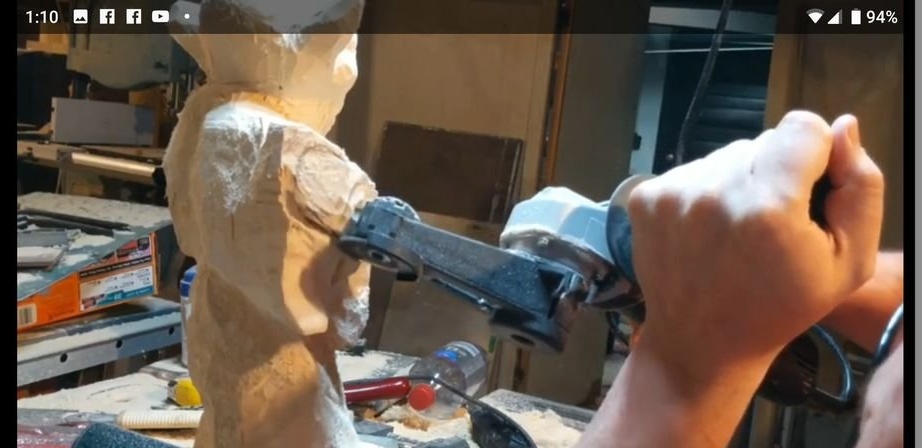
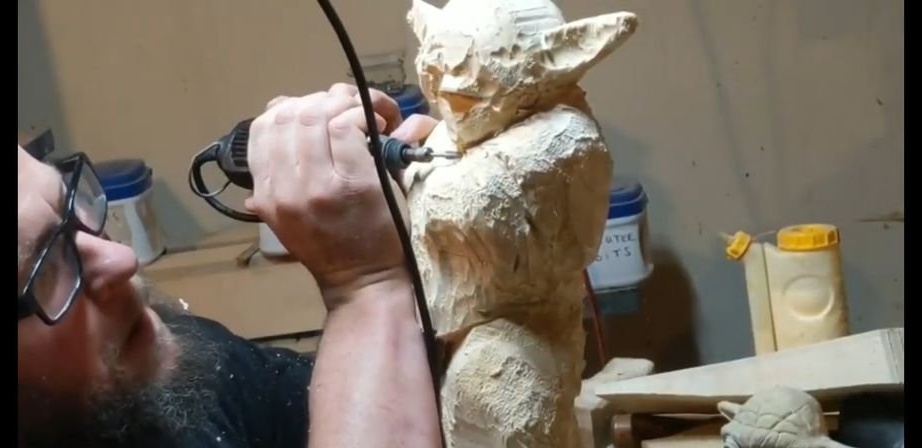
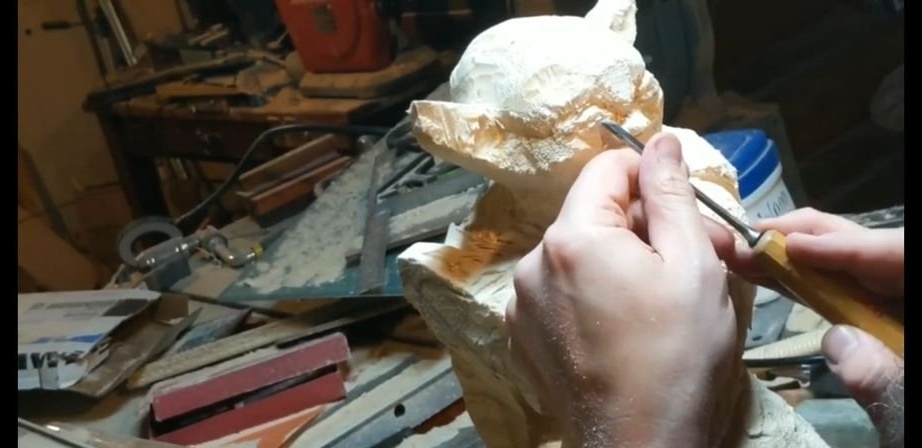
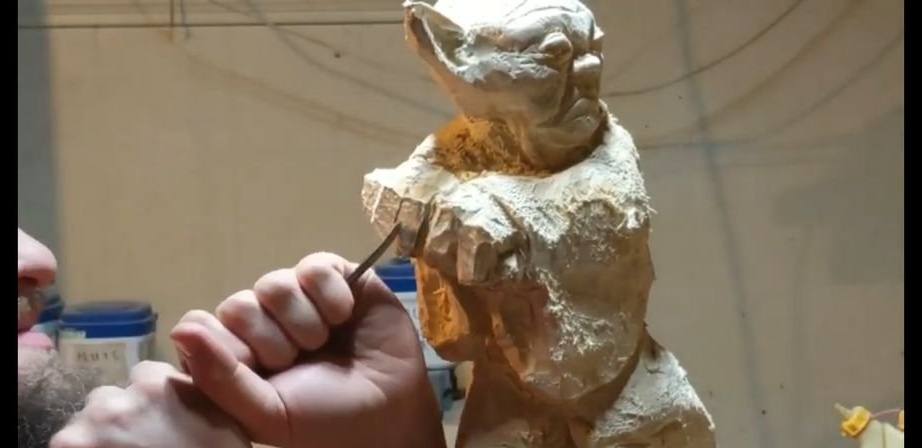
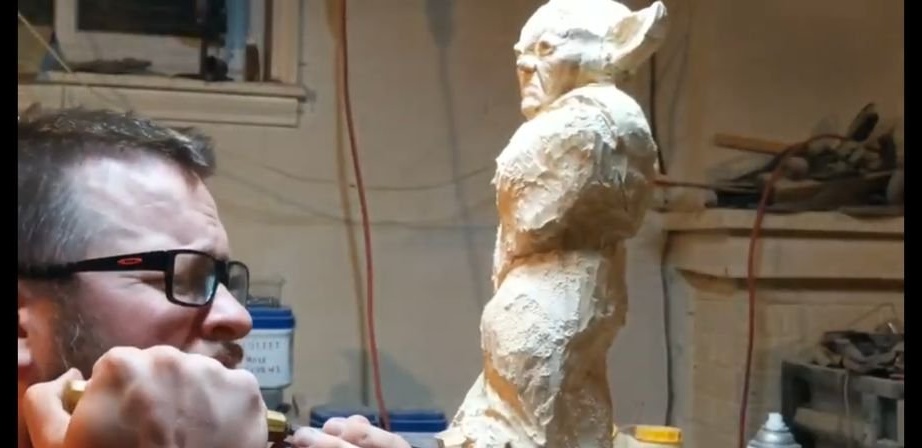
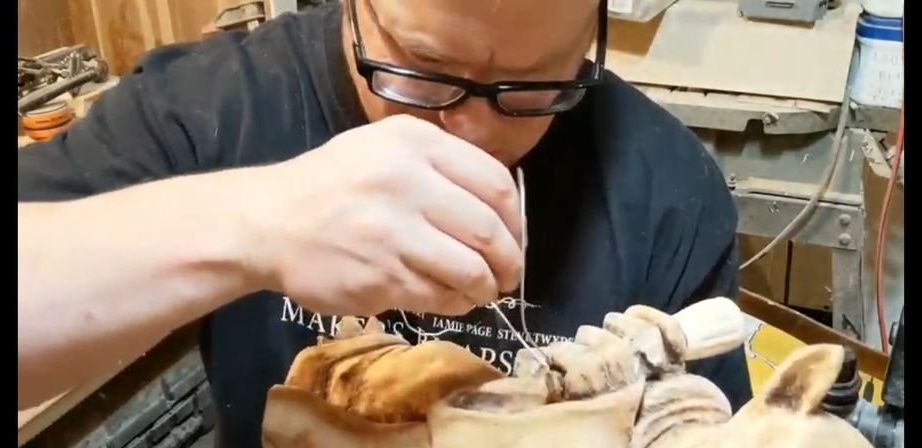
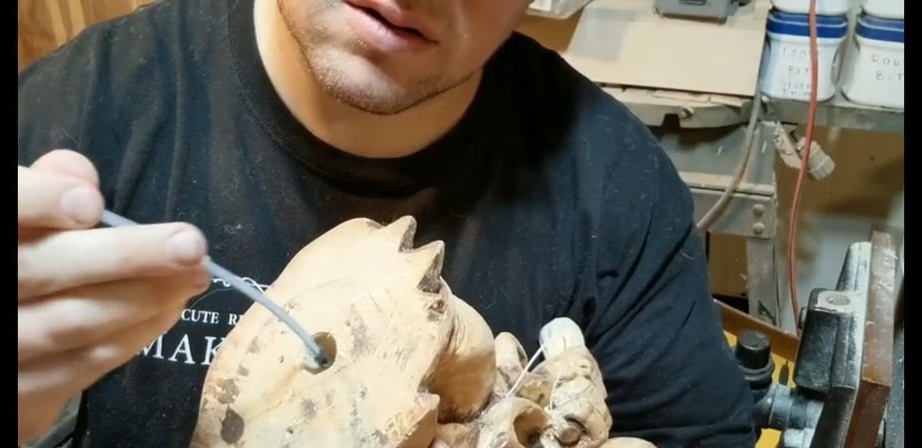
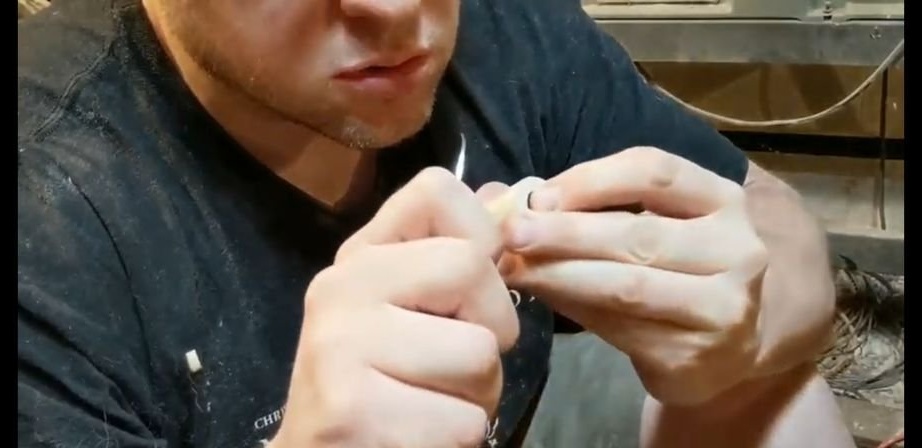
Step Three: Carving
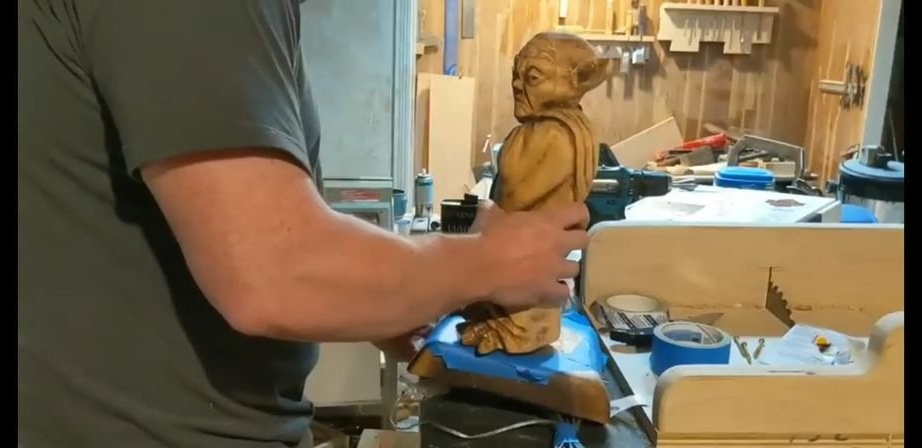
Now the hardest part is wood carving. The tools that the master used were a mini grinder, a Dremel, various cutters and knives.
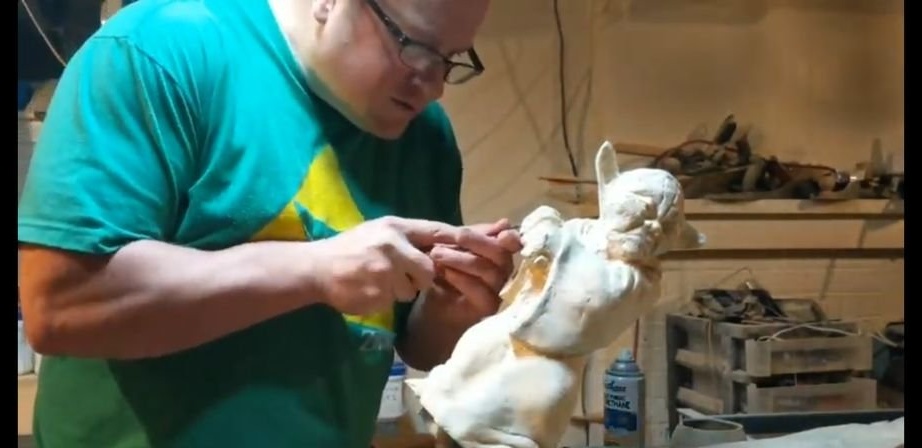
Step Four: Painting
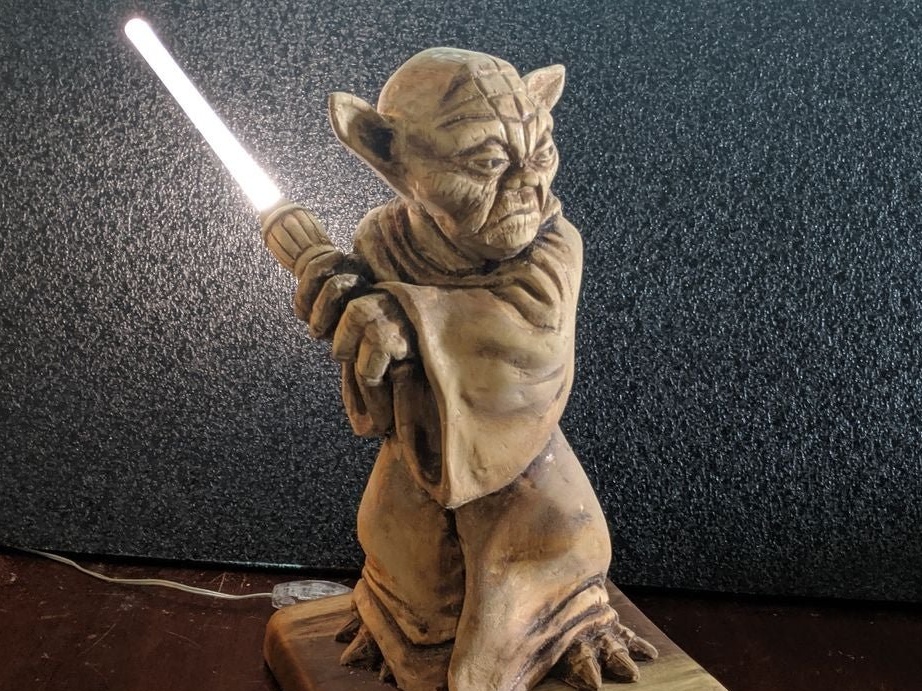
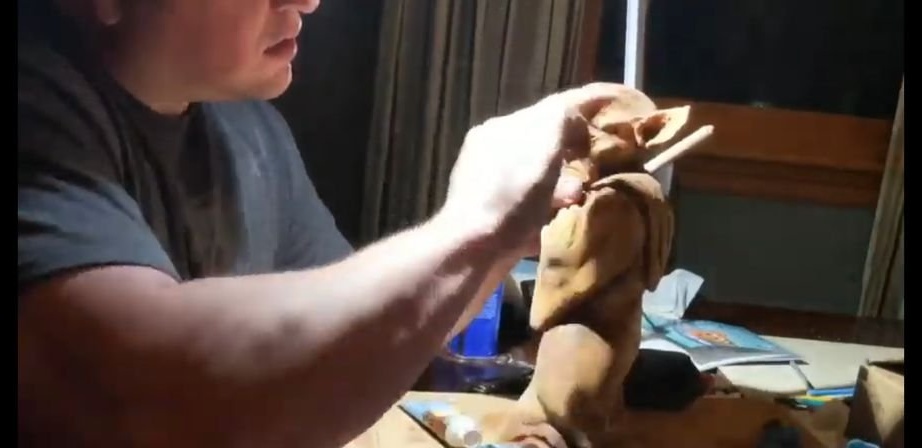
The figure is carved and the master covers it with amber oil paint.


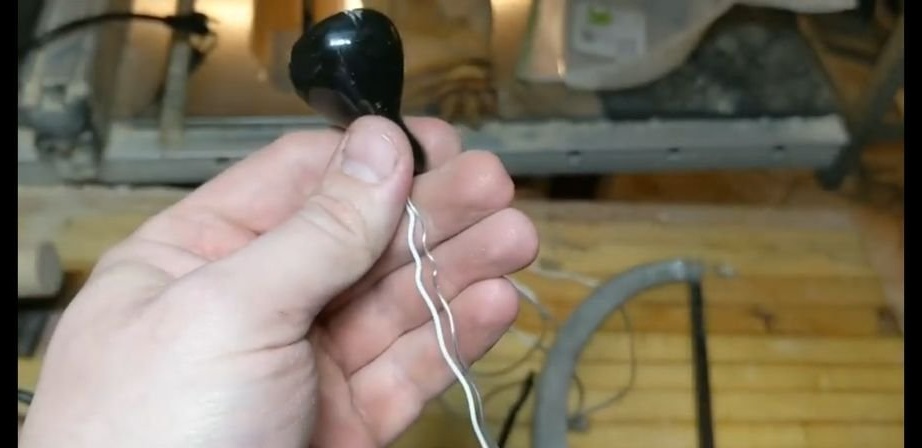
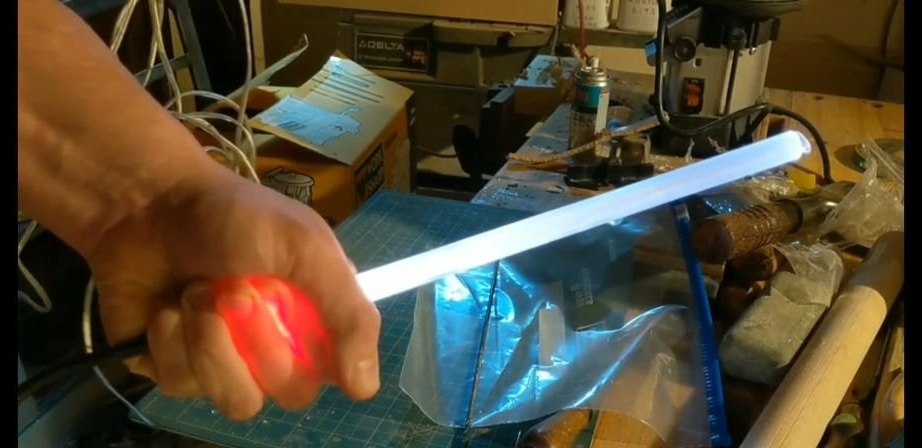
Step Five: LED
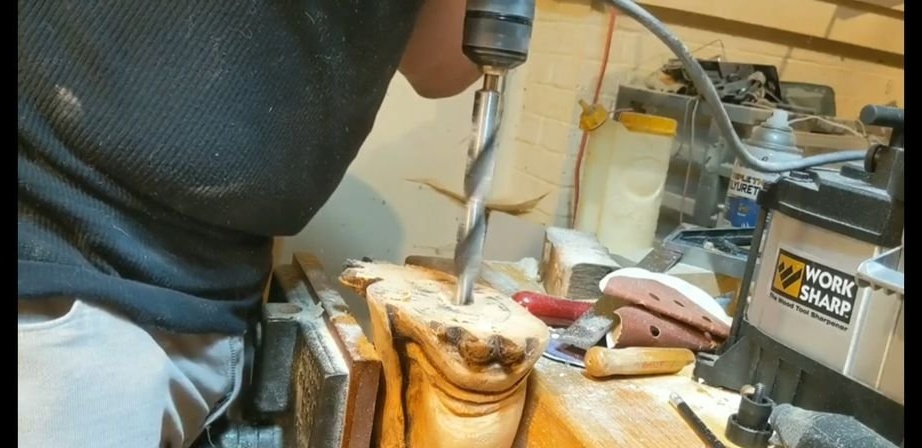
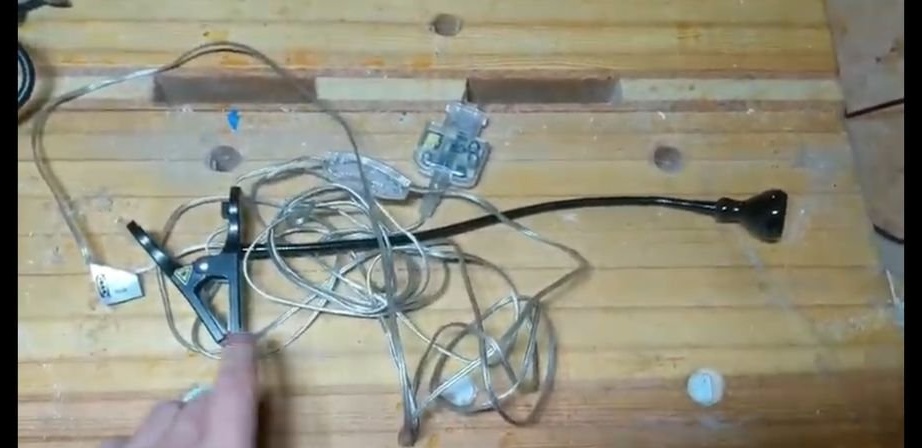
Now you need to install the LED. The master drills a through hole in his hand and a through hole from the bottom up. The second hole should have an outlet near the bottom of the arm. The master used a cheap LED lamp as a light source. The lamp was dismantled and removed by an LED with wires. He pulled the wires through his hand to the bottom of the figure. Subsequently, the holes are putty and painted over.


Step Six: The Base
The base is a walnut board. The master cuts it to size. Drills a hole and cuts a groove under the wire. Grinds and stains the base. Screws a figure to it.

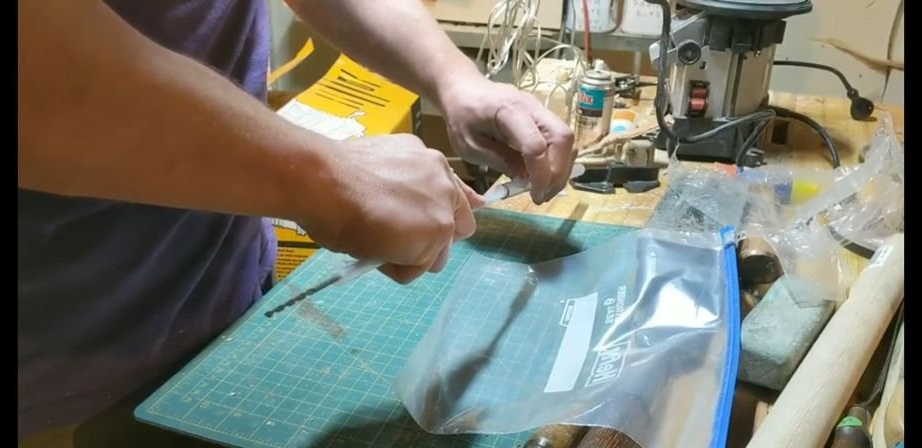
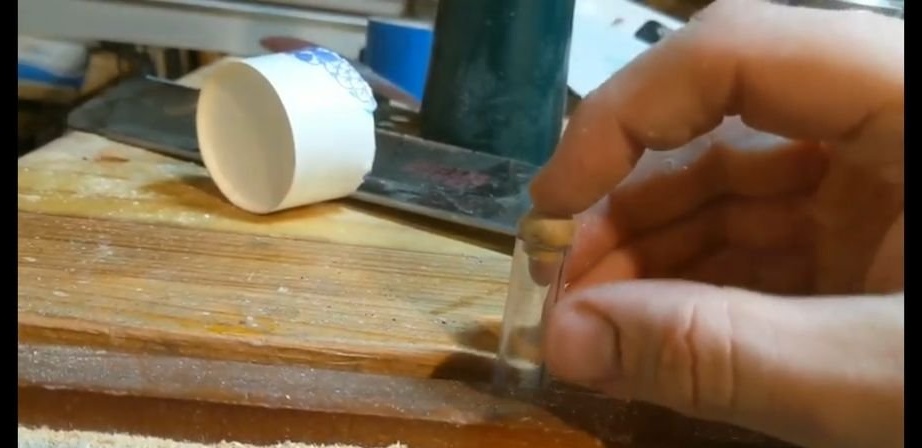
Seventh step: sword
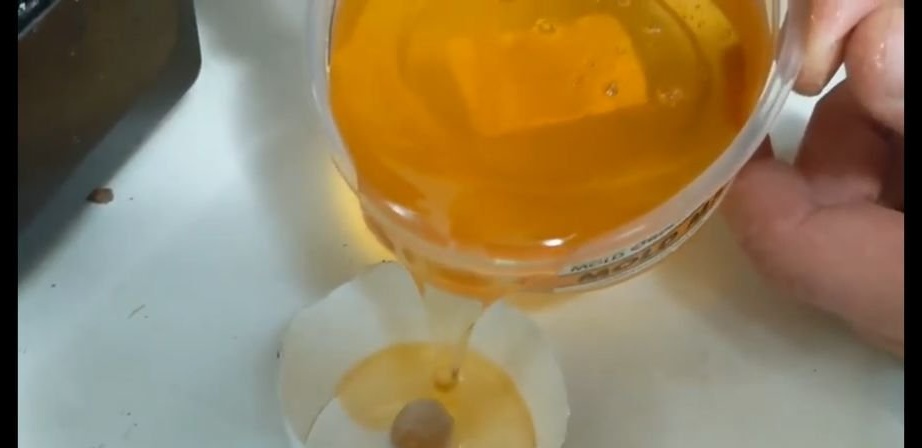
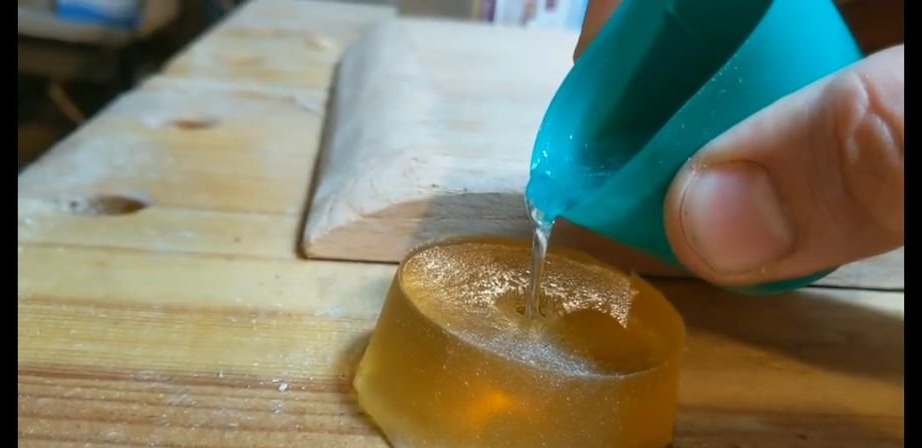
The master uses a transparent acrylic tube as a sword. Cuts it off. At the end of the tube makes a blank of wood. It mixes the epoxy resin and interferes with the plug. A container with epoxy will interfere with the microwave. Now you need to warm the epoxy to a jelly-like state. Then the wooden plug is removed and an epoxy is poured in its place. After solidification, an exact copy of the wooden plug was obtained. The master installs it on the end of the tube and sticks the tube on the hand.

The lamp "Master Yoda" is ready.
The entire process for its manufacture can be seen in the video.