Lantern assembly
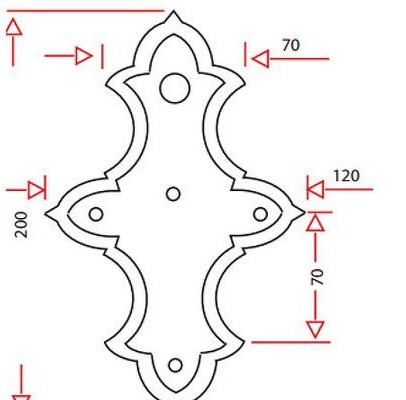
The lantern body consists of 6 openwork panels and is connected using connecting angles (see Fig. 1). The panels are made of aluminum sheets with a thickness of 0.5-0.6 mm (can also be made of brass or copper).
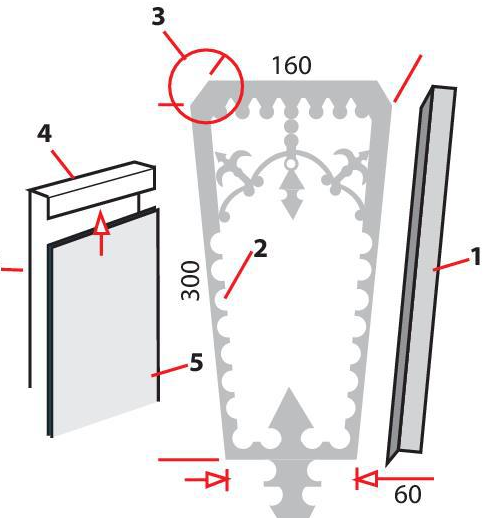
1 - Mounting bracket, 2 - Places for drilling holes, 3 - Panel, 4 - Bend, 5 - Glass
Initially, on a sheet of metal we glue a full-size paper drawing of a lantern. This will allow us to get rid of complex markup. Wavy lines that will be along the sides are made with a drill with a diameter of 10 mm (designed for drilling wood). Then remove the jumpers and start working with the main pattern. A metal blank is carefully laid on a 3 mm thick plywood sheet and then sawed with a jigsaw. This method, although it implies minimal errors, but allows you to get panels of plywood, which can subsequently be used to assemble a balcony lantern. (see photo 1).

Before starting assembly of the housing, it is necessary to bend the upper part from the finished panels. Thus, we get a lock for fastening and installing glasses. We attach the bottom to the resulting housing (see Fig. 2), in which an electric cartridge, racks and a threaded rod for mounting to the roof are built-in.
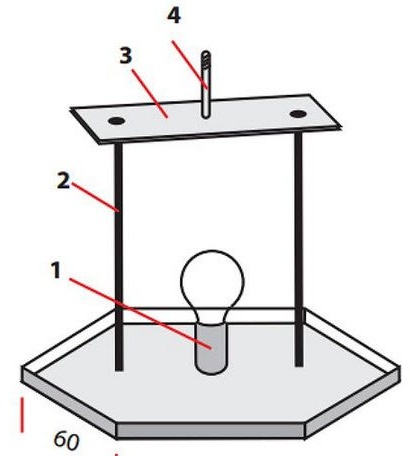
1 - Electric cartridge with a bulb, 2 - Metal racks, 3 - Fixing plate, 4 - Rod with thread
The lantern roof is assembled from six triangles (see Fig. 3).
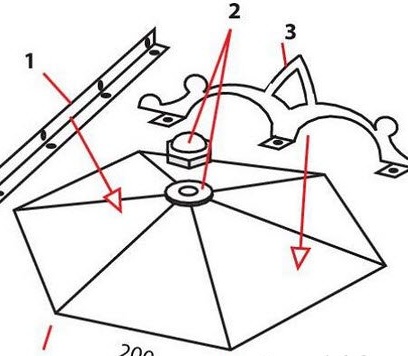
1 - Connecting corner, 2 - shaped nut with washer, 3 - roof pattern
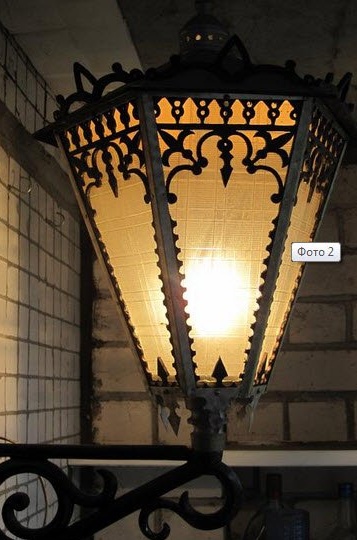
Decorative patterns are installed on the roof and then with the help of a shaped nut we fix it to the lantern (see photo 2).
Lantern installation
The easiest option is to hang the lamp on chains. If one is used, then we fix it to the middle of the roof of the lamp, if we use three, then we fix them in the corners.
Another option - using a special decorative bracket, created in the style of antiquity. For its manufacture, we need an aluminum ski pole with a diameter of 16 mm.With the help of clamps, we attach to it curved elements from steel (copper, aluminum) strips with a section of 3x20 mm (see Fig. 4), and then we connect them together with rivets.

We attach the resulting bracket to a decorative plate (see. Fig. 5). The resulting product is painted in black and silver or stylized in bronze.