
To make such a robot with your own hands will be not at all difficult and even interesting. The result is a very interesting device that will behave like a living creature. All this thanks to two small motors, they are the ones that drive the robot. By changing the angle of attack of the motor shafts, you can make the robot faster or slower. You can also experiment with various tips that can be worn on the motor shaft.
Materials and tools:
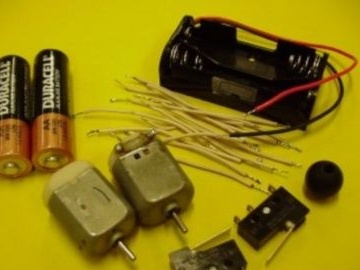
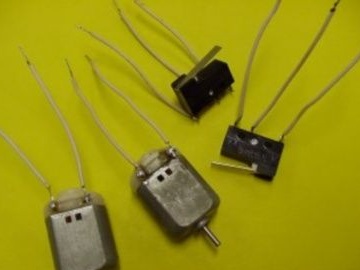
- two small motors (3 Volts, can be found in children's toys);
- holder for batteries (you can do it yourself or pull it out of the old remote control, flashlight, etc.);
- two switches of type SPDT (they can be obtained from an old computer mouse);
- two small and one large paper clip;
- a small wheel from the toy;
- thin wiring
Manufacturing process:
Step one. Soldering wiring
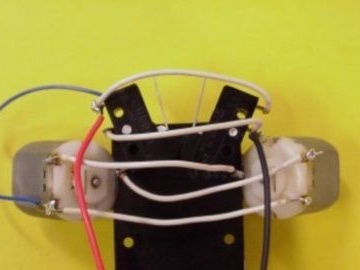
First of all, you need to prepare the wires and solder them to all electronic components, so that later it is convenient to connect the nodes. The wires must be cut to a length of 6 cm and removed from their ends by about 1 cm. Now you need to solder two wires to the motors and the switches. Also, do not forget to solder the two wires to the contacts of the battery holder. Other ends of the wires are preferably tinned.
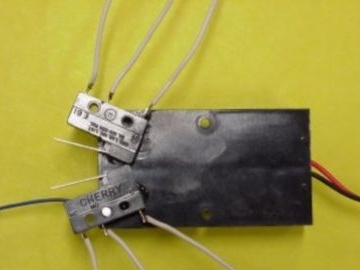
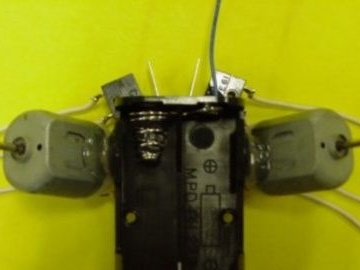
Step Two Setting switches
To set the switches, the battery holder must be turned upside down. Now you need to glue the switches with glue to the battery holder. As a result, the letter V should form.
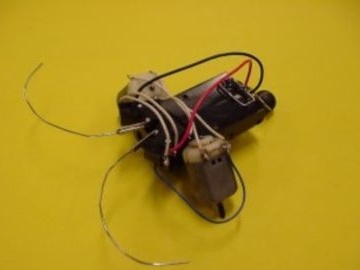
Step Three Engine installation
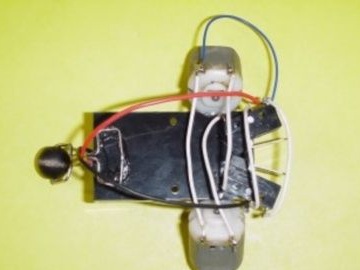
The motors must be attached to the battery holder at an angle, as indicated in the picture. The angles on both sides must be the same, otherwise robot will not work properly. The motor shafts must rest against the road. Motors can be mounted with glue.
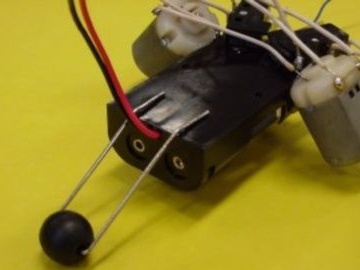
Step Four Installation of the stabilizer wheel
The stabilizer is needed in order to homemade stood flat on the road. To make a wheel, you can use a roller from a tape recorder or a wheel from a children's toy. As for the “plug”, it is made of a long paper clip or string.In conclusion, the stabilizer sticks evenly to the battery holder.
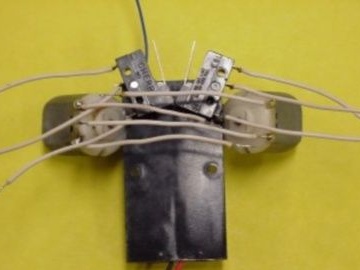
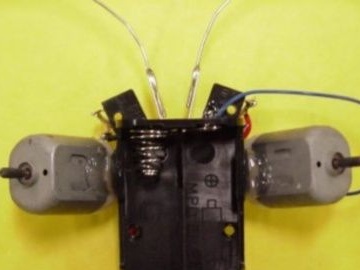
Step Five Wiring connection
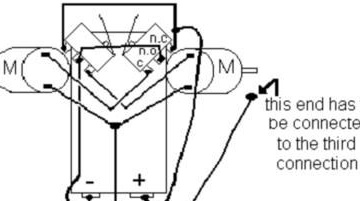
In order for the robot to work correctly, all wires must be connected clearly according to the scheme. The circuit can be seen in the picture.
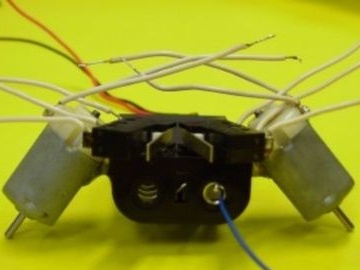
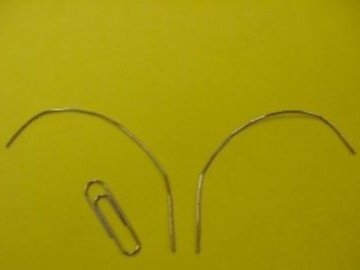
Step Six Making a mustache for the bug
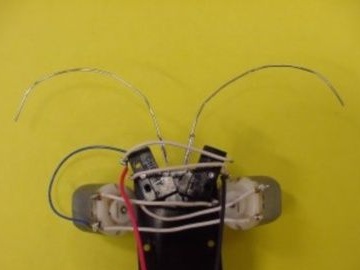
The mustache will serve as a wheel for the bug, as soon as an obstacle meets on its way, the mustache will turn on the switches, and then the motors will turn the robot in the other direction. When the switch is activated, one of the motors turns off and a kind of differential is triggered. If both switches are activated, the robot stops completely. The mustache is made of small paper clips, they must be carefully glued to the buttons of the switches.
Seventh step. Final revision and testing of the robot
At the final stage, rubber tips must be installed on the motor shafts, they are needed for better grip. They can be made from cambric.
That's all, the robot is ready. You need to run it on a smooth surface, for example, on a table or linoleum. Since the paws of the beetle are too small, it will not crawl along the carpet, for this it will be necessary to increase the tips on the motor shafts.
In the future, the robot can be upgraded at its discretion. For example, he can make LED eyes that will light up when in contact with an obstacle.