
This auxiliary tool will be useful for fixing any parts, for example, for processing parts or for tight holding when gluing several parts together.
In this project, the author decided to make several clamps at once, a kind of kit for fixing parts of various sizes. But you may not need such a number of clamps, so for simplicity, the volume of materials used will be indicated on one clamp, and if you want to make the exact same set as the author, then simply multiply the amount of materials by four.
Materials used:
- Hardwood wood 1.9 cm thick and at least 2.5 cm wide
- steel rod 12mm
- hairpin 6 mm 20 turns by 2.5 cm
- inch nuts 12mm 2 pcs.
- inch spring pins 2.38 mm, length 19 mm 2 pcs.
- 6 mm tap 20 turns by 2.5 cm for cylindrical nuts
- a drill under a tap of 5 mm.
Description of the manufacturing process of wooden clamps:
Step One: Preparing Wood Parts.

To begin with, the author decided to divide the wooden blank into two parts. The first part should be wider, clamp jaws, 25 by 19 mm in size, will be made from it. The second part of the workpiece will be square in shape with a size of 19 by 19 mm, it will be necessary to make handles for a clamp from it. Separation of the initial wooden billet, thus allowing faster and easier to cut the necessary parts.
Step Two: Cutting the grips for the clamp.

At this stage, a tape cutting machine was used.
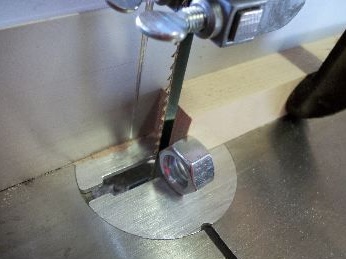
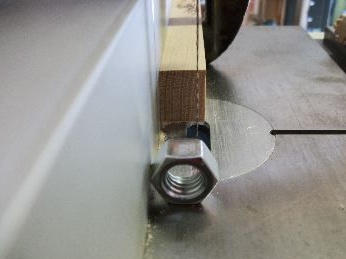
In order to cut the workpiece for pens to the desired shape, an angle of 33 degrees was set on the machine. A nut of 12 mm was used as a separator to obtain the required thickness and orientation in shape.
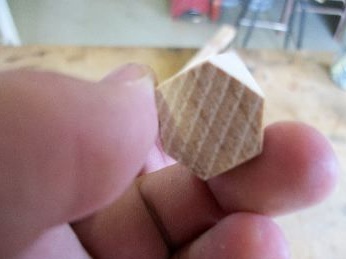
Thus, making slices with the help of a machine, turning the workpiece alternately, the author cut off layer by layer to obtain the hexagonal shape of the workpiece according to the example of the used nut.
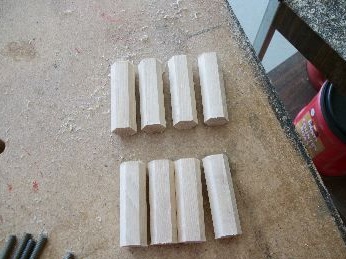
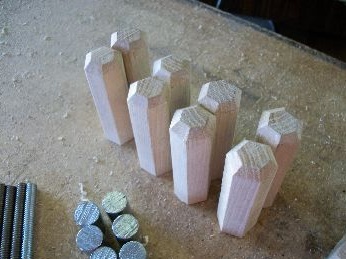
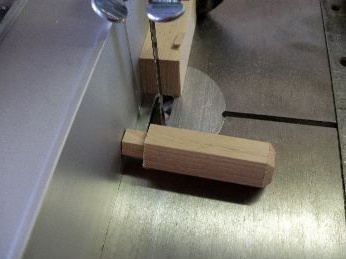
After the preparation of a hexagonal shape and optimal thickness was obtained, the machine parameters were transferred to a 90 degree cut. Further, the author of the same machine cut the required number of handles with a length of 64 mm from a hexagonal workpiece.
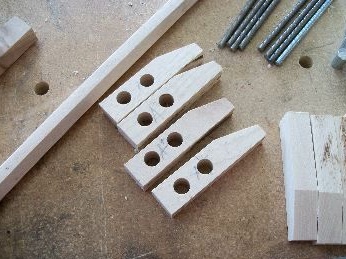
Step Three: Cutting the jaws for the clamp.


Further, the author was engaged in processing the second workpiece and cutting sponges from it for a clamp. The angle of inclination on the jaws is optional, it rather serves for greater convenience. Therefore, the amount of slope you can determine for yourself based on your preferences. The author made this part longer, after which he used it to cut an inclined angle for other parts and other workpieces. The angle of inclination of 15 degrees, he considered the most universal.
When using a joiner's corner, it is necessary to take into account the fact that the slope of the line is 50 mm to 70 mm. The corner should be installed at a distance of 12 mm or in the center in the workpiece with a width of 25.4 mm. With this approach, the author recommends that you first cut the corner, and then cut the jaws for the clamp to a length of 102 mm. These preparatory steps will allow you to reduce the chances of making any mistakes and spoil the workpiece, which means that you will save materials and your time.
After completing the cutting of blanks for clamp lips, the author divided them into two groups: he marked one group as lips A, and the second as lips B.
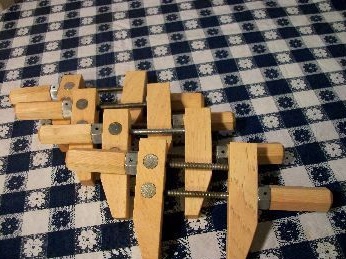
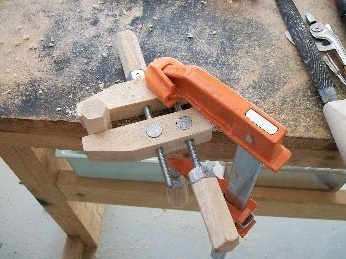
Separation into two groups is necessary, since the sponges will have different mounts. Therefore, the work of drilling holes for them will also differ, it is easier to understand the scheme of differences in fastening from photographs of an already finished clamp.
Step Four: Work on B. Sponges
To begin with, markings were made for drilling sponges from both groups. It is necessary to mark two holes with a diameter of 6 mm for the pins that will tighten the jaws. Two holes with a diameter of 6 mm should be located on the inner and upper surfaces of the jaws, passing through them. The first hole is 19 mm from the rectangular edge of the sponge and located 9.5 mm from each side. The second hole is marked at a distance of 44 mm from the rectangular (back) wall of the sponge and is also located in the center relative to other sides. After that, jaws B are laid aside.
Step Five: Completing the Sponges from Group A.

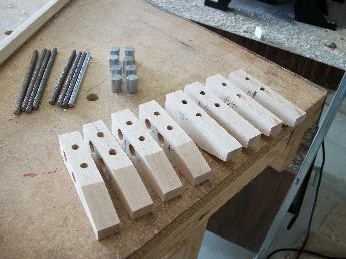
Sponge A is slightly different from sponge B. Sponge A has two additional holes for cylindrical nuts through which rods will pass to tighten the clamp jaws.
Therefore, in each jaw A, two holes with a diameter of 12 mm were drilled through one side, as shown in the picture. The first hole with a diameter of 12 mm should be located at a distance of 19 mm from the back wall of the sponge and at an equidistant distance from the upper and lower faces of the sponge. The second 12 mm hole should be located at a distance of 44 mm from the back wall and equally equidistant from the upper and lower faces. Thus, you should get a set of jaws with two holes on the center line of the outer surfaces of the jaws, as well as with two holes for pins with a diameter of 6 mm from the inside of the jaws.
Step Six: Threaded Studs
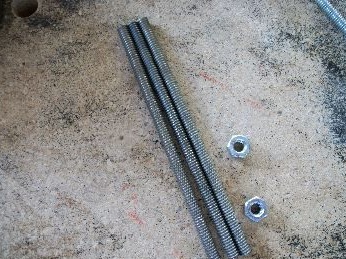

Using a hacksaw, the existing stud with a 6 mm thread was cut into blanks of the required length. There should be two studs for each clamp. One workpiece is 114 mm long, and the second is 127 mm long. Then they were put aside until the stage of manufacturing handles for clamps.
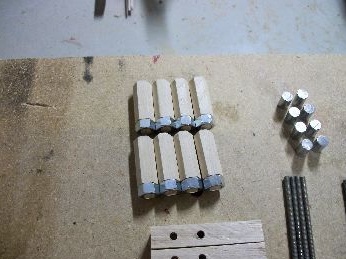
Seventh step: making cylindrical nuts.
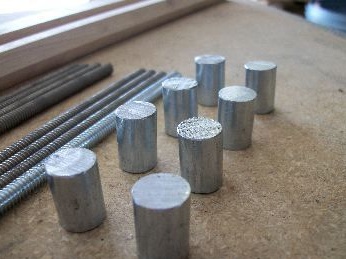
In this case, cylindrical nuts mean round steel parts with side holes drilled in them with a 6 mm threaded stud. You can probably buy such nuts or something similar, but the author decided to make them yourself.
For the manufacture of cylindrical nuts, a metal round billet with a diameter of 12 mm was required. Cylinders 19 mm long were cut from it, under the thickness of the clamp jaws. Then, holes were made in each cylinder in the center side, which, when the cylinders were placed in 12 mm holes on jaws B, should coincide with 6 mm holes on the same jaws B. Then a thread was cut into the holes of steel cylinders at an angle of 90 degrees by 20 turns with a 6 mm tap.
Step Eight: Chamfering the Clamp Handles
In order to make it easier and more convenient to hold and tighten the clamp handles, each of them will have bevels. Moreover, such a detail makes the appearance of the instrument more attractive, according to the author.
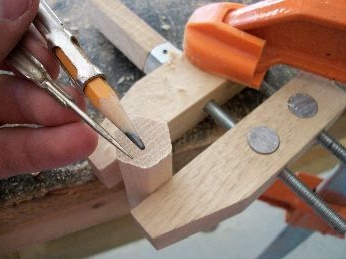
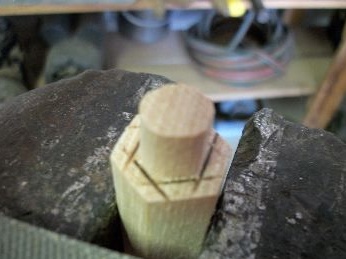
To begin with, the workpiece for the handle was fixed, in this case, in another finished clamp. After that, the author made a marking in the form of a hexagon on the outer surface of the workpiece, as well as marking was made in the form of bounding lines on the sides of the future handle at a distance of 3 mm from the outer plane of the handle, as shown in the picture.
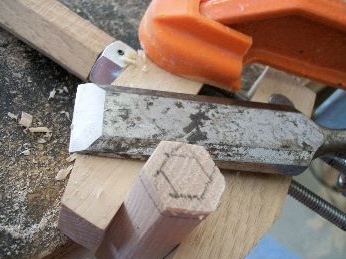
Then, with the help of a sharp cutter, the chamfers were cut and a blank of the handle with chamfers was obtained.
Step nine: create a protrusion on the clamp handles.

In order for the handles to be able to screw a 12 mm nut, the handles must be cut to a diameter slightly larger than the hole for the nuts. Thus, the thread of the nut will reliably engage with the wooden protrusion of the handle, providing a sufficiently reliable connection. It would be convenient to handle the handles on a lathe to create the desired diameter of the protrusion, but you can also do this manually.
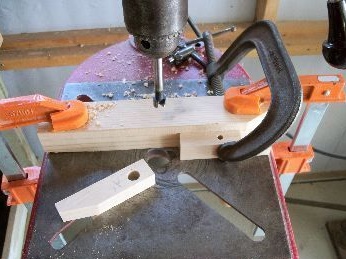
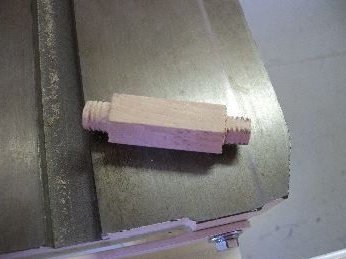
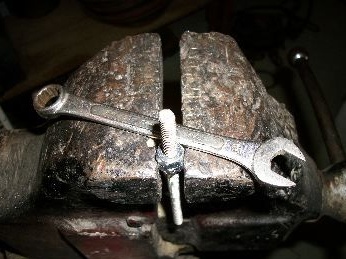
To do this, the author pressed the thrust block to the saw guard, and used a 12 mm nut as a limiter for the cutting depth, as well as to ensure the necessary distance from the guard. After that, a wooden blank was taken for each handle and all the necessary incisions were made.
Thus, we got a picture that you can see in the picture above. Having then cut off all the extra protrusions, you should get a handle with a finished protrusion under the nut.
Step ten: turning the protrusion of the handles.

In order to put 12 mm nuts on the handles, it is necessary to cut off all the corners of the protrusion and grind the protrusion to the desired diameter. It is best to practice before doing this on any failed workpiece, in order to understand to what extent it is necessary to grind the protrusion and not spoil the other workpieces.
For this, the workpiece must be rigidly fixed and sharpened to a perfect cylindrical shape. Then carefully, so as not to damage the workpiece, you need to screw the nut onto the protrusion.
Step eleven: the final step in the manufacture of pens.
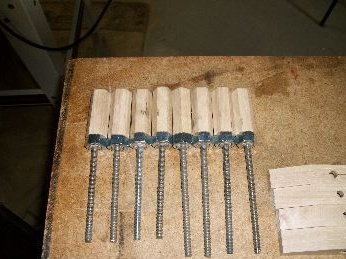
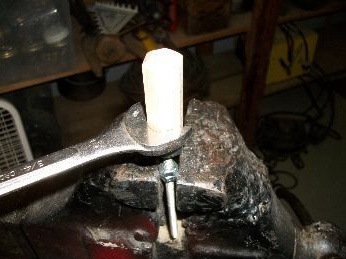
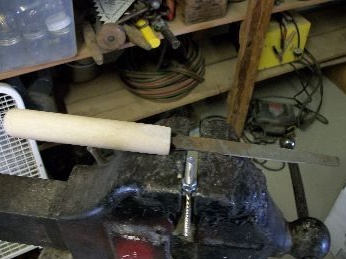
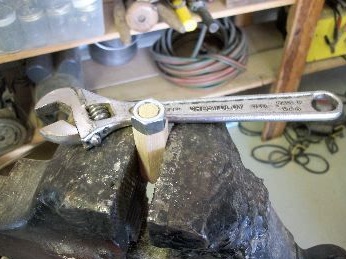
Then 6 mm nuts were screwed and tightened on a threaded stud in order to securely fasten the clamping device. With a metal file, the ends were slightly rounded so that the handle could move smoothly. It is necessary to connect everything in such a way that at least 2.5 cm of material protrudes from the clamping device, after which you need to screw the wooden handle as far as possible. To tighten to the base and align with the handle, the author used a standard wrench. The main thing is not to overtighten and smoothly release the nut until it reaches the stop. Then it needs to be aligned with the handle.
Next, the pin is inserted into the handle. To do this, a 2.38 mm hole was drilled in the center of the threaded stud nut with a pin driven into it with a hammer.
Step Twelve: Completion of Work.

At this stage, you should have already made all the basic elements of the clamp device. It remains to correctly connect all the necessary parts of the device together to obtain the finished product. It is also necessary to sand the surface to eliminate all sharp edges, and then apply the finish coating. This is the final stage of the assembly of wooden clamps.
At this stage, rubber gloves will be needed to first rub a little drying oil into the surface, and then rub the wooden surface of the clamp with wax. After that, the clamp will be ready for use and have a pleasant appearance.