
Hello to all the inhabitants of our sites, as you know, from simple things you can make original things with a little effort. In this article I will tell you how the author made an original and interesting table with a picture on the countertop from a large wooden coil.
First of all, you need to acquire materials such as:
* Large coil of wood.
* A rope or other braided rope of large thickness.
* Oil for wooden products.
* Rag and black paint.
* Transparent varnish for wood.
* Drawing tools: pencil, ruler, tape measure.
*Electric drill.
*Stationery knife.
* Electric jigsaw or other tool that can replace it.
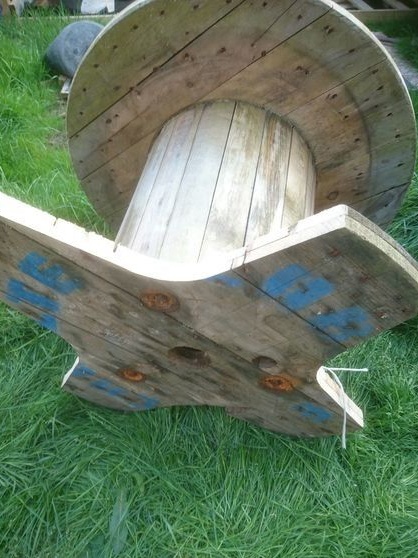
Step one. Take the coil out of the tree, turn it over on the back side and mark the places of the saw cuts so that something like a cross comes out, observe the proportionality of each of its four sides before cutting. Following the lines, saw off the excess parts of the lower base of the table.
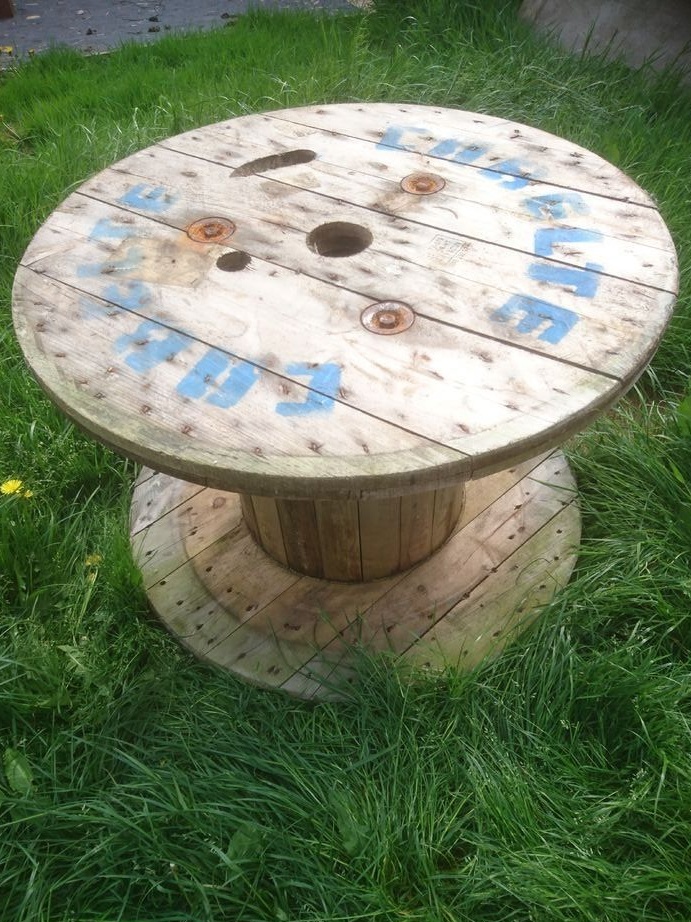
Step Two Like all wooden products, the table also requires preliminary processing, so we take larger sandpaper and grind it; we will have to work longer and more thoroughly on the countertop. For processing, first use a large grain of sandpaper, then gradually reduce its granularity, reaching a value of 240, stop grinding, the table surface will already be quite smooth with the wood texture preserved.
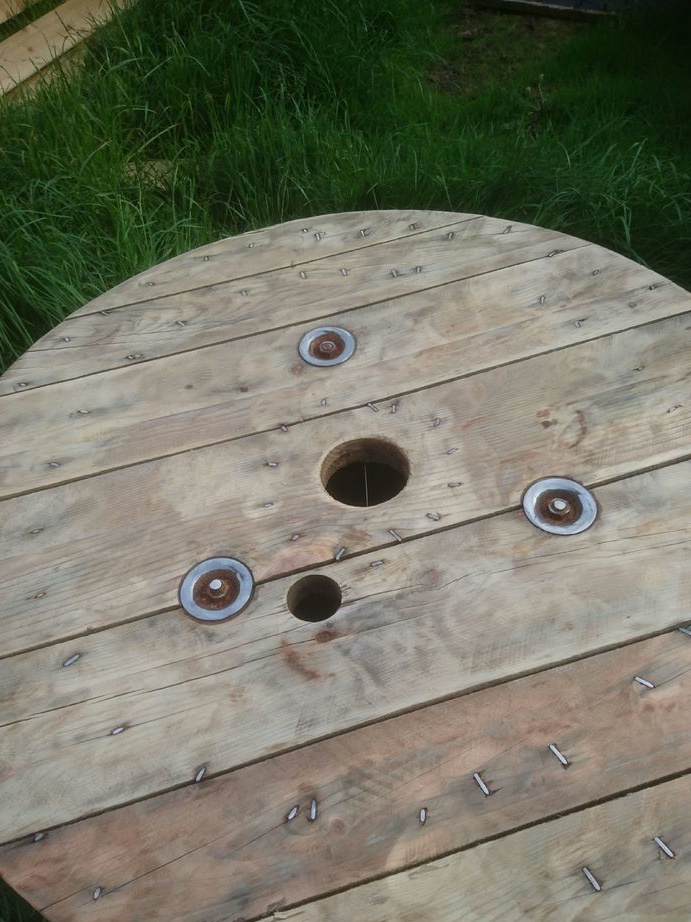
Step Three Use a dry cloth to remove dust and debris from the table. Armed with transparent oil for wood, cover it with all parts of the future table, after rubbing the oil, leave everything to completely dry the base of the table and its countertop.

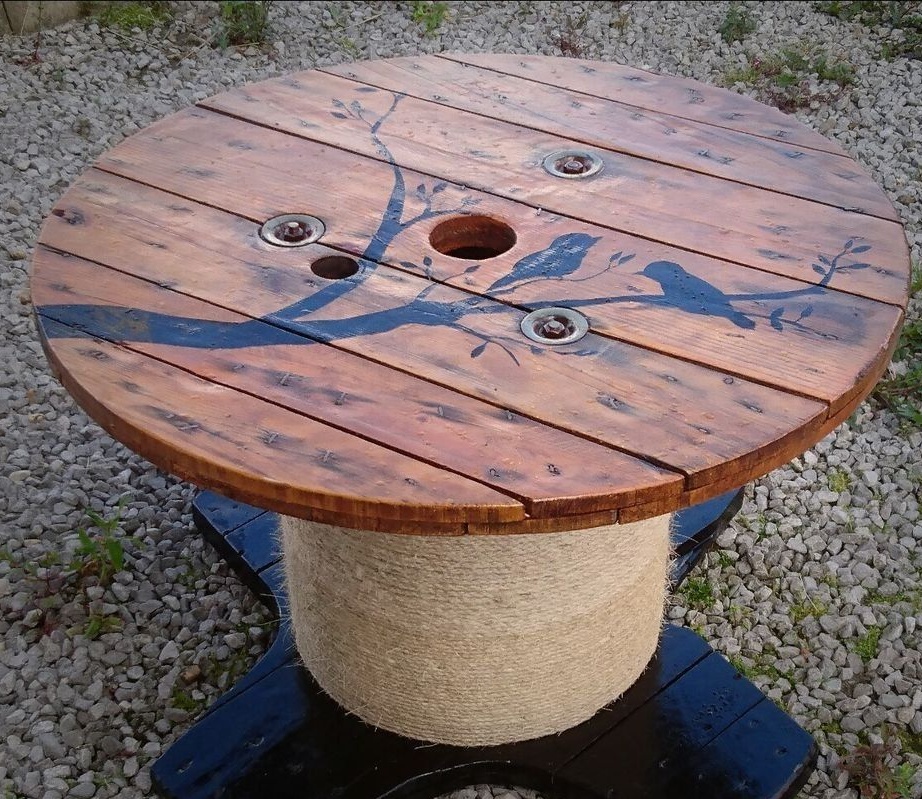
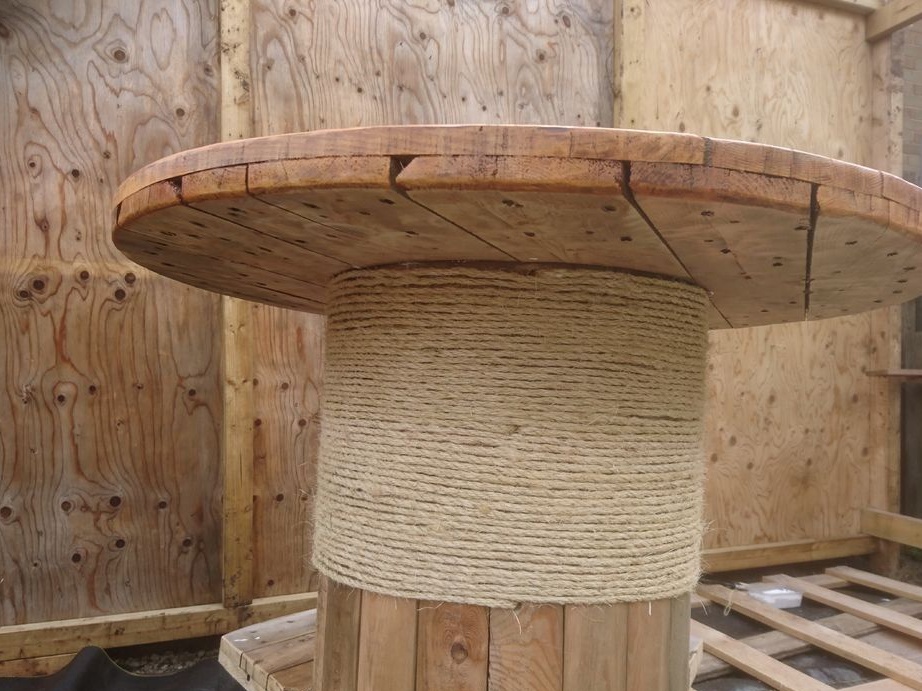
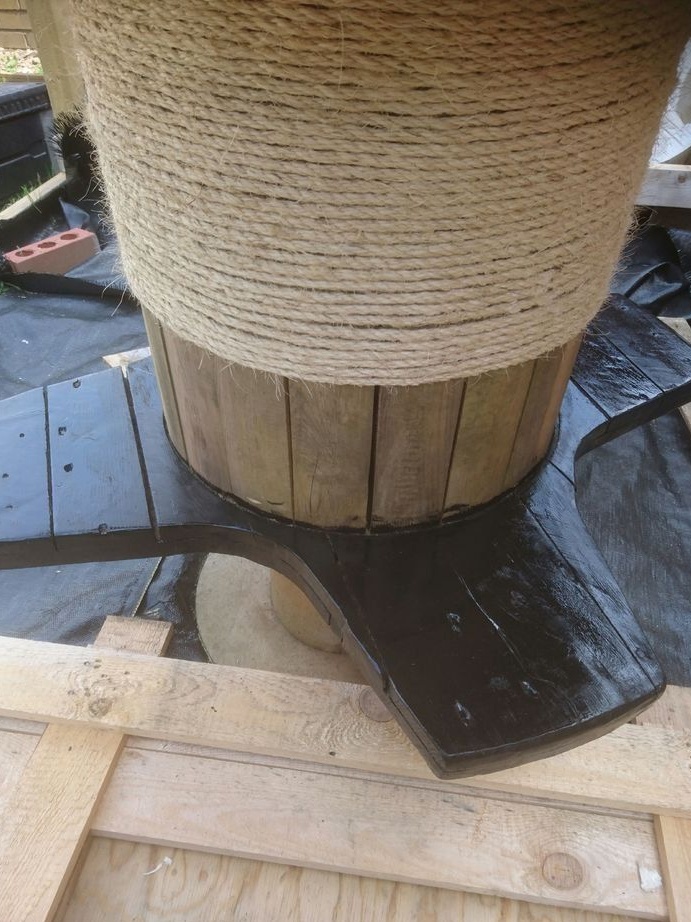
Step Four In the central leg of the coil at the beginning of the countertop, make a hole for the rope, then thread it into this hole and make a knot, and then pull it back. The entire rope must be wrapped around the rack, keeping the stretch and making a turn to the turn, fix its tip in the same way as at the beginning.
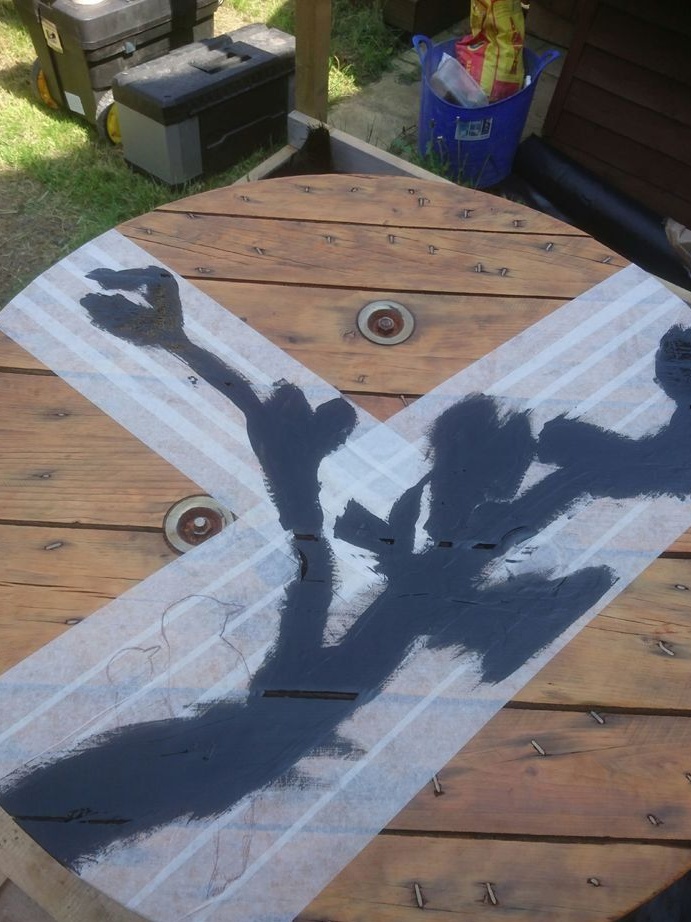
Step Five For greater beauty of the table, it is necessary to apply a drawing to its upper part, we will use the long-known stencil technology. You can make it as do it yourselfand buy in special stores. In this homemade A budget version of the stencil was adopted, namely using masking tape. With it, we make wide stripes, as in the photo.
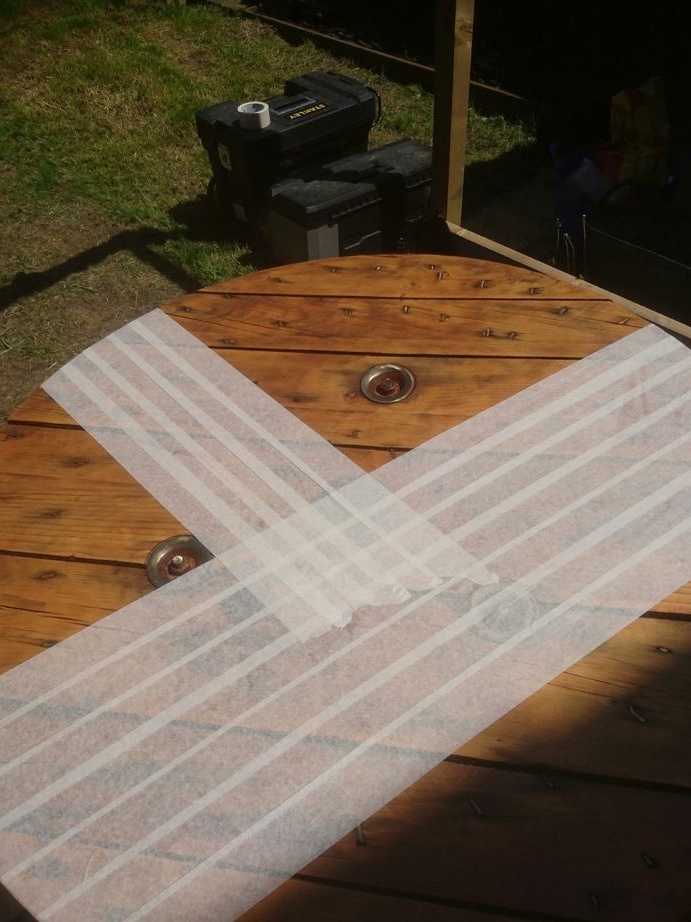
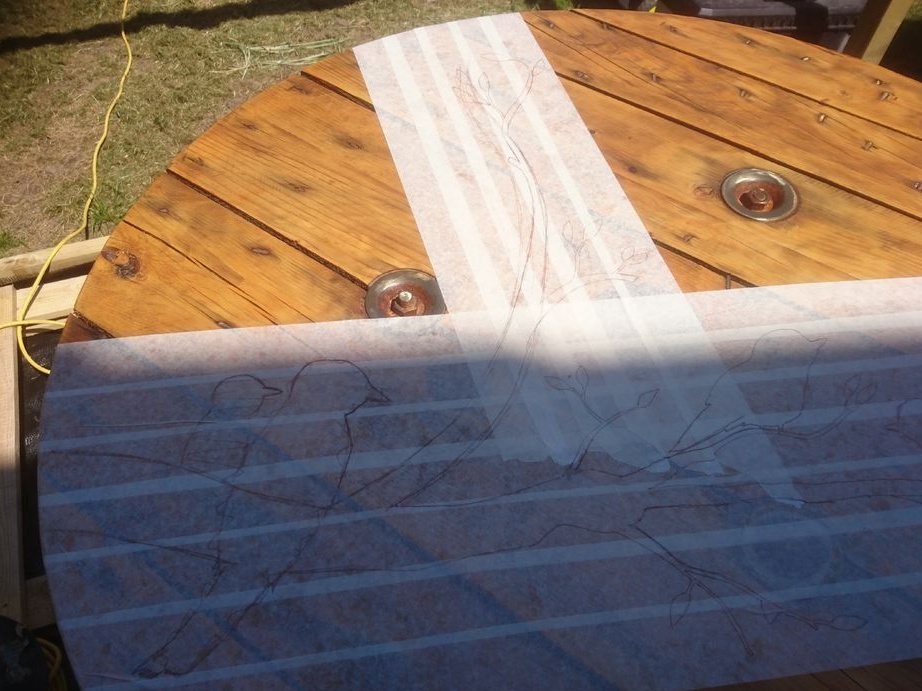
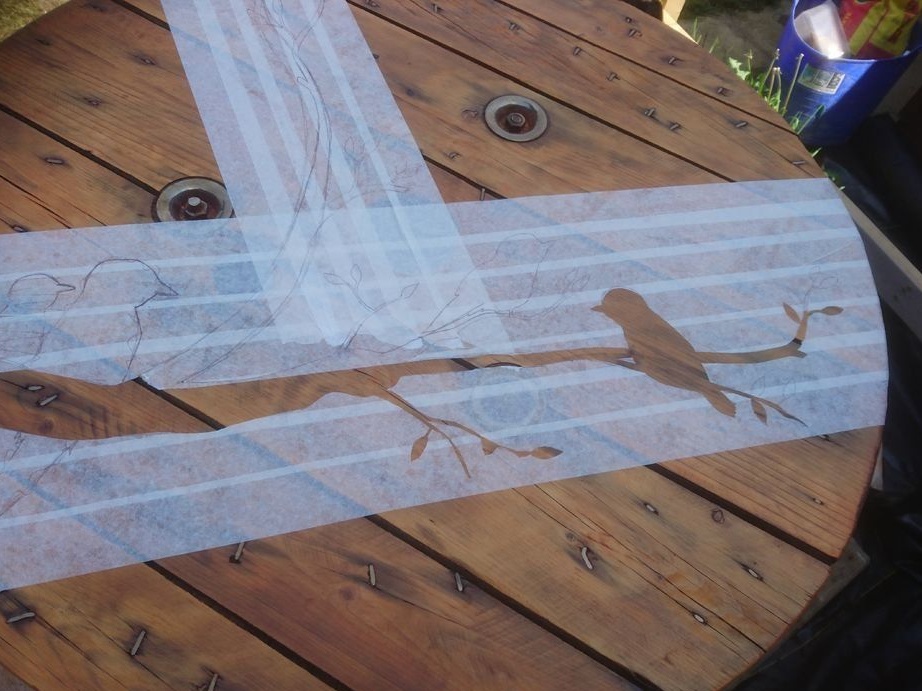
For precision cutting use a clerical knife, use it with caution and safety precautions.
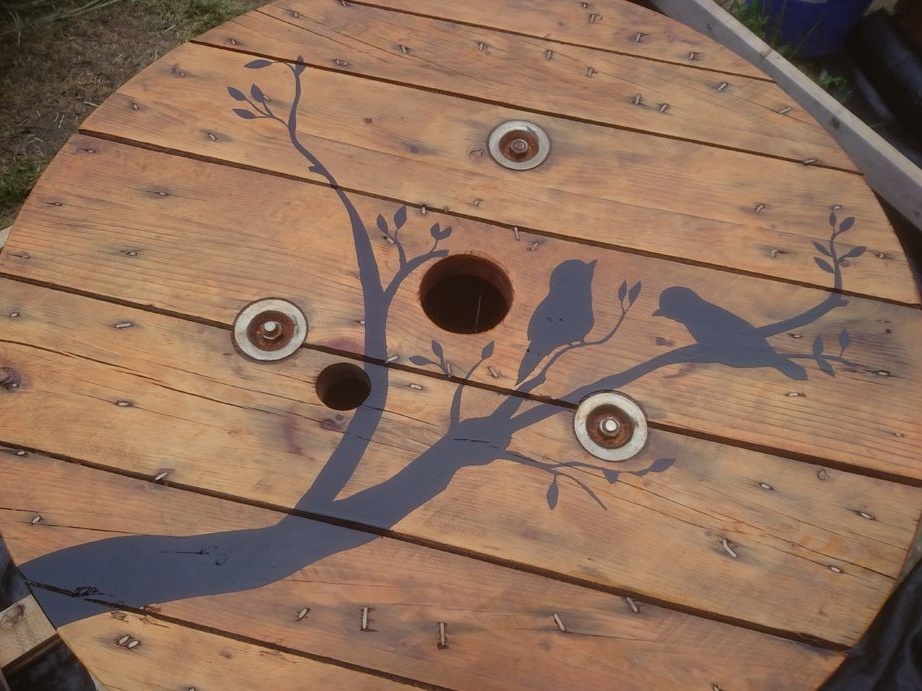
Sixth step. Having picked up black paint with a sponge, apply it to the stencil we cut, after completely drying, remove the adhesive tape.
We finish the stand with a tight-fitting rope, wrap it close to the bottom base.
In the same color as the drawing, we paint and the cross-shaped legs of the table.
At the end, coat the exposed elements of the table with varnish and allow time to dry.
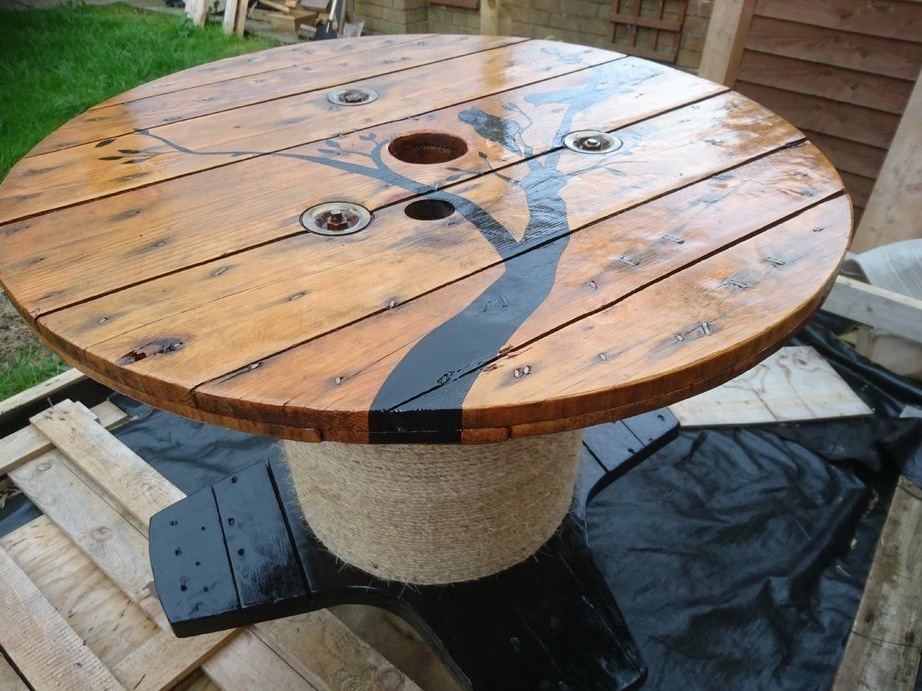
On this homemade unique table is ready, thank you all.