

Hello to all lovers homemadesome of the things done do it yourself seem unnecessary at first glance, but over time you realize that without it fixtures it was much more complicated, maybe not much, but its presence made life a little easier. Specifically, setting this goal, the author decided to make a homemade key keeper from improvised materials, where it will be convenient to hang up keys so as not to look for them throughout the apartment, well, and she will easily fit into your room interior. It did not take a long time to look for materials for assembly, and every master who is fond of woodwork can find them at home.
For the manufacture of a key holder, materials such as:
* A few parquet blocks.
* Primer.
* Spray of black paint.
* Self-tapping screws.
* Hooks purchased at the store.
* PVA glue for wood.
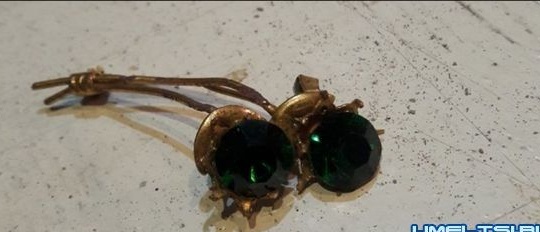
* Large decorative rhinestones, the role of which will be an imitation of the eyes.
You will also need tools:
* Electric fretsaw.
* Screwdriver.
All the necessary materials and tools are ready, you can start assembling, disassembling each item.
Step one.
And we will start the homemade work by taking three parquet bars and gluing them together, for this we still need to press them so that the surfaces to be glued are smooth and do not warp, and PVA glue dries in this way faster. After the time, which is usually indicated by the adhesive manufacturer, you can proceed to the next step, usually this time is 24 hours.
Step Two
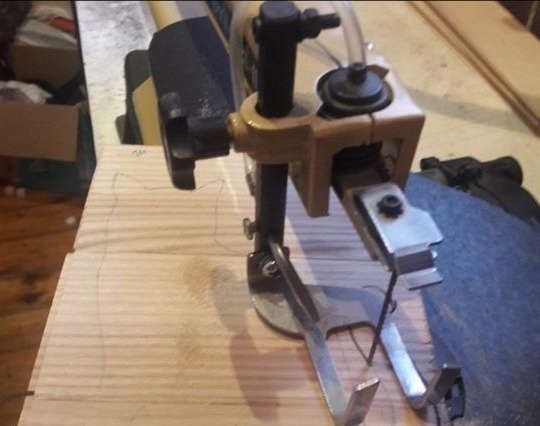
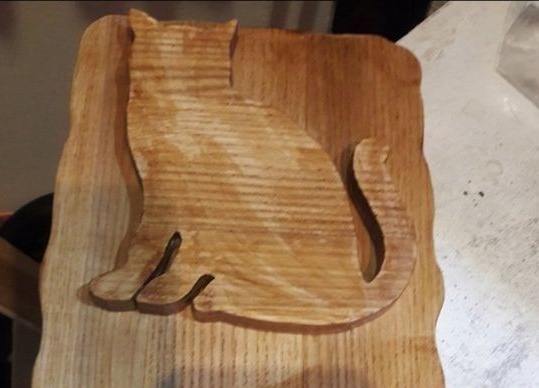
At this step, we need a sheet of paper and a pencil, you can also use a pen, in general, draw a cat on the sheet, after which we transfer the cut out template to the glued shield, which we assembled in the previous step from three parquet floors. We circle the outline of the template and cut out the part we need on it, using a stationary electric jigsaw, when working with a power tool, be careful and wear safety glasses in order to protect your eyes from any dust. On the same tool, we cut the base of the key holder in size. The tree needs to be properly sanded with sandpaper, we do this with both blanks.
Step Three
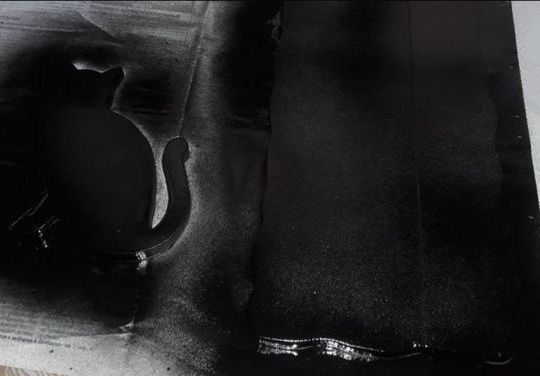
Before painting our workpieces, it is necessary to apply a primer layer, for this it is better to use a spray gun. At the end of the time of complete drying of the primer, you can go further.

Step Four
And now you can apply black paint from the spray can, do it with smooth movements, avoiding smudges of paint. After which we wait until the paint dries, this paint dries quite quickly.
Step Five
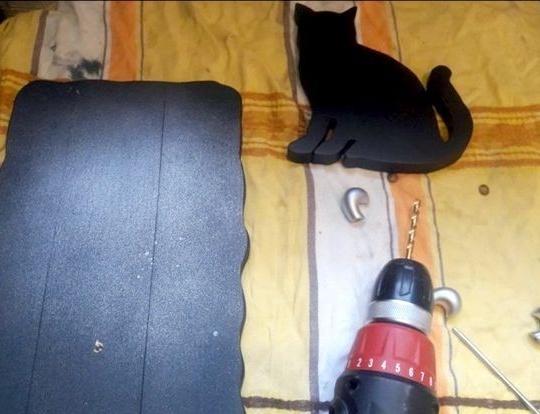
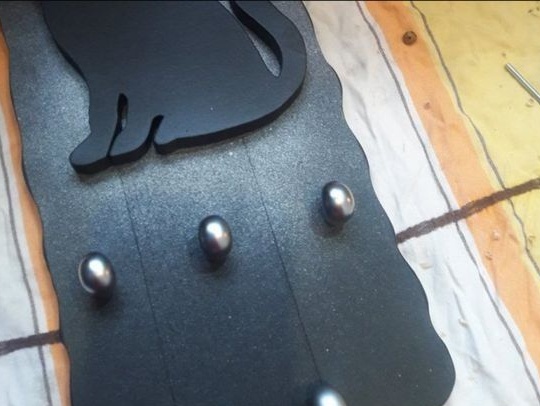
So it's time to put everything together. To do this, drill holes for screws. Armed with a screwdriver and screws, we fasten the silhouette of a cat to the base, and also do not forget about the hooks.
Step Six
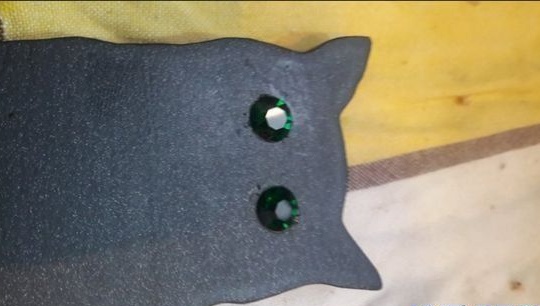
In the end, you need to glue large decorative rhinestones to the cat, which will be her eyes, which is very very similar.
On this, the wooden housekeeper is ready with her own hands, thank you all for reading this article, and also a special thank you to the author.