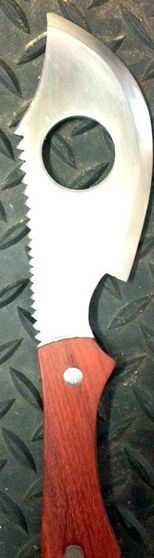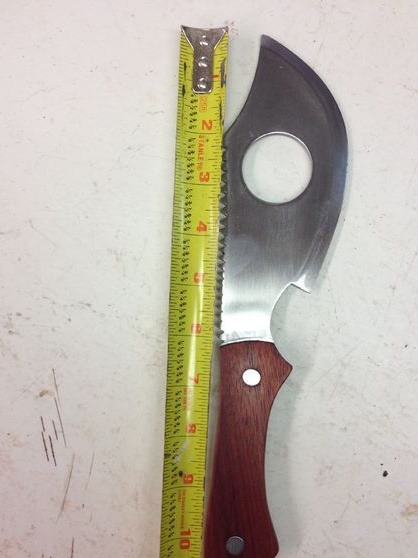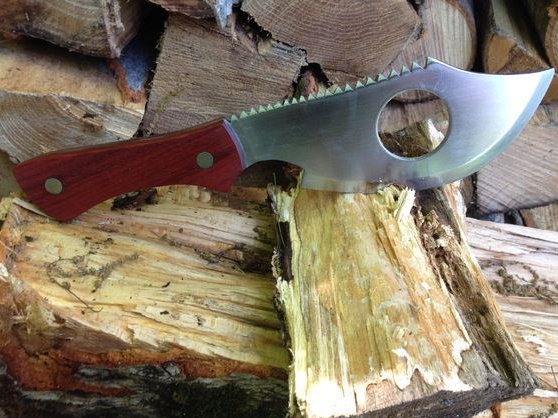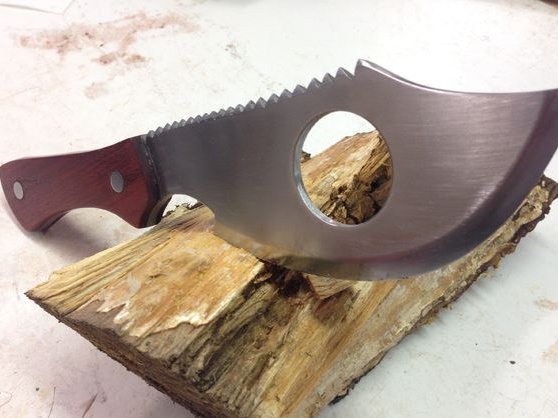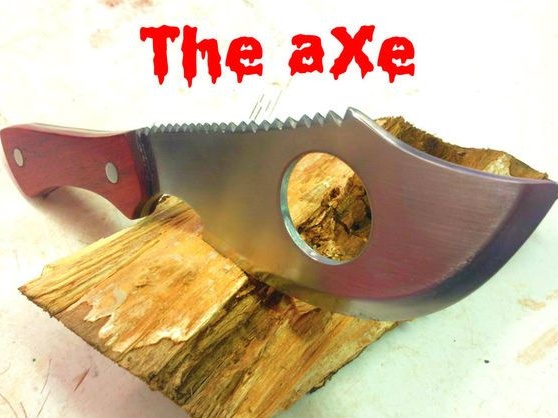
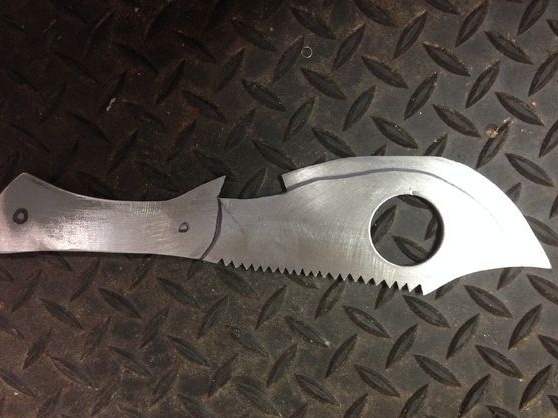
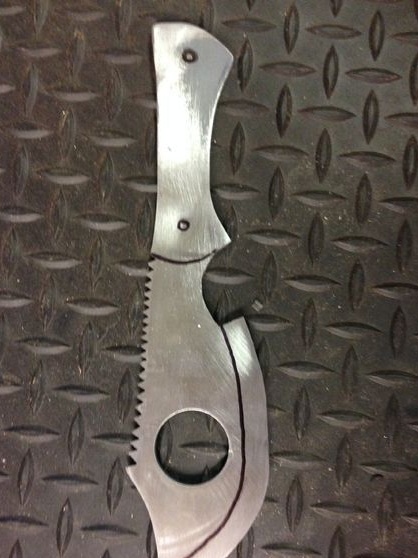
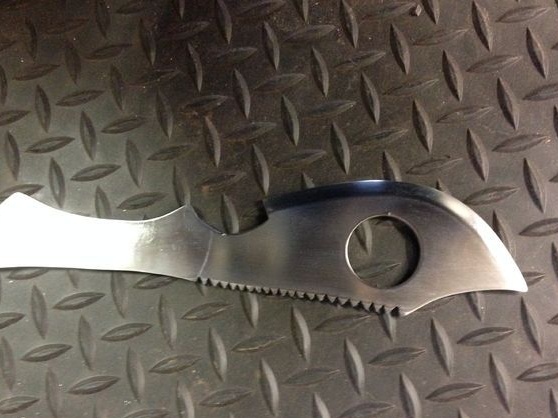
You will just need such a knife if you are a hunter, fisherman or travel enthusiast. With it, you can not only cut something, but also chop, for example, firewood, bones when cutting loot, and much more. There are teeth in the upper part of the knife, this will even cut something with a knife, if necessary, or pick it up.
To make such a knife will be able to work with metal lovers. However, a novice lover of these homemade it will not be difficult to do, since you don’t even have to forge anything here. Everything is cut out of sheet metal.
Materials and tools for homemade:
- a piece of steel that can be hardened (some use lawn mower knives, files, etc.);
- wood for the manufacture of pens (here you can choose to your taste);
- material for pins (brass, copper and other soft non-ferrous metals);
- varnish for metal;
- a saw for cutting metal (grinder, band saw, table saw or other suitable);
- sandpaper (large and small);
- Grinder;
- dremel;
- drill;
- epoxy adhesive;
- a bit with bits and more.

The process of making a knife:
Step one. Design and cutting
If you have design skills, you can make a knife project do it yourself, in which case it will become 100% unique. Or you can find and slightly change a finished project, of which there are many on the Internet.
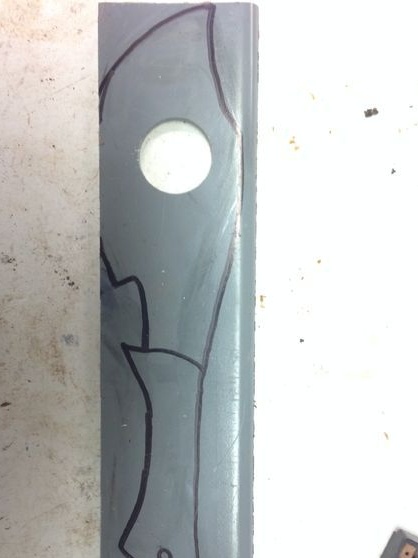
Then the project, drawn on paper, needs to be transferred to steel. To do this, you need to cut it with scissors, and transfer the manufactured template to steel. Someone circles a template with a sharp object, leaving a scratch on the steel. And someone uses markers, here is at their discretion.
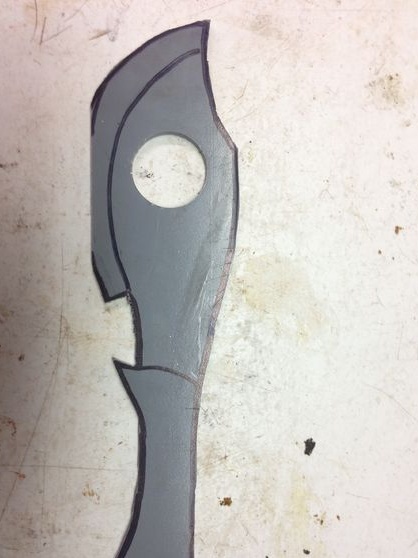
Further, when the main profile is cut, you will need a grinder, she needs to properly process the workpiece. The author also cuts teeth in the upper part of the knife, in appearance they should look like shark teeth. This gives the knife a special style, and gives it some additional functions.
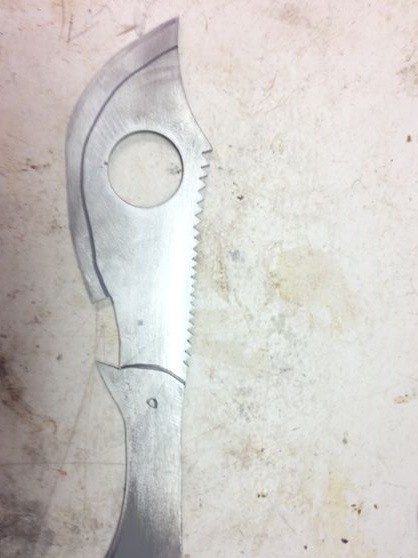
Step Two Blade forming and knife sharpening
In general, for such operations it is best to get a belt sander. At this stage, the author sets the profile of the cutting edge, and also grinds the blade. In his opinion, the blade should not be made too thin, otherwise the metal may lead and the knife itself will skew.
The blade is also polished at this stage, 60-6000 grit is used.

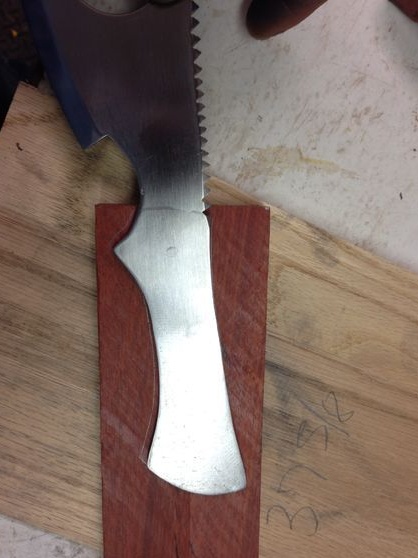
Step Three We make and assemble the knife handle
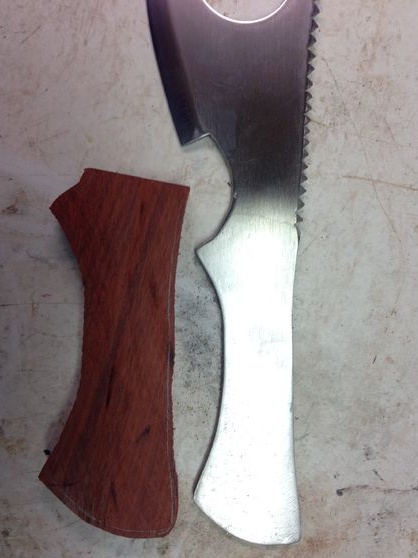
The handle of the knife is very simple. You need to take the blade, put on the selected piece of wood and circle the place where the handle should be.Well, then you just need to cut two identical halves. In size, they should be a couple of millimeters larger than the knife, since in the future the handle will also be ground and will repeat the shape of the metal.
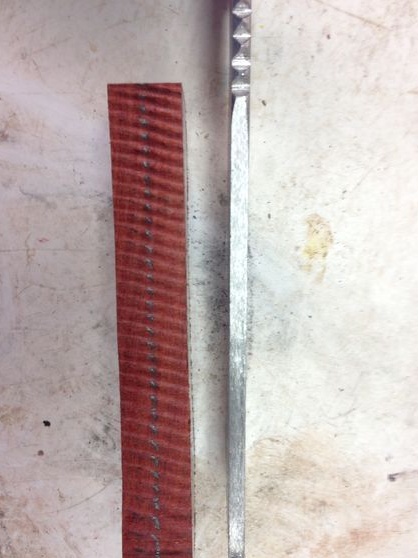
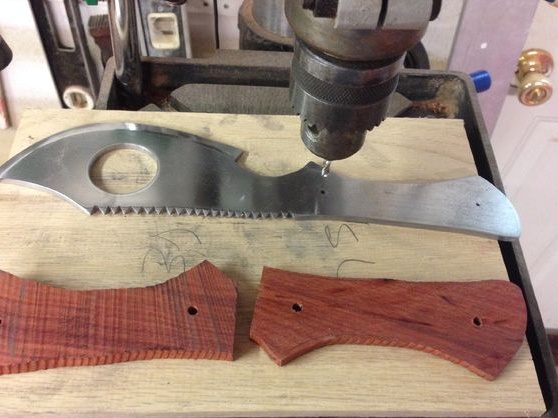
After making the halves in them and steel, you need to drill at least two holes. Drilling a larger number of holes can be for beauty, and reliability. It’s best to put all the parts together and then drill through them in one fell swoop.
further details can be fastened with the help of pins. It is best to use various beautiful non-ferrous metals. For example, copper, brass, bronze and others. So the handle of the knife after grinding will look more beautiful.
The pins must be carefully driven into the drilled holes on the anvil without damaging the handle. In length, they should be such that they protrude slightly on both sides of the handle.
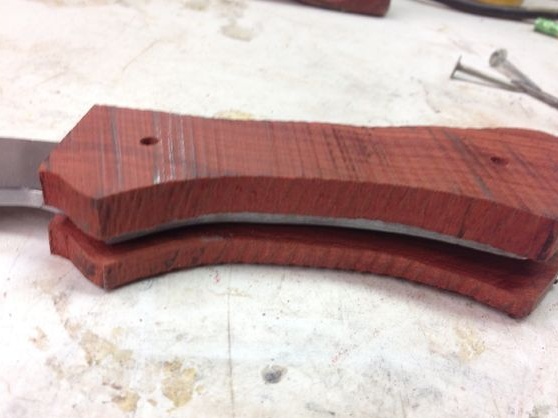
Well, then you need a good glue, in our case it is epoxy. The resin must be thoroughly mixed with the hardener and applied to both halves. Then the handle is compressed and remains in this position for 24 hours, during which time the glue dries. Excess glue that comes out when squeezing the handle must be removed immediately and try not to cover the blade.
Step Four The final stage. Grinding
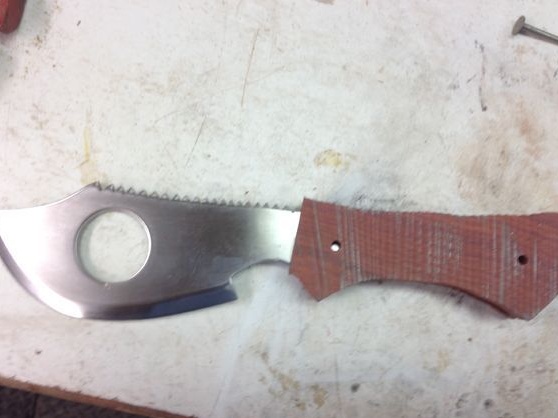
Immediately after the epoxy glue hardens, the handle can be sanded. It is most convenient to work with a belt grinder. It is necessary to smooth out all the sharp edges of the handle, protruding drops of dried glue, and so on. As a result, the tree should repeat the shape of the metal. If scratches are formed on the blade during operation, they must be removed immediately. In conclusion, the author covers the knife with varnish for steel. That's all, now he is ready for testing.