Modern fashion on furniture provides a unique opportunity to use simple and understandable designs in your interior. This combination of traditional styles and rustic motifs allows us to do something for ourselves. Yes, making furniture in home conditions has long been transformed from a sacrament into a common practice.
Such home-made wooden furniture is thoughtful design and functionality. It is beautiful and versatile, and it does not require rich experience in the woodworking industry. Everything you need can be found in the nearest building supermarket, and the Internet will provide free plans and workshops, like this on how, for example, to make a wooden bench do it yourself.
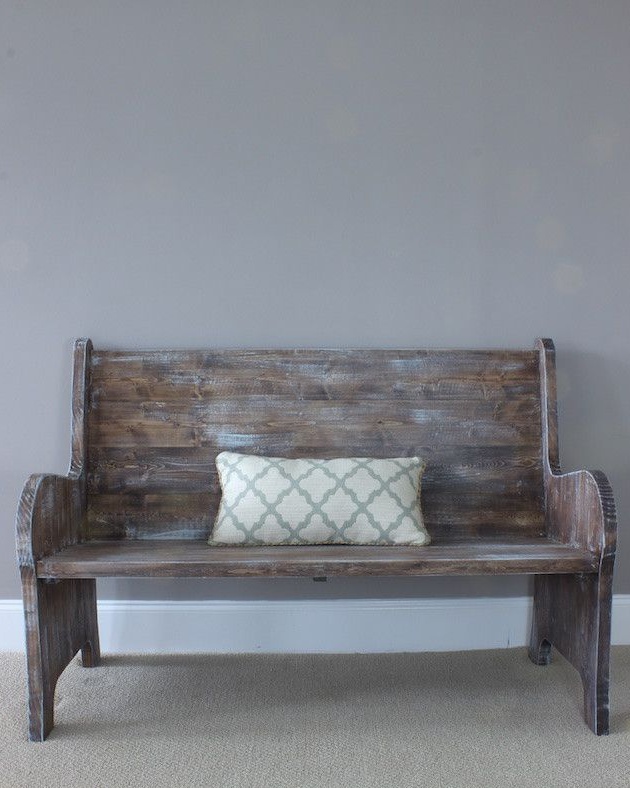
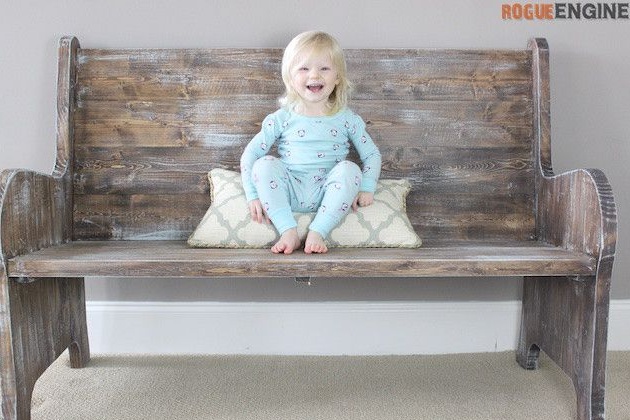
Please note that this project is primarily intended for operation within the home. He will replace the couch in the kitchen or hallway. The bench will also serve as a magnificent base for a homemade sofa with textile upper. Read about how to turn a bench into a sofa.
But in general, in order to make this universal wooden bench for your home you will need:
Materials:
- pine boards with a thickness of at least 25 mm, and preferably thicker;
- wooden slats for the manufacture of some parts of the frame with a thickness of 20 mm of arbitrary width;
- furniture screws or wood screws;
- decorative toner oil or stain based on alcohol;
- suitable type of varnish for woodwork;
- paint for artistic aging of the paintwork.
Instruments:
- jigsaw;
- circular or miter saw;
- an orbital or tape type grinder;
- electric drill;
- screwdriver;
- pneumatic nail gun or joiner's hammer;
- sandpaper;
- paint brushes and soft, lint-free fabric for tinting wood;
- building tape measure and square;
- a pencil;
- A suitable rounded object for drawing smooth lines of curly details of the shop.
Step one: determine the overall dimensions lavki
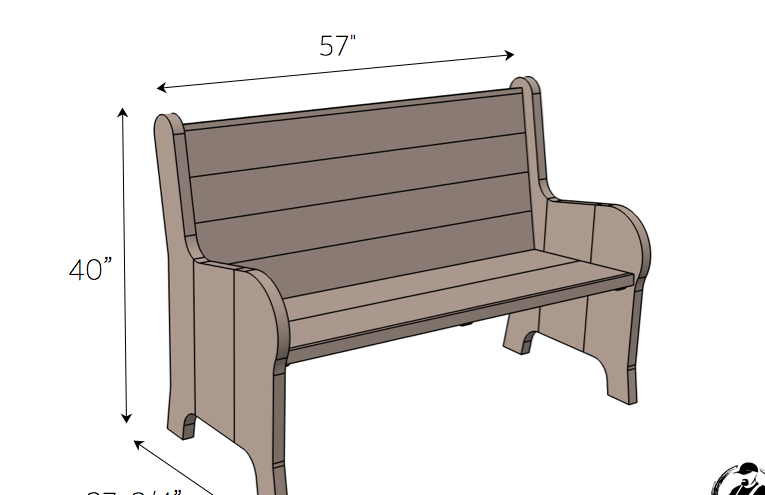
The author has provided enough photos and computer circuits, but the dimensions are traditionally indicated in inches. Use only the overall dimensions of this plan to avoid errors when converting inches to centimeters.
The width of the workshop from the master class is almost 700 mm. Whereas its height is within 1000 mm. The length of the bench is 1430 mm.If desired, any of the parameters can be reduced or increased, taking into account the size and decor of your living space.
Keep in mind that if you want to equip the bench with a soft back and a seat, part of the area of this seat will not be functional. Therefore, calculate the width in reserve.
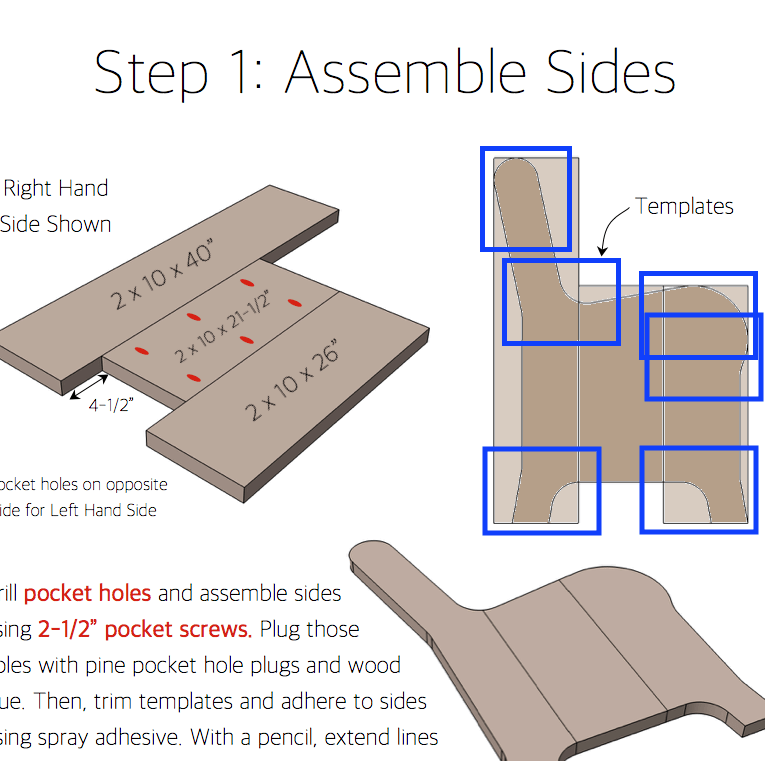
Step two: mark and make curly side walls of the bench
The bench is completely made of wood. Including considerable in size square sides. They are composite and made of ordinary planed boards.
Be sure to pick up the boards, processed properly. Similar processing is carried out on a surface planer. All boards are curved on both sides and automatically adjusted to a specific thickness set in advance by the machine operator. Working with such material in the manufacture of furniture is not only easy, but also necessary.
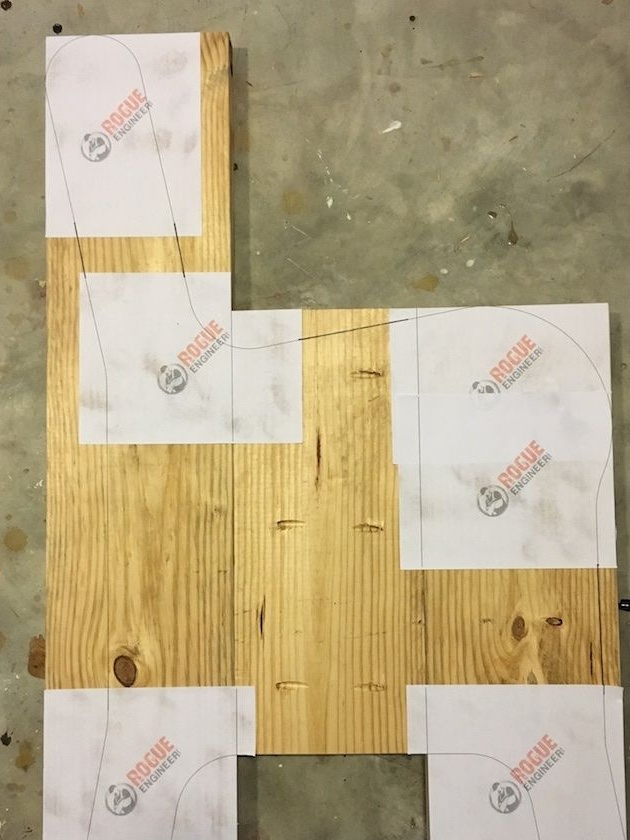
To make the side of the bench, saw off three sections of the board of different lengths - as shown in the diagram below. Arrange them properly and mark the places where the parts join together.
It is worth saying that the design of the bench was assembled by the author using pocket connections. They are holes drilled at an angle into which a furniture screw or screw is screwed, connecting one part to another. Such joints are supplemented with glue to provide strength to the product.
Drill pocket holes, apply a little glue evenly on the edges of the sidewall blanks and connect them with screws. Make sure that the sidewall is perfectly flat, because if the edges are uneven, it can give a curvature.
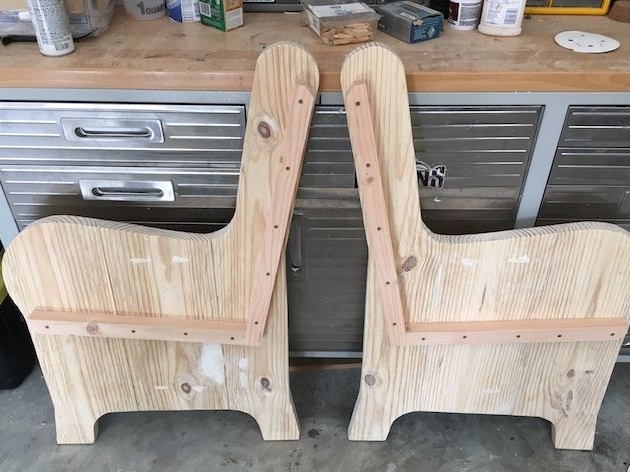
Assemble the second side part in the likeness of the first. Treat the surface and edges with a grinder, thus preparing it for painting.
Step Three: Place the base under the back and seat
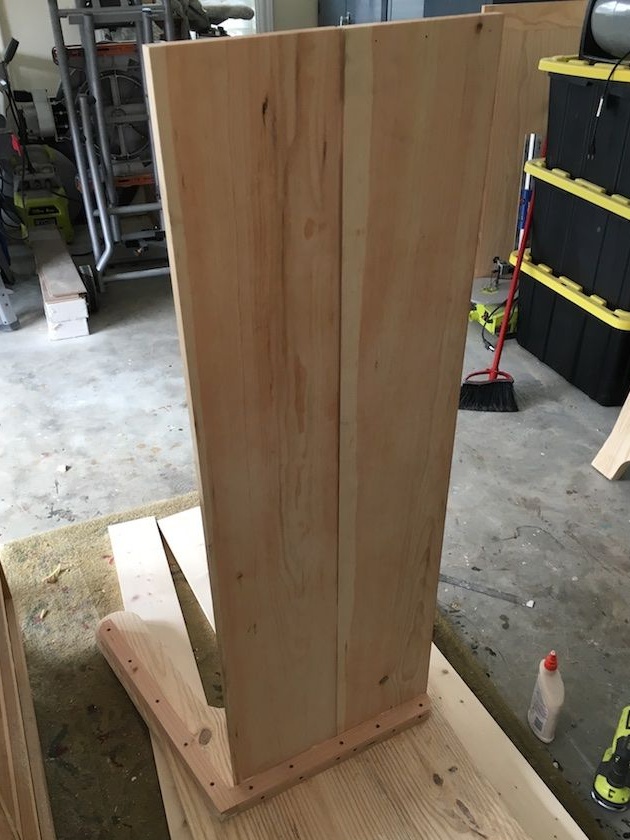
The seats and back of the bench are attached to the rails of the base, and those, in turn, are bolted to the back of the sidewall. Therefore, take the necessary measurements, mark and saw off the rails of the length you need. fasten them on the sidewalls as shown in the photo. Use small self-tapping screws for this.
Keep in mind that the backrest is at an angle to make it more comfortable to sit. You can also give the seat a slight bias back, if that seems more convenient to you.
Be sure to drill holes before tightening the screws. Otherwise, the racks may split, and they will have to be replaced.

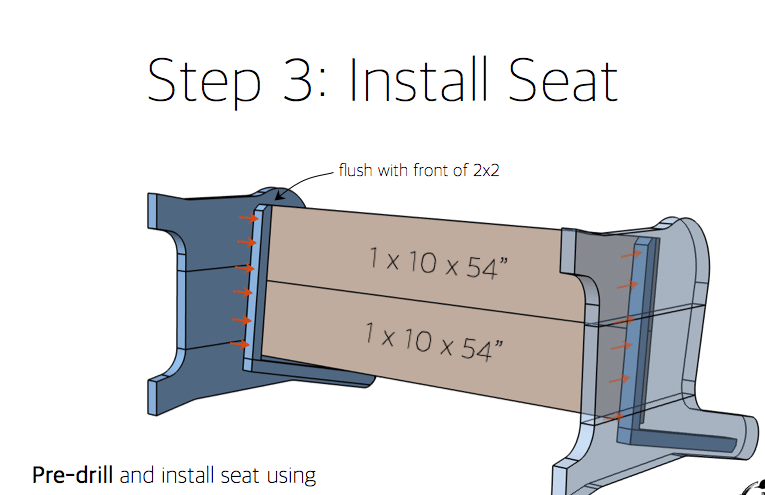
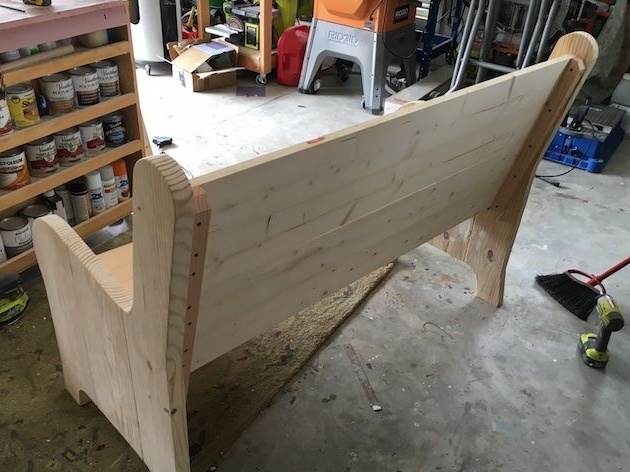
Fourth step: secure the seat and back of the bench
Using glue and screws, secure the seat to the rails. Choose screws of suitable length for this. So that the sharp ends do not come out from the front. Be sure to remove excess glue and sand it when the surface dries.
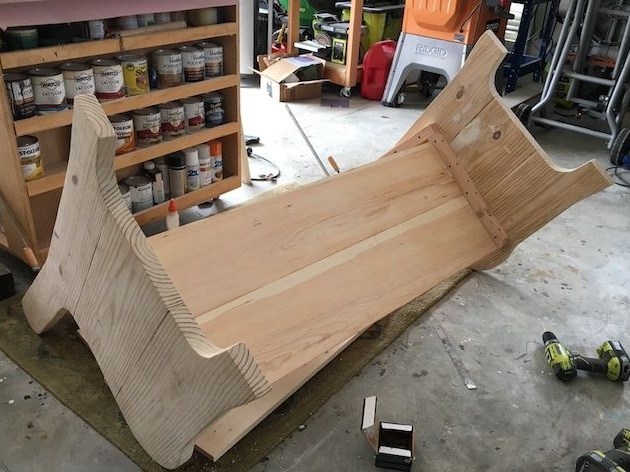
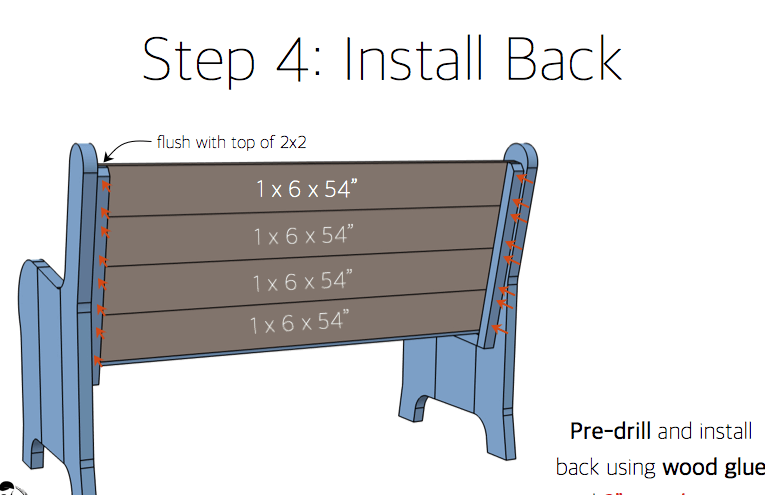
Fix on the back side the second sidewall and pass to a back. Set the bench in its natural position, prepare the blanks and screw them with a screwdriver on the back side. It is better not to leave cracks. Through them, dust can fall on textiles and accumulate there.
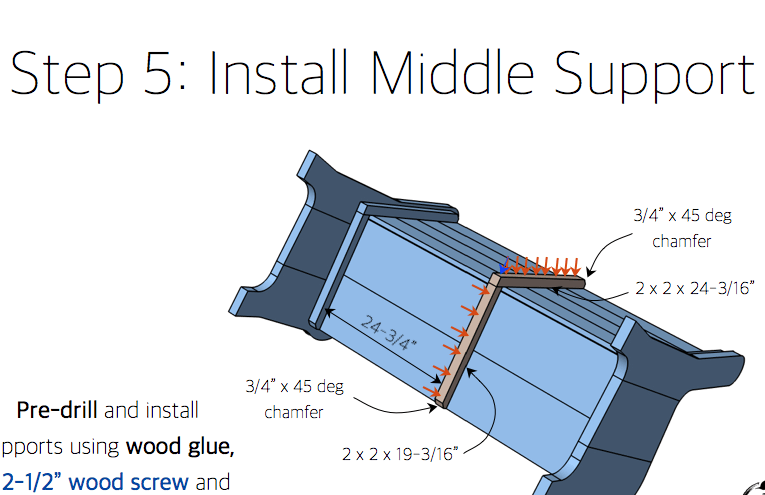
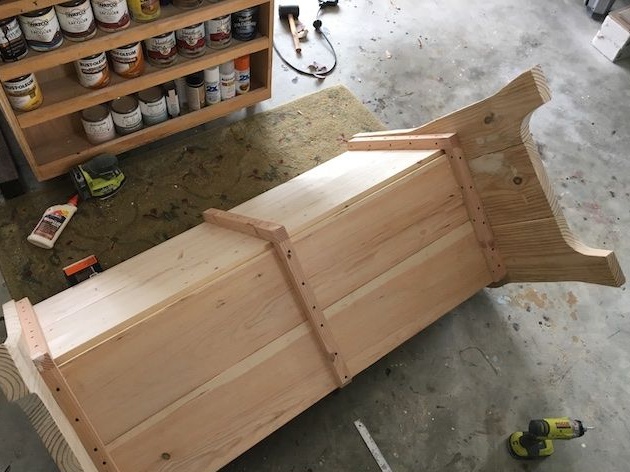
To strengthen the seat and back, screw in the center a couple of rails, as in the photo. This will give the bench a little strength, and the boards will not sag. Especially if you have increased the length of the bench.
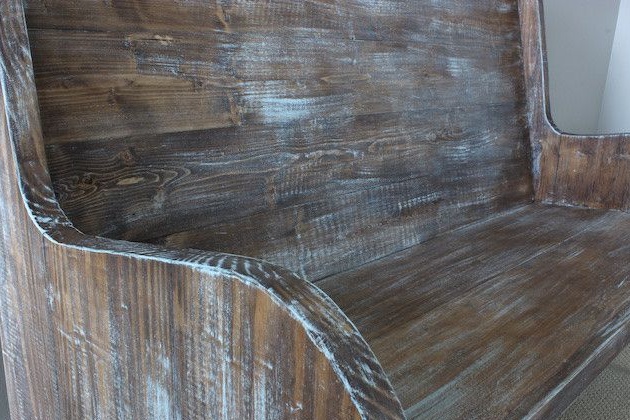
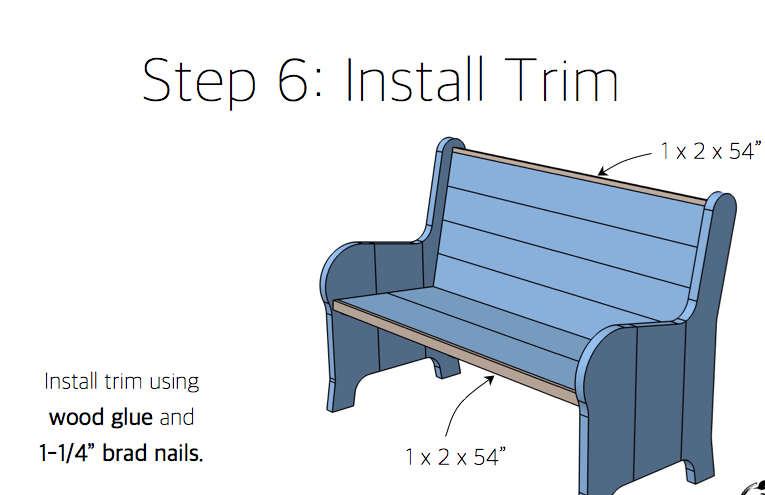
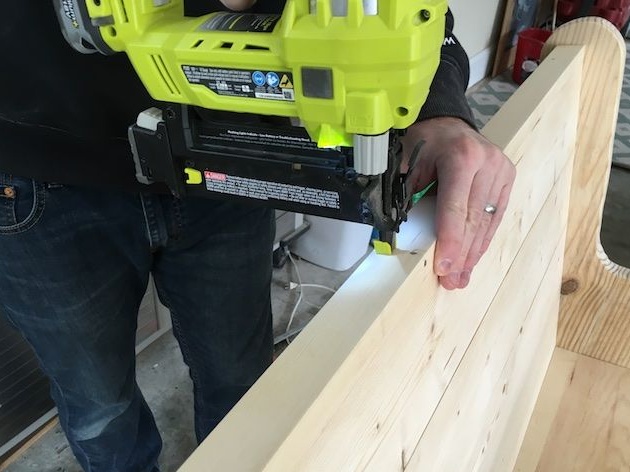
Step Five: Fasten the Trims
Using a hammer or pneumatic nail gun, fasten trim strips along the top of the back and front of the seat.
Do not use self-tapping screws here, as their hats will stand out against the general background even after processing the wood.
To keep the planks firmly in place, use glue over the entire surface of the joint. Do not forget to grind its remains before painting.
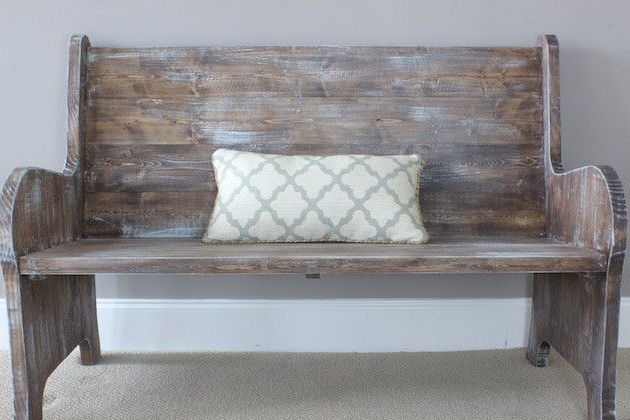
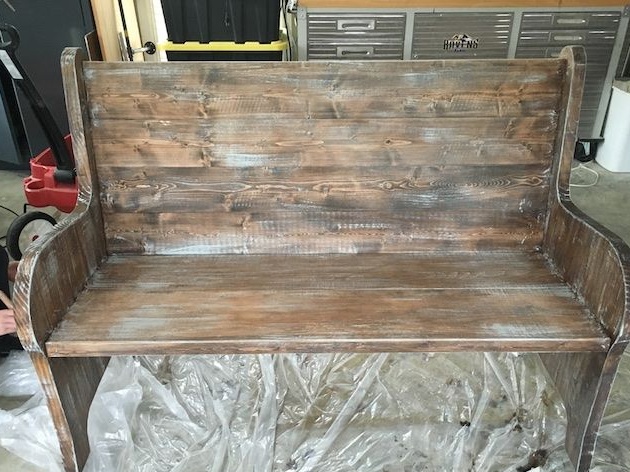
Step six: tinting the bench
To tint wood, the author used the popular Varathane line. It produces a series of compounds to simulate valuable species of wood, which, among other things, reliably protect the tree from adverse environmental influences.
Apply with a soft, lint-free cloth, rubbing it onto the surface of the wood. If the tone does not suit you, repeat the procedure until you achieve the shade declared by the manufacturer.Such funds are remarkably absorbed, and there is no need to remove residues. Just wait until the bench surface dries.
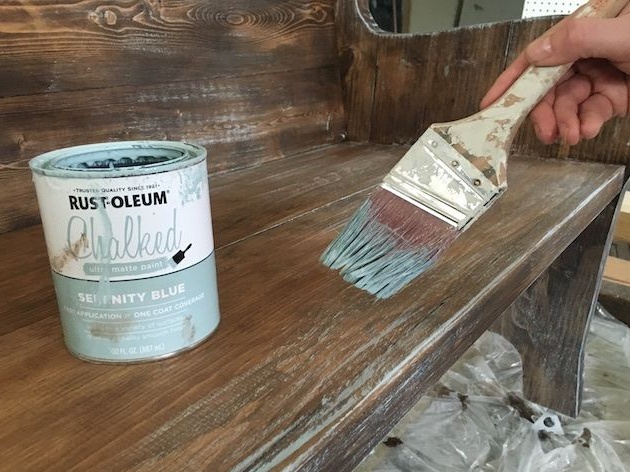
The author also used the technique of artificial aging of the paintwork. To do this, he applied a special light-pastel-colored paint-glaze over the treated wood.
You can varnish the bench to extend its life. Apply several coats of varnish with a paint brush, waiting a while until each coat coats as it should.
Instead of specialized toners, you can also use the good old stain for alcohol, which has been used for many decades. It is also easily varnished and effectively tones natural wood.


Seventh step: how to turn a bench into a sofa
The bench is universal. Enough of your desire and modest efforts - and before you is a soft sofa made of wood. For transformation you will need furniture foam of two types of rigidity and furniture fabric.
Cut a piece of foam and fabric to the size of the bench. Glue foam rubber to the back with special furniture glue. You can use PVA glue. Apply fabric over the foam and secure it with a stapler. In parallel, make soft pillows from two layers of furniture foam - hard and soft. Use base fabric for covers. And in order to give them a proper decorative look, sew removable covers with zippers. At any time, they can be washed and restored.