

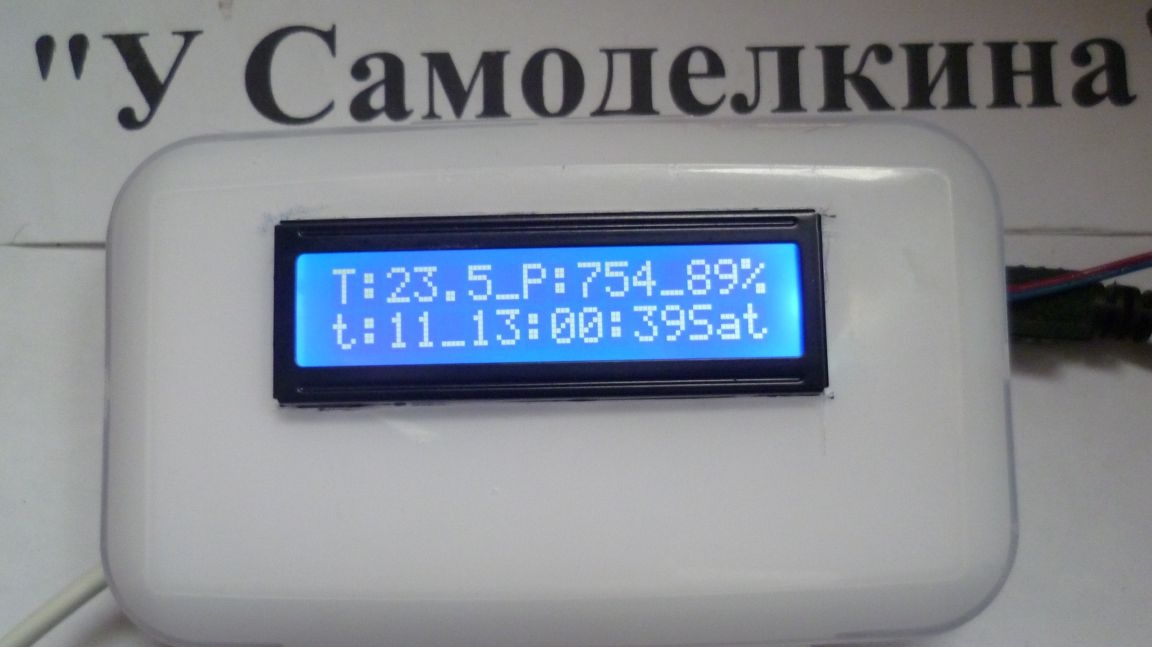
For a long time I wanted to make a mini weather station, tired of looking out the window to look at a thermometer behind the glass. This device will replace the hygrometer, barometer and thermometer and also show the current time. In this post I will tell you how to quickly and easily assemble a small weather station based on Arduino. The basis will be the board Arduino Nano can use other boards - Arduino Uno, Arduino Pro mini). We will receive atmospheric pressure and temperature data from the BMP180 sensor, and humidity and outdoor temperature from the DHT11 sensor. The DS1302 real-time clock will indicate the current time. All information is displayed on a two-line LCD1602 display.
The DHT11 transmits information over a single wire to an arduino. It is powered by a voltage of 5 V. It measures humidity in the range from 20 to 80%. Temperature measures in the range of 0 to 50aboutFROM.

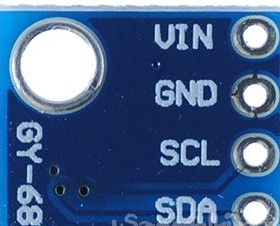
The BMP180 sensor measures atmospheric pressure in the range of 300-1100 hPa, temperature in the range of -40 +85aboutC. The supply voltage is 3.3 V. It is connected via the I2C communication protocol.
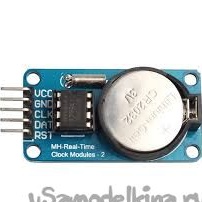
The DS1302 real-time clock is powered by 5 V and is connected via the I2C communication protocol. When installed in the appropriate slot, CR2032 batteries support the clock when the main power is turned off.
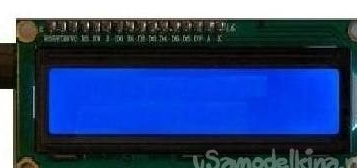
The LCD1602 display is powered by a voltage of 5 Volts and is also connected via the I2C communication protocol.
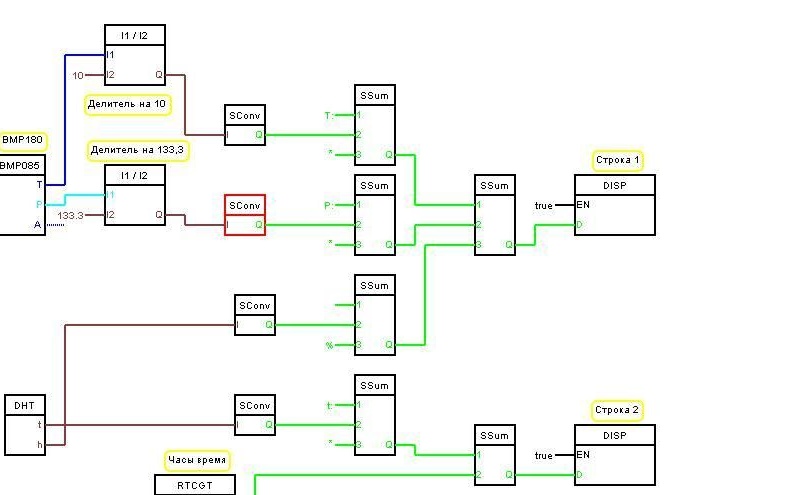
This homemade made on the basis of ready-made boards and sensors, so it can be repeated to any novice lover to work with a soldering iron. At the same time, you can get the basics of programming Arduino. I programmed this weather station in the visual programming program FLPROG in 15 minutes. No need to manually sketch for hours, this program helps beginners (and not only) quickly learn the basics of programming devices based on the Arduino platform.
Who is too lazy to tinker with the program - a sketch (you only need to set the current time of the clock):
#include
#include "DHT_NEW.h"
#include
#include
#include
BMP085 _bmp085 = BMP085 ();
long _bmp085P = 0;
long _bmp085T = 0;
long _bmp085A = 0;

LiquidCrystal_I2C _lcd1 (0x3f, 16, 2);
int _dispTempLength1 = 0;
boolean _isNeedClearDisp1;

DHT _dht1;

iarduino_RTC _RTC1 (RTC_DS1302, 7, 5, 6);

unsigned long _dht1LRT = 0UL;
unsigned long _dht1Tti = 0UL;
int _disp1oldLength = 0;
unsigned long _bmp0852Tti = 0UL;
String _RTC1_GetTime2_StrOut;
int _disp2oldLength = 0;
void setup ()
{
Wire.begin ();
delay (10);
_bmp085.init (MODE_ULTRA_HIGHRES, 116, true);
_RTC1.begin ();
_RTC1.period (1);
_lcd1.init ();
_lcd1.backlight ();
_dht1.setup (4);
_dht1LRT = millis ();
_dht1Tti = millis ();
}
void loop ()
{if (_isNeedClearDisp1) {_lcd1.clear (); _isNeedClearDisp1 = 0;}
if (_isTimer (_bmp0852Tti, 1000)) {
_bmp0852Tti = millis ();
_bmp085.getAltitude (& _ bmp085A);
_bmp085.getPressure (& _ bmp085P);
_bmp085.getTemperature (& _ bmp085T);
}

// Fee: 1
if (1) {
_dispTempLength1 = ((((((String ("T:")) + ((_floatToStringWitRaz ((_ bmp085T) / (10.00), 1))) + (String ("*")))) + (((String ( "P:")) + ((_floatToStringWitRaz ((_ bmp085P) / (133.3), 0))) + (String ("*"))) + (((String ("")) + ((_floatToStringWitRaz (_dht1 .humidity, 0))) + (String ("%"))))). length ();
if (_disp1oldLength> _dispTempLength1) {_isNeedClearDisp1 = 1;}
_disp1oldLength = _dispTempLength1;
_lcd1.setCursor (int ((16 - _dispTempLength1) / 2), 0);
_lcd1.print ((((((String ("T:")) + ((_floatToStringWitRaz ((_ bmp085T) / (10.00), 1))) + (String ("*")))) + (((String ("P:")) + ((_floatToStringWitRaz ((_ bmp085P) / (133.3), 0))) + (String ("*")))) + (((String ("")) + ((_floatToStringWitRaz ( _dht1.humidity, 0))) + (String ("%")))));
} else {
if (_disp1oldLength> 0) {_isNeedClearDisp1 = 1; _disp1oldLength = 0;}
}
if (_isTimer (_dht1Tti, 2000)) {
if (_isTimer (_dht1LRT, (_dht1.getMinimumSamplingPeriod ()))) {
_dht1.readSensor ();
_dht1LRT = millis ();
_dht1Tti = millis ();
}
}
if (1) {
_dispTempLength1 = ((((((String ("t:")) + ((_floatToStringWitRaz (_dht1.temperature, 0))) + (String ("*")))) + (_RTC1_GetTime2_StrOut)))). length ( );
if (_disp2oldLength> _dispTempLength1) {_isNeedClearDisp1 = 1;}
_disp2oldLength = _dispTempLength1;
_lcd1.setCursor (int ((16 - _dispTempLength1) / 2), 1);
_lcd1.print ((((((String ("t:"))) + ((_floatToStringWitRaz (_dht1.temperature, 0))) + (String ("*")))) + (_RTC1_GetTime2_StrOut))));
} else {
if (_disp2oldLength> 0) {_isNeedClearDisp1 = 1; _disp2oldLength = 0;}
}
_RTC1_GetTime2_StrOut = _RTC1.gettime ("H: i: sD");

}
String _floatToStringWitRaz (float value, int raz)
{

return String (value, raz);
}
bool _isTimer (unsigned long startTime, unsigned long period)
{
unsigned long currentTime;
currentTime = millis ();
if (currentTime> = startTime) {return (currentTime> = (startTime + period));} else {return (currentTime> = (4294967295-startTime + period));}
}
You can use such a device anywhere or at home, in nature, or place in car. It is possible to power the circuit from the batteries, using a charge board, in the end will be portable model weather stations.
All information can be obtained by looking at the video:
List of materials and tools
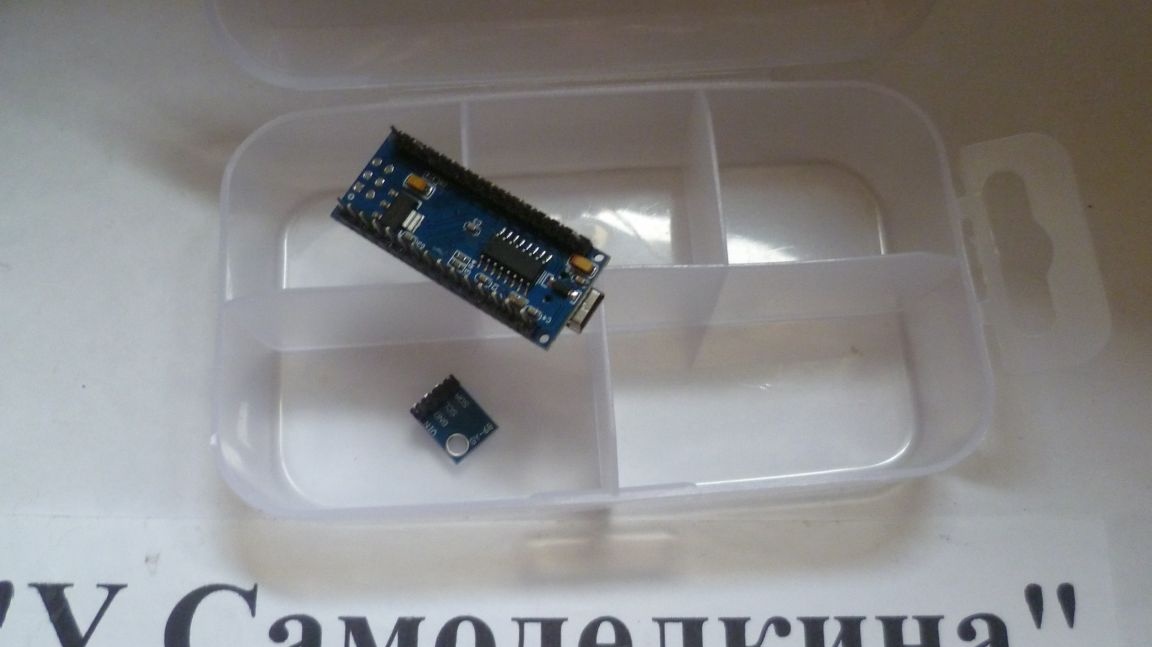
Arduino Nano Board
two-line LCD1602 display;
- real time clock DS1302;
- atmospheric pressure and temperature sensor BMP180;
- temperature and humidity sensor DHT11;
-block charging from the phone;
- any suitable housing
-tweezers;
scissors;
soldering iron;
Cambridge;
-tester;
-connecting wires;
Four-wire for remote sensor.
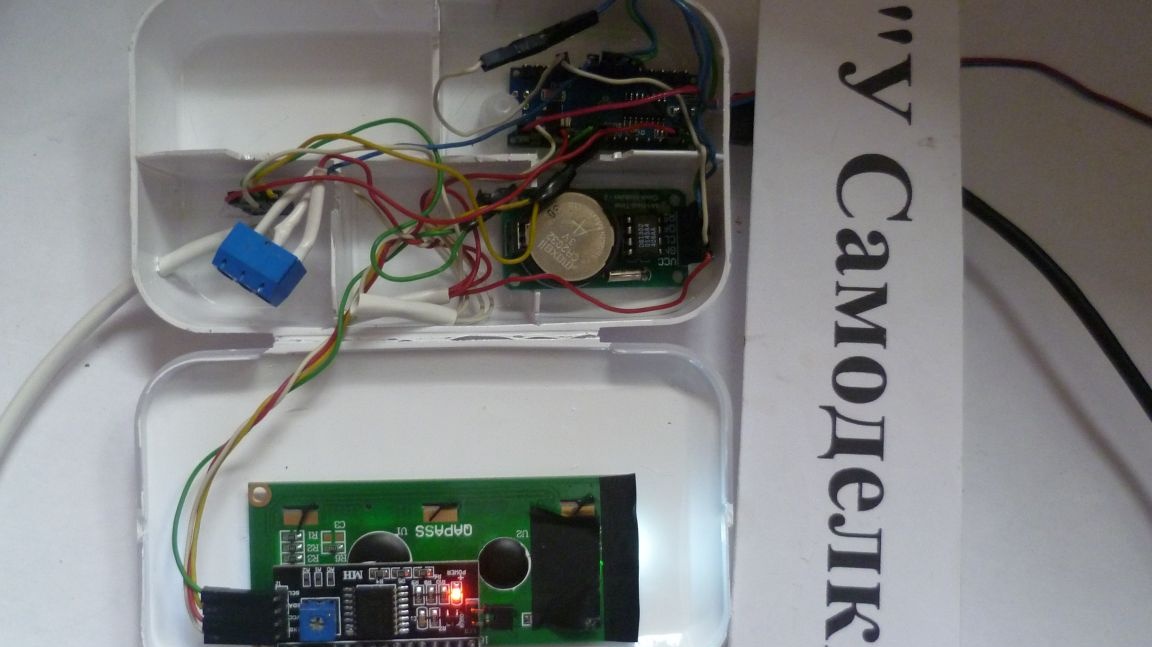
Step one. Making a building for a weather station
I picked up a plastic box from the Fix Price store (total 17p). Pre cut window for display in the lid. Then he partially cut out the partitions in the box, made holes for the USB connector of the Arduino board, the opening for the BMP180 sensor The BMP180 sensor will be located on the outside of the case to prevent excessive heating from e toppings inside. After I painted the body of the homemade product from the inside because the plastic is transparent. The box closes with a latch and in it all the elements fit nicely.
Step Two Assembly diagram of the device.
Photo scheme
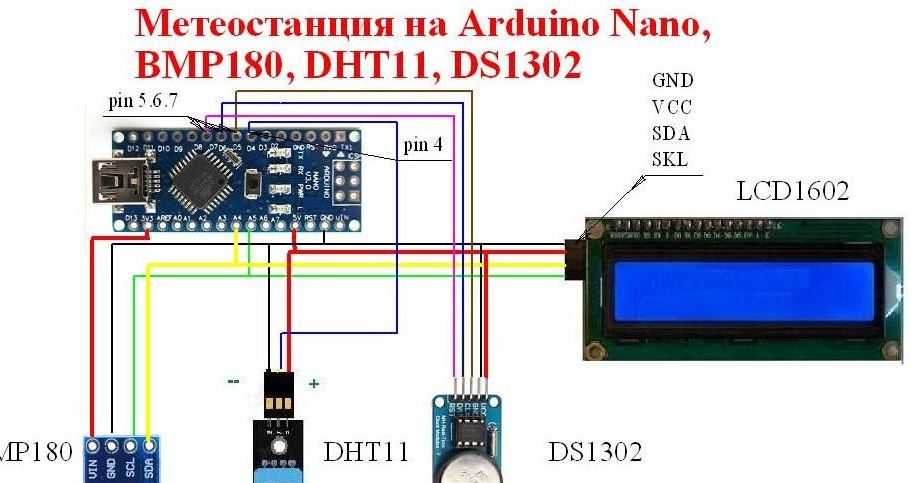
Next, you need to connect all the boards and sensors of the weather station according to the scheme. We do this using mounting wires with the appropriate connectors. I did not make a solder connection, so in the future, when a module fails (or for other reasons), you can easily replace it. On the screw connector, the DHT11 sensor cable going to the street is connected. Power can be supplied from the USB connector of the Arduino board to a computer, or by applying a voltage of 7-12V to the VIN and GND pin.
First, I assembled the circuit outside the enclosure and programmed and debugged it in the FLPROG program.
Photo block diagram in the FLPROG program.
When I first programmed and turned on the weather station circuit, it worked. Now it has become possible to have weather data overboard and in the room. In general, an interesting home weather station with many different functions turned out.
Photo complete
A good home-made design was assembled on the weekend. It was exciting to make an interesting and useful appliance yourself. To make such a device yourself, I think even a beginner can do it. It does not require a lot of time and money. You can apply it wherever you want in a house in a country cottage. For the whole work, two weekend nights went, I took all the electronics to Aliexpress. The rest of the materials I found on the chopper. Based on the Arduino platform, you can assemble a wide variety of useful devices.
Thank you all for your attention, I wish you success and good luck both in your life and in your work!