
If you want to try your hand at working with metal, this instruction is for you. For the manufacture of such a knife does not require any special skills, you only need your patience and effort. Especially a lot of effort will have to be spent if you do everything with hand tools, but even using them without using sophisticated equipment, you can make such a knife.
The blade is made of steel with a high carbon content and is hardened, so there is no doubt in its strength.
Materials and tools for homemade:
- steel with a high carbon content (the author used grade 01);
- wood, horns, animal bones, textolite or other materials for the manufacture of pads on handles;
- epoxy adhesive;
- brass rods (for the manufacture of pins);
- linseed oil or other impregnation (if you make lining of wood);
- pencil, paper, scissors, etc. (for making a template);
- a hacksaw for metal (you can grinder);
- drill with drills;
- a grinding nozzle on a drill (not necessary, but convenient when forming bevels);
- files;
- sandpaper;
- vise, protective equipment and more.
The process of making a knife:
Step one. Making a template
Making any knife you need to start by creating a template. We take paper and draw a blade that you would like. We determine the size, decide where the strategic teeth, holes and other details will be. If you have a tight imagination, you can select the finished knife profile on the Internet and print it on a printer. You can also change the existing profile to your taste.
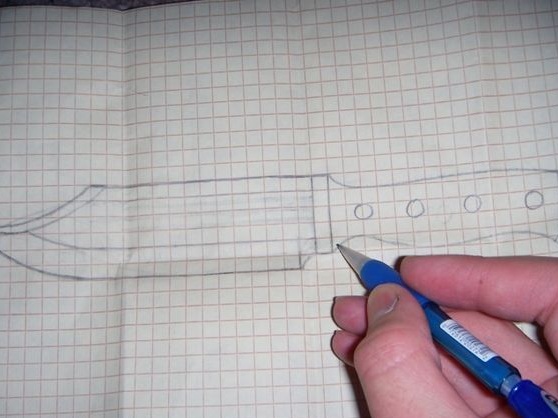
The knife profile must first be cut out of paper. It is better to use cardboard, as in this case you can hold a paper knife in your hands and make sure that it will be convenient to use.
Step Two Cut the workpiece
1. Tooling steel can be used as the starting material; it is usually amenable to hardening. No exception will be saw blades, car springs, various types of steel that can spring.
After attaching the template to a sheet of steel, we circle it with a marker or a sharp object. Now it’s clear to us which piece of metal we need to cut off to make the blade.
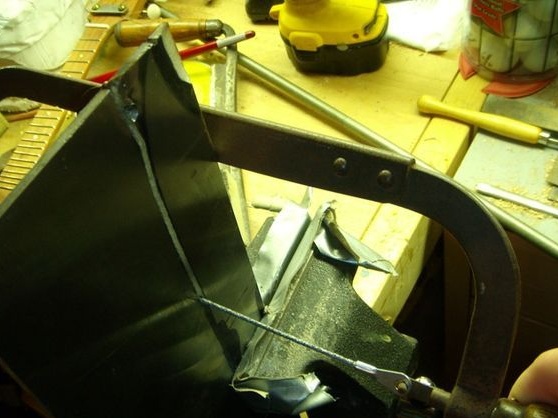
It is important to note that cutting hardened steel, and indeed it will be difficult to work with it. If you come across just such, you must first take a vacation. We heat the steel until a bright yellow glow and allow to cool gradually. After that, the metal will become soft.At this step, the author works with an ordinary hacksaw.
2. Cut the workpiece and clamp it in a vise, the stage of final formation of the knife profile begins. It is safest to work with files, in this case you will definitely not overheat the metal, and you will not cut off the excess. If you already have experience with the grinder in the manufacture of knives, then you can grind off the excess with it. Work so that the metal does not change color; if this happens, the metal overheats. It is best to wet the workpiece from time to time with water. Finishing the thinnest details with files and sandpaper.
3. We drill holes in the blade for the pins that will hold the pads of the handles. Choose the diameter of the holes depending on the thickness of the pins you have. For beauty, the pins are made of brass, bronze, copper and other non-ferrous metals, but some use steel nails more commonly. It is extremely important to make holes at this stage, since after hardening it will be very difficult.
Step Three We form bevels
All the cutting characteristics of the knife will depend on how correctly you make the bevels. Be sure to mark the location of the bevels on the blade, otherwise you will not succeed in making them symmetrical. You also need to divide the blade into two parts so that you can evenly remove metal from both sides.
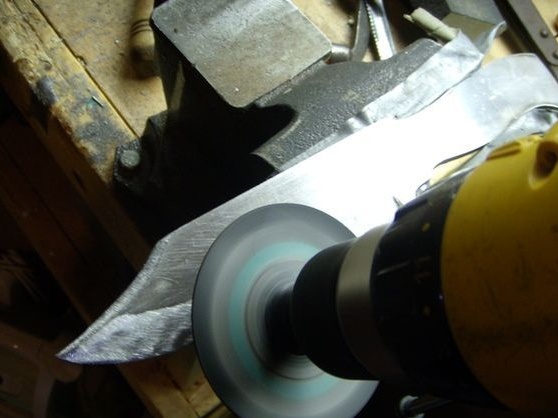
Work again, it is better to file if there are no professional tools. The author cheated using a drill and a grinding nozzle. This method is good, but not safe in the sense that the metal can be overheated. Carefully follow this matter, soak the blade with water and do not
hurry up.
At this step, you have to finish the work on steel processing, as hardening follows. We take sandpaper and carefully grind the entire surface of the blade. You need to make it perfectly smooth, remove scratches and so on.
Step Four Quenching
Quenching from the author consists of three stages, this is annealing, quenching directly, and then another vacation follows.
The essence of annealing is that the metal is heated to a critical temperature, and then allowed to cool gradually. The procedure is repeated several times. The bottom line is that after machining, there are stresses in the metal, and if they are not removed, the steel can warp during quenching. At least some friends recommend it.
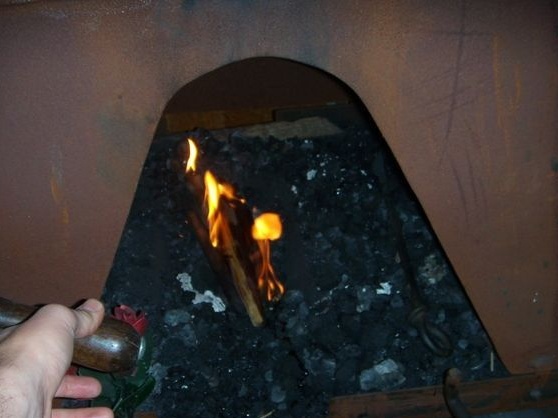
Then the steel is hardened, engine oil is used to cool steel 01. We inflate the metal until a bright glow, while a permanent magnet should not be attracted to it, well, and then cool in engine oil. Be careful, the oil ignites and splashes when immersing hot metal.
After quenching, the final stage is followed - vacation. Thanks to this procedure, the metal ceases to be brittle as it became after hardening. Steel begins to spring a little and will not break if you drop a knife or pick something with it. Leave in an oven preheated to a temperature of approximately 200aboutC. Place the knife for an hour and allow the oven to cool with the knife without opening the door. That's all, hardened, steel ready for use.
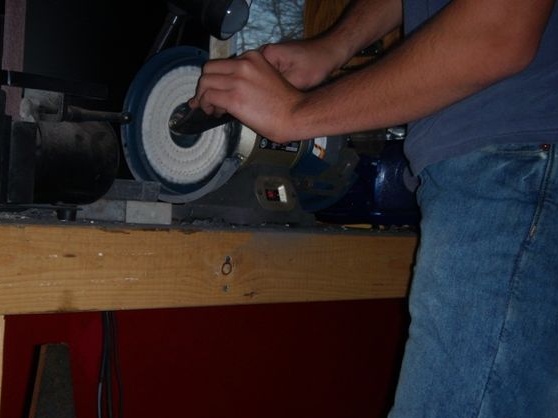
Step Five Finishing Blade
After hardening, there will be a lot of pollution on the blade, they all need to be removed. Very fine sandpaper can be used in conjunction with the WD40. By removing dirt, the metal can be polished. The author does this on his machine. Be careful, work with gloves, otherwise, if the knife engages in a polishing wheel, you may be left without fingers.
Step Six Set the handle pads
We prepare pins and epoxy glue. The author used four pins of brass in the amount of four pieces for reliable fixation of the handle. You need to make overlays on handles, the author makes them of wood. Attach the knife to the workpiece and circle at the location of the pads.Then cut the workpieces, drill holes for the pins in them and glue to the knife. All this business needs to be left for 24 hours so that the glue is completely dry. The handle must be clamped with a clamp or in a vice.
When the glue dries, the pen can be sanded, finalized, made smooth. You can work with files and sandpaper, rough work can be done with a grinder.

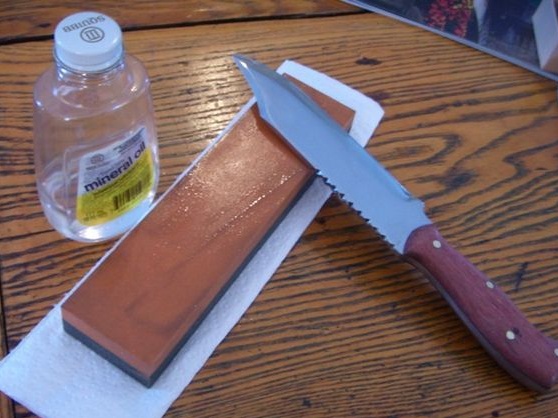
Seventh step. Impregnate the handle and sharpen the knife
At the end, we sharpen the knife. You can use fine sandpaper, grindstones, and Japanese water stone is best suited. We wet it with water and bring the blade to the ideal.
To protect the tree from moisture, soak it with linseed oil or special impregnation. Let the oil dry and then polish the handle. During long-term storage, the metal part must also be coated with oil so that the metal does not rust.
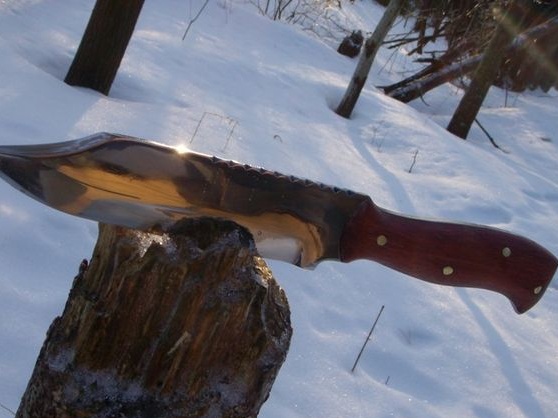
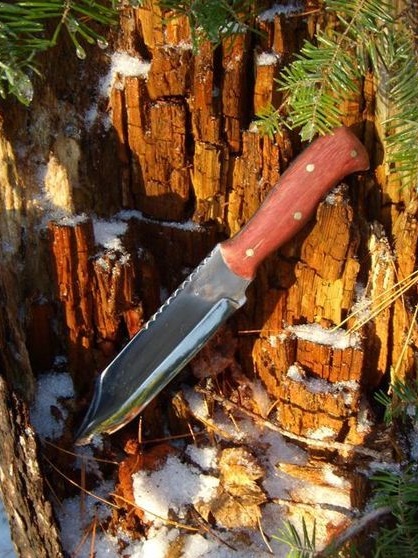
That's all. Your knife that you made from a piece of metal do it yourselfcompletely ready. It is strong, has excellent cutting qualities, you can take it with you on a hike, hunting or fishing. True, in this case it will be extremely useful to make a sheath for him.